Overview
Crux is a framework for building cross-platform applications with better testability, higher code and behavior reuse, better safety, security, and more joy from better tools.
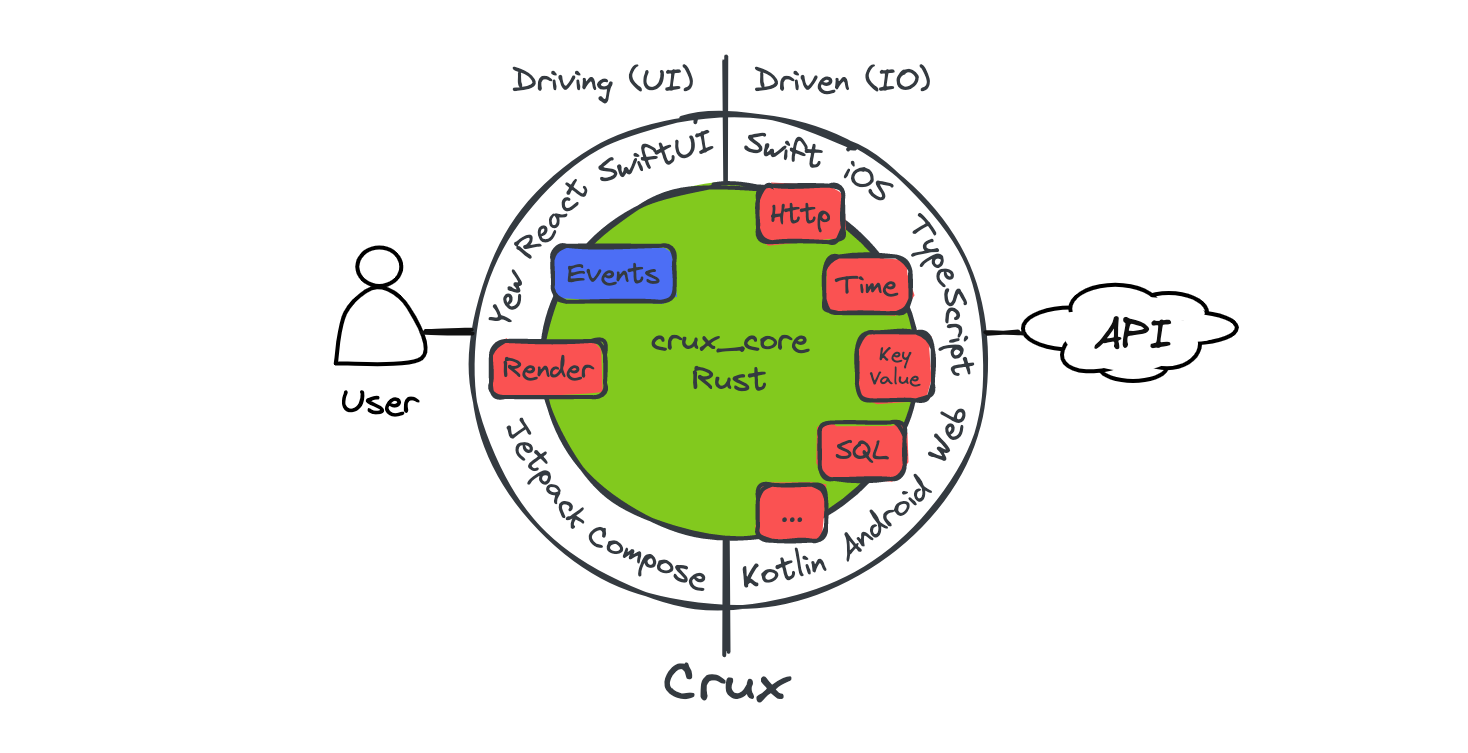
It splits the application into two distinct parts, a Core built in Rust, which drives as much of the business logic as possible, and a Shell, built in the platform native language (Swift, Kotlin, TypeScript), which provides all interfaces with the external world, including the human user, and acts as a platform on which the core runs.
The aim is to separate three kinds of code in a typical app, which have different goals:
- the presentation layer in the user interface,
- the pure logic driving behaviour and state updates in response to the user's actions, and
- the effects (or I/O) layer where network communication, storage, interactions with real-world time, and other similar things are handled
The Core handles the behaviour logic, the Shell handles the presentation layer and effect execution (but not orchestration, that is part of the behaviour and therefore in the Core). This strict separation makes the behaviour logic much easier to test without any of the other layers getting involved.
The interface between the Core and the Shell is a native FFI (Foreign Function Interface) with message passing semantics, where simple data structures are passed across the boundary, supported by cross-language code generation and type checking.
To get playing with Crux quickly, follow Part I of the book, from the Getting Started chapter onward. It will take you from zero to a basic working app on your preferred platform quickly. From there, continue on to Part II – building the Weather App, which builds on the basics and covers the more advanced features and patterns needed in a real world app.
If you just want to understand why we set out to build Crux in the first place and what problems it tries to solve, before you spend any time trying it (no hard feelings, we would too), read our original Motivation.
API docs
There are two places to find API documentation: the latest published version on docs.rs, or the very latest master docs if you too like to live dangerously.
- crux_core - the main Crux crate: latest release | latest master
- crux_http - HTTP client capability: latest release | latest master
- crux_kv - Key-value store capability: latest release | latest master
- crux_time - Time capability: latest release | latest master
You can see the latest version of this book (generated from the master branch) on Github Pages.
Crux is open source on Github. A good way to learn Crux is to explore the code, play with the examples, and raise issues or pull requests. We'd love you to get involved.
You can also join the friendly conversation on our Zulip channel.
Design overview
The architecture is event-driven, with state management based on event sourcing, similar to Elm or Redux. The Core holds the majority of state, which is updated in response to events happening in the Shell. The interface between the Core and the Shell is message-based.
Native UI
The user interface layer is built natively, with modern declarative UI frameworks such as Swift UI, Jetpack Compose and React/Svelte or a WASM based framework on the web. The UI layer is as thin as it can be, and all behaviour logic is implemented by the shared Core. The one restriction is that the Core is side–effect free. This is both a technical requirement (to be able to target WebAssembly), and an intentional design goal, to separate behaviour from effects and make them both easier to test in isolation.
Managed effects
Crux uses managed side-effects – the Core requests side-effects from the Shell, which executes them. The basic difference is that instead of doing the asynchronous work, the core describes the intent for the work with data (which also serves as the input for the effect), and passes this to the Shell to be performed. The Shell performs the work, and returns the outcomes back to the Core. This approach using deferred execution is inspired by Elm, and similar to how other purely functional languages deal with effects and I/O (e.g. the IO monad in Haskell). It is also similar in its laziness to how iterators work in Rust.
Type generation
The Core exports types for the messages it can understand. The Shell can call the Core and pass one of the messages. In return, it receives a set of side-effect requests to perform. When the work is completed, the Shell sends the result back into the Core, which responds with further requests if necessary.
Updating the user interface is considered one of the side-effects the Core can request. The entire interface is strongly typed and breaking changes in the core will result in build failures in the Shell.
Goals
We set out to find a better way of building apps across platforms. You can read more about our motivation. The overall goals of Crux are to:
- Build the majority of the application code once, in Rust
- Encapsulate the behavior of the app in the Core for reuse
- Follow the Ports and Adapters pattern, also known as Hexagonal Architecture to facilitate pushing side-effects to the edge, making behavior easy to test
- Strictly separate the behavior from the look and feel and interaction design
- Use the native UI tool kits to create user experience that is the best fit for a given platform
- Use the native I/O libraries to be good citizens of the ecosystem and get the benefit of any OS-provided services
Path to 1.0
Crux is used in production apps today, and we consider it production ready. However, we still have a number of things to work on to call it 1.0, with a stable API and excellent DX expected from a mature framework.
Below is a list of some of the things we know we want to do before 1.0:
- Better code generation with additional features, support for more languages (e.g. Dart or C++), and in turn more Shells (e.g. Flutter)
- Improved documentation, code examples, and example apps for newcomers
- Improved onboarding experience, with less boilerplate code that end users have to write or copy from an example
Until then, we hope you will work with us on the rough edges, and adapt to the necessary API updates as we evolve. We strive to minimise the impact of changes as much as we can, but before 1.0, some breaking changes will be unavoidable.
Motivation
We set out to prove this approach to building apps largely because we've seen the drawbacks of all the other approaches in real life, and thought "there must be a better way". The two major available approaches to building the same application for iOS and Android are:
- Build a native app for each platform, effectively doing the work twice.
- Use React Native or Flutter to build the application once1 and produce native looking and feeling apps which behave nearly identically.
The drawback of the first approach is doing the work twice. In order to build every feature for iOS and Android at the same time, you need twice the number of people, either people who happily do Swift and Kotlin (and they are very rare), or more likely a set of iOS engineers and another set of Android engineers. This typically leads to forming two separate, platform-focused teams. We have witnessed situations first-hand, where those teams struggle with the same design problems, and despite one encountering and solving the problem first, the other one can learn nothing from their experience (and that's despite long design discussions).
We think such experiences with the platform native approach are common, and the reason why people look to React Native and Flutter.
The issues with the second approach are two-fold:
- Only mostly native user interface
- In the case of React Native, the JavaScript ecosystem tooling disaster
React Native (we'll focus the discussion on it, but most of the below applies to Flutter too) effectively takes over, and works hard to insulate the engineer from the native platform underneath and pretend it doesn't really exist, but of course, inevitably, it does exist and the user interface ends up being built in a combination of 90% JavaScript/TypeScript and 10% Kotlin/Swift. This was a major win when React Native was first introduced, because the platform native UI toolkits were imperative, following a version of MVC architecture, and generally made it quite difficult to get UI state management right. React on the other hand is declarative, leaving much less space for errors stemming from the UI getting into an undefined state (although as apps got more complex and codebases grew, React's state management model got more complex with them). The benefit of declarative UI was clearly recognised by iOS and Android, and both introduced their own declarative UI toolkit - Swift UI and Jetpack Compose. Both of them are quite good, matching that particular advantage of React Native, and leaving only building things once (in theory). But in exchange, they have to be written in JavaScript (and adjacent tools and languages).
Why not build all apps in JavaScript?
The main issue with the JavaScript ecosystem is that it's built on sand. The underlying language is quite loose and has a lot of inconsistencies. It came with no package manager originally, now it has three. To serve code to the browser, it gets bundled, and the list of bundlers is too long to include here, and even 10 years since the introduction of ES modules, the ecosystem is still split and the competing module standards make all tooling more complex and difficult to configure.
JavaScript was built as a dynamic language. This means a lot of basic human errors,
which are made while writing the code are only discovered when running the code.
Static type systems aim to solve that problem and TypeScript
adds this onto JavaScript, but the types only go so far (until they hit an any type,
or dependencies with no type definitions), and they disappear at runtime, so you don't
get a type based conditional (well, kind of).
In short, upgrading JavaScript to something modern, capable of handling a large app codebase with multiple people or even teams working on it is possible, but takes a lot of tooling. Getting all this tooling set up and ready to build things is an all day job, and so more tooling, like Vite has popped up providing this configuration in a box, batteries included. Perhaps the final admission of this problem is the Biome toolchain (formerly the Rome project), attempting to bring all the various tools under one roof (and Biome itself is built in Rust...).
It's no wonder that even a working setup of all the tooling has sharp edges, and cannot afford to be nearly as strict as tooling designed with strictness in mind, such as Rust's. The heart of the problem is that computers are strict and precise instruments, and humans are sloppy creatures. With enough humans (more than 10, being generous) and no additional help, the resulting code will be sloppy, full of unhandled edge cases, undefined behaviour being relied on, circular dependencies preventing testing in isolation, etc. (and yes, these are not hypotheticals).
Contrast that with Rust, which is as strict as it gets, and generally backs up
the claim that if it compiles it will work (and if you struggle to get it past
the compiler, it's probably a bad idea). The tooling and package management is
built in with cargo. There are fewer decisions to make when setting up a Rust
project.
In short, we think the JS ecosystem has jumped the shark, the "complexity toothpaste" is out of the tube, and it's time to stop. But there's no real viable alternative.
Crux is our attempt to provide one.
-
In reality it's more like 1.4x effort build the same app for two platforms. ↩
Getting started
We generally recommend building Crux apps from inside out, starting with the Core.
This part will first take you through setting up the tools and building the Core, and writing tests to make sure everything works as expected. Finally, once we're confident we have a working core, we'll set up the necessary bindings for the shell and build the UI for your chosen platform.
But first, we need to make sure we have all the necessary tools
Install the tools
This is an example of a
rust-toolchain.toml
file, which you can add at the root of your repo. It should ensure that the
correct rust channel and compile targets are installed automatically for you
when you use any rust tooling within the repo.
You may not need all the targets if you're not planning to build a fully cross platform app.
[toolchain]
channel = "stable"
components = ["rustfmt", "rustc-dev"]
targets = [
    "aarch64-apple-darwin",
    "aarch64-apple-ios",
    "aarch64-apple-ios-sim",
    "aarch64-linux-android",
    "wasm32-unknown-unknown",
    "x86_64-apple-ios",
]
profile = "minimal"
For testing, we also recommend to install cargo-nextest, the test runner we'll be using
in the examples.
cargo install cargo-nextest
Create the core crate
We need a crate to hold our application's core, but since one of our shell options later will be rust based, we'll set up a cargo workspace to have some isolation between the core and the other Rust based modules
The workspace and library manifests
First, create a workspace and start with a /Cargo.toml file, at the monorepo
root, to add the new library to our workspace.
It should look something like this:
# /Cargo.toml
[workspace]
resolver = "3"
members = ["shared"]

[workspace.package]
edition = "2024"
rust-version = "1.90"

[workspace.dependencies]
anyhow = "1.0.102"
crux_core = "0.19"
serde = "1.0.228"
The shared library
The first library to create is the one that will be shared across all platforms,
containing the behavior of the app. You can call it whatever you like, but we
have chosen the name shared here. You can create the shared rust library, like
this:
cargo new --lib shared
The library's manifest, at /shared/Cargo.toml, should look something like the
following,
# /shared/Cargo.toml
[package]
name = "shared"
version = "0.1.0"
edition.workspace = true
rust-version.workspace = true

[lib]
crate-type = ["cdylib", "lib", "staticlib"]
name = "shared"

[dependencies]
crux_core.workspace = true
serde = { workspace = true, features = ["derive"] }
Note the crate-type in the [lib] section. This is in preparation for linking with the
shells:
libis the default rust library when linking into a rust binarystaticlibis a static library (libshared.a) for use with Apple appscdylibis a C-ABI dynamic library (libshared.so) for use with Android and other native shells
The basic files
The only missing part now is your src/lib.rs file. This will eventually
contain a fair bit of configuration for the shell interface, so we tend to
recommend reserving it to this job and creating a a src/app.rs module
for your app code.
For now, the lib.rs file looks as follows:
// src/lib.rs
mod app;

pub use app::*;
and app.rs can be empty, but let's put our app's main type in it,
call it Counter:
// src/app.rs

#[derive(Default)]
pub struct Counter;
Running
cargo build
should build your Core. Let's make it do something now.
A very basic app
The basic app we'll build as an example to demonstrate the interaction between the Shell and the Core and the state management will be the well known and loved counter app. A simple counter we can increment, decrement and reset.
Code of the app
You can find the full code for this part of the guide here
In the last chapter, we started with the main type
#[derive(Default)]
pub struct Counter;
We need to implement Default so that Crux can construct the app for us.
To turn it into a Crux app, we need to implement the App trait from the
crux_core crate.
use crux_core::App;

impl App for Counter {

}
If you're following along, the compiler is now screaming at you that you're
missing four associated types for the trait — Event, Model, ViewModel,
and Effect.
Let's add them and talk about them one by one.
Event
Event defines all the possible events the app can respond to. It is essentially the Core's public API.
In our case it will look as follows:
use serde::{Deserialize, Serialize};

#[derive(Serialize, Deserialize, Clone, Debug)]
pub enum Event {
    Increment,
    Decrement,
    Reset,
}
Those are the three things we can do with the counter. None of them need any additional
information, so this simple enum will do. It is serializable, because it will
eventually be crossing the FFI boundary. We will get to that soon.
Model
Model holds our application's internal state. You can probably guess what this will look like:
#[derive(Default)]
pub struct Model {
    count: isize,
}
It is a simple counter after all. Model stays in the core, so it doesn't need to serialize.
You can derive (or implement) Default and have Crux create an instance of your app and your model for you, or you can explicitly create a core with specified App and Model instances (this may be useful if you need to set up some initial state).
ViewModel
ViewModel represents the user interface at any one point in time. This is our indirection between the internal state and the UI on screen. In the case of the counter, this is pretty academic, there is no practical reason for making them different, but for the sake of the example, let's add some formatting in the mix and make it a string.
#[derive(Serialize, Deserialize, Clone, Default)]
pub struct ViewModel {
    pub count: String,
}
The difference between Model and ViewModel will get a lot more pronounced once we introduce
some navigation into the mix in Part II.
Effect
For now, the counter has no side effects. Except it wants to update the user interface, and that is also a side effect. We'll go with this:
use crux_core::macros::effect;
use crux_core::render::RenderOperation;

#[effect]
#[derive(Debug)]
pub enum Effect {
    Render(RenderOperation),
}
We're saying "the only side effect of our behaviour is rendering the user interface".
The Effect type is worth understanding further, but in order to do that we need to
talk about what makes Crux different from most UI frameworks.
Managed side-effects
One of the key design choices in Crux is that the Core is free of side-effects (besides its internal state). Your application can never perform anything that directly interacts with the environment around it - no network calls, no reading/writing files, not even updating the screen. Actually doing all those things is the job of the Shell, the core can only ask for them to be done.
This makes the core portable between platforms, and, importantly, very easy to test. It also separates the intent – the "functional" requirements – from the implementation of the side-effects and the "non-functional" requirements (NFRs).
For example, your application knows it wants to store data in a SQL database, but it doesn't need to know or care whether that database is local or remote. That decision can even change as the application evolves, and be different on each platform. We won't go into the detail at this point, because we don't need the full extent of side effects just yet. If you want to know more now, you can jump ahead to the chapter on Managed Effects, but it's probably a bit much at this point. Up to you.
All you need to know for now is that for us to ask the Shell for side effects, it will need to know what side effects it needs to handle, so we will need to list the possible kinds of effects (as an enum). Effects are simply messages describing what should happen. In our case the only option is asking for a UI update (or, more precisely, telling the shell a new view model is available).
That's enough about effects for now, we will spend a lot more time with them later on.
Implementing the App trait
We now have all the building blocks to implement the App trait. Here is
where we end up (straight from the actual example code):
impl App for Counter {
type Event = Event;
type Model = Model;
type ViewModel = ViewModel;
type Effect = Effect;
fn update(&self, event: Event, model: &mut Model) -> Command<Effect, Event> {
match event {
Event::Increment => model.count += 1,
Event::Decrement => model.count -= 1,
Event::Reset => model.count = 0,
}
render()
}
fn view(&self, model: &Model) -> ViewModel {
ViewModel {
count: format!("Count is: {}", model.count),
}
}
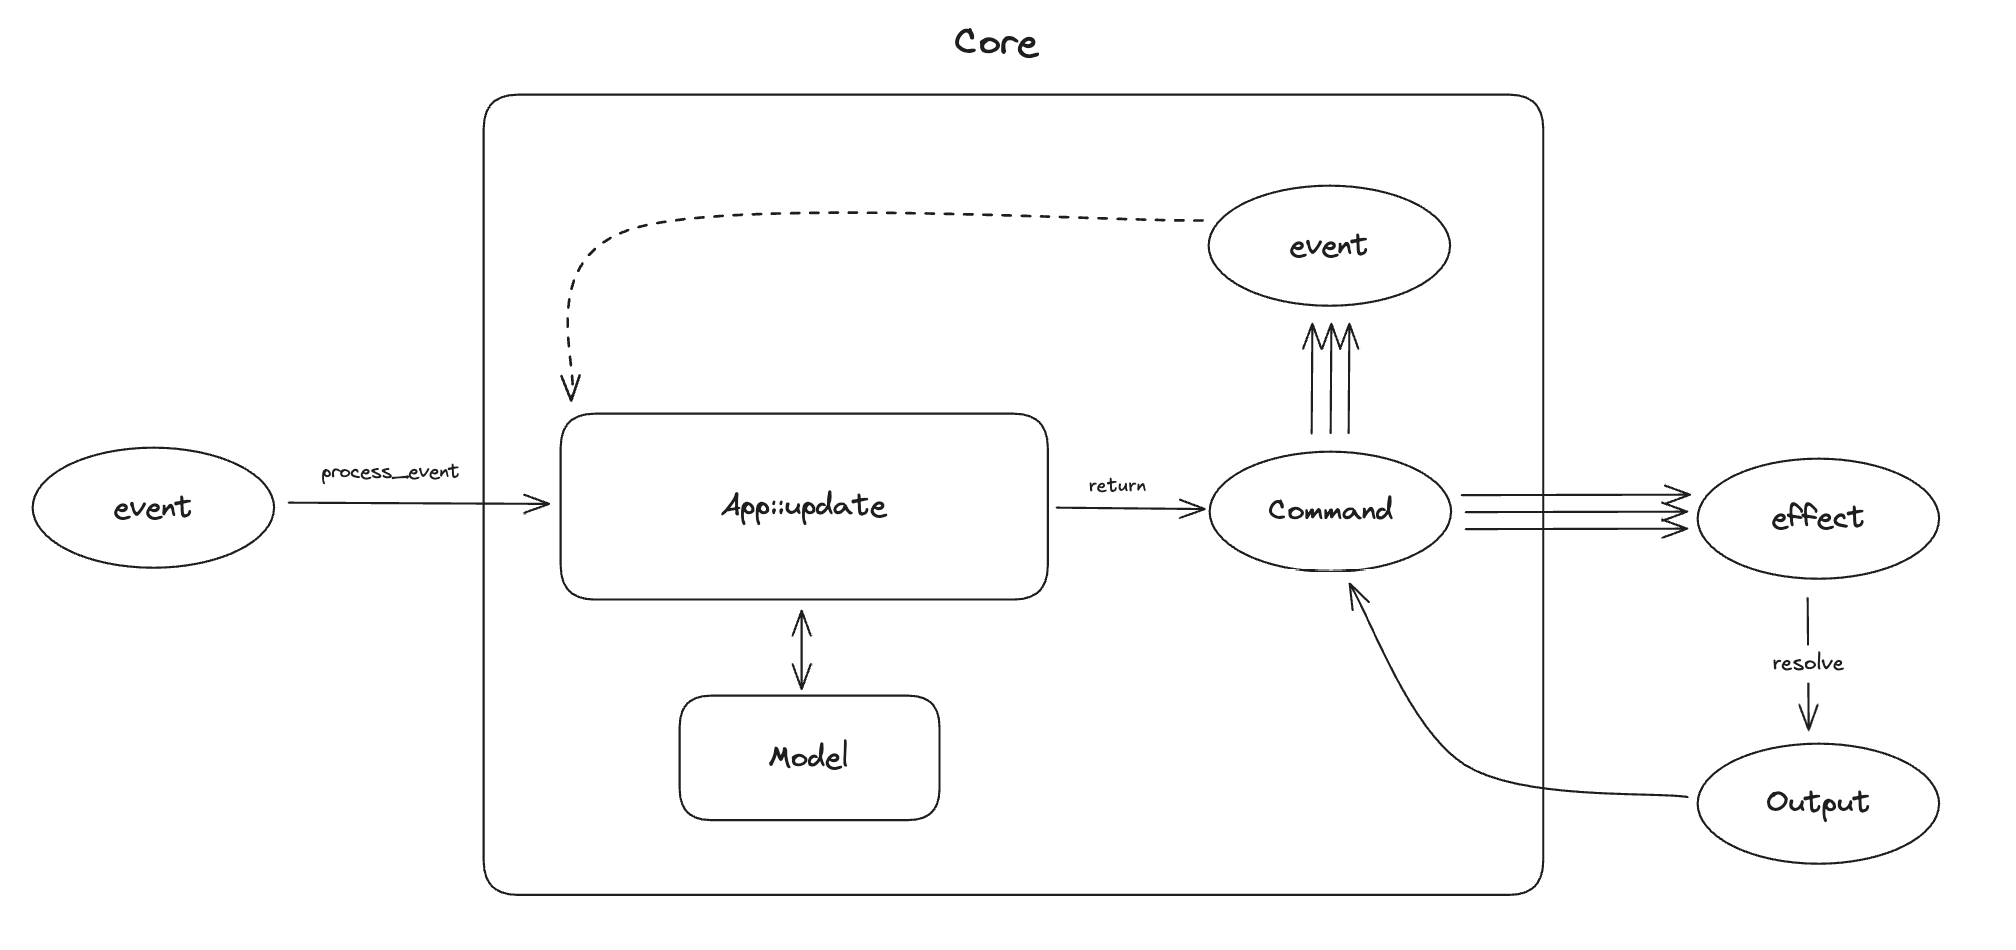
}The update function is the heart of the app, it manages the state transitions
of the app. It responds to events by (optionally) updating the state. You
may have noticed the strange return type: Command<Effect, Event>.
This is the request for some side-effects. We seem to be accumulating terminology, so let's do a quick recap:
- Effect - a request for a type of side-effect (e.g. a HTTP request)
- Operation - carried by the Effect, specifies the data for the effect (e.g. the URL, method, headers, body...)
- Command - a bundle of effect requests which execute together, sequentially, in parallel or in a more complex coordination
In real apps, we typically use a few kinds of effects over and over,
and so it's necessary to allow reuse. That's what the Effect enum does, it
bundles together effects of the same type, defined by the same module or crate (We
call those modules Capabilities, but lets not worry about those yet).
The other thing that happens in real apps is mixing different kinds of effects in workflows, chaining them, running them concurrently, even racing them. That's what commands allow you to do.
Our update function looks at the event it got, updates the model.count, and
since the count has changed, the UI needs to update, so it calls render(). The
render() call returns a Command, which update just passes on to the caller.
The view function's job is to return the representation of what we want the Shell to show
on screen. It's up to the Shell to call it when ready. Our view does a bit of string
formatting and wraps it in a ViewModel.
That's a working counter done. It's obviously really basic, but it's enough for us to test it.
Testing the Counter app
In this chapter we'll write some basic tests for our counter app. It is tempting to skip reading this, but please don't. Testing and testability is one of the most important benefits of Crux, and even in this simple case, subtle things are going on, which we'll build on later.
Before writing tests that use Crux's command test helpers, enable the testing
API for tests in shared/Cargo.toml:
[dev-dependencies]
crux_core = { workspace = true, features = ["testing"] }
This enables Crux's test-only command helpers, including the generated
EffectTestExt fluent helpers and the Command assertion helpers we'll use in
tests, without adding them to your production dependency.
The first test
Technically, we've already broken the rules and written code without having a failing test for it. We're going to let that slip in the name of education, but let's fix that before someone alerts the TDD authorities.
The first test we're going to write will check that resetting the count renders the UI.
#[cfg(test)]
mod test {
    use super::*;

    #[test]
    fn renders() {
        let app = Counter;
        let mut model = Model::default();

        // Check update asked us to `Render`, and only that
        app.update(Event::Reset, &mut model).expect_only_render();
    }
}
We create an instance of the app, and an instance of the model. Then we call
update with the Event::Reset event. As you may remember we get back
a Command, which we expect to carry a request for a render operation. The
#[effect] macro on the Effect enum we declared earlier generates chainable
test-helper methods for Command. These methods live on a generated trait
called EffectTestExt, which needs to be in scope. One of them is
expect_only_render, which asserts "the next effect is a Render and there are
no others." It panics if either condition fails. The trait is generated
alongside the Effect declaration when crux_core's testing feature is
enabled, so use super::*; brings it into scope automatically for module tests.
That test should pass (check with cargo nextest run). Next up, we can check
that the view model is rendered correctly
#[test]
fn shows_initial_count() {
    let app = Counter;
    let model = Model::default();

    let actual_view = app.view(&model).count;
    let expected_view = "Count is: 0";

    assert_eq!(actual_view, expected_view);
}
This is a lot more basic, just a simple equality assertion. Let's try something a bit more interesting
#[test]
fn increments_count() {
    let app = Counter;
    let mut model = Model::default();

    // Check update asked us to `Render`, and only that
    app.update(Event::Increment, &mut model).expect_only_render();

    let actual_view = app.view(&model).count;
    let expected_view = "Count is: 1";
    assert_eq!(actual_view, expected_view);
}
When we send the increment event, we expect to be told to render, and we expect the view to show "Count is: 1".
You could just as well test just the model state, this is really up to you, what is more convenient and whether you prefer your tests to know about how your state works and to what extent.
By now you get the gist, so here's all the tests to satisfy ourselves that the app does in fact work:
#[cfg(test)]
mod test {
    use super::*;

    #[test]
    fn renders() {
        let app = Counter;
        let mut model = Model::default();

        app.update(Event::Reset, &mut model).expect_only_render();
    }

    #[test]
    fn shows_initial_count() {
        let app = Counter;
        let model = Model::default();

        let actual_view = app.view(&model).count;
        let expected_view = "Count is: 0";
        assert_eq!(actual_view, expected_view);
    }

    #[test]
    fn increments_count() {
        let app = Counter;
        let mut model = Model::default();

        app.update(Event::Increment, &mut model)
            .expect_only_render();

        let actual_view = app.view(&model).count;
        let expected_view = "Count is: 1";
        assert_eq!(actual_view, expected_view);
    }

    #[test]
    fn decrements_count() {
        let app = Counter;
        let mut model = Model::default();

        app.update(Event::Decrement, &mut model)
            .expect_only_render();

        let actual_view = app.view(&model).count;
        let expected_view = "Count is: -1";
        assert_eq!(actual_view, expected_view);
    }

    #[test]
    fn resets_count() {
        let app = Counter;
        let mut model = Model::default();

        let _ = app.update(Event::Increment, &mut model);
        let _ = app.update(Event::Reset, &mut model);

        // Was the view updated correctly?
        let actual = app.view(&model).count;
        let expected = "Count is: 0";
        assert_eq!(actual, expected);
    }

    #[test]
    fn counts_up_and_down() {
        let app = Counter;
        let mut model = Model::default();

        let _ = app.update(Event::Increment, &mut model);
        let _ = app.update(Event::Reset, &mut model);
        let _ = app.update(Event::Decrement, &mut model);
        let _ = app.update(Event::Increment, &mut model);
        let _ = app.update(Event::Increment, &mut model);

        // Was the view updated correctly?
        let actual = app.view(&model).count;
        let expected = "Count is: 1";
        assert_eq!(actual, expected);
    }
}
You can see that occasionally, we test for the render to be requested. This will be important later, because
we'll be able to not only check for the effects, but also resolve them – provide the value they requested,
for example the response to a HTTP request. The same EffectTestExt extension generates a resolve_<variant>
method per effect variant for that purpose, which we'll meet in Testing with Effects.
That will let us test entire user flows calling web APIs, working with local storage and timers, and anything else, all at the speed of unit test and without ever touching the external world or writing a single fake (and maintaining it later).
For now though, let's actually give this thing some user interface. Time to build a Shell.
Preparing to add the Shell
So far, we've built a basic app in relatively basic Rust. If we now want to expose it to a Shell written in a different language, we'll have to set up the necessary plumbing, starting with the foreign function interface.
The core FFI bindings
From the work so far, you may have noticed the app has a pretty limited API,
basically the update and view methods. There's one more for resolving
effects (called resolve), but that really is it. We need to make those three methods available
to the Shell, but once that's done, we don't have to touch it again.
Let's briefly talk about what we want from this interface. Ideally, in our shell language we would:
- have native equivalents of the
update,viewandresolvefunctions - have an equivalent for our
Event,EffectandViewModeltypes - not have to worry about what black magic is happening behind the scenes to make that work
Crux provides code generation support for all of the above.
It isn't in any way actual black magic. What happens is Crux exposes FFI calls taking and returning
the values serialized with bincode (by default), and generated "foreign" (Swift, Kotlin, TypeScript, ...)
types handling the foreign side of the serialization.
Yes, this introduces some extra work to the FFI, but generally, for each user interaction we make a relatively small number of round-trips (almost certainly less than ten), and our benchmarks say we can make thousands of them per second. The real throughput is dependent on how much data gets serialized, but it only becomes a problem with really large messages, and advanced workarounds exist. You most likely don't need to worry about it, at least not for now.
Preparing the core
We will prepare the core for native, WebAssembly, and C# shells.
Crux uses BoltFFI for the small byte-oriented FFI
surface. Crux's type generation remains separate: Facet-generated Swift,
Kotlin, TypeScript, and C# types handle the app's serialized
Event/Effect/ViewModel data.
First, let's update our Cargo.toml:
# shared/Cargo.toml
[package]
name = "shared"
version = "0.1.0"
edition.workspace = true
rust-version.workspace = true

[lib]
crate-type = ["cdylib", "lib", "staticlib"]

[[bin]]
name = "codegen"
required-features = ["codegen"]

[features]
facet_typegen = ["crux_core/facet_typegen"]
codegen = [
    "dep:anyhow",
    "dep:clap",
    "dep:log",
    "dep:pretty_env_logger",
    "facet_typegen"
]

[dependencies]
boltffi = "=0.25.2"
facet = "=0.44"
crux_core.workspace = true
serde = { workspace = true, features = ["derive"] }

# optional dependencies
anyhow = { workspace = true, optional = true }
clap = { version = "4.6.1", optional = true, features = ["derive"] }
log = { version = "0.4.29", optional = true }
pretty_env_logger = { version = "0.5.0", optional = true }
A lot has changed! The key things we added are:
- a
bintarget calledcodegen, which is how we're going to run all the code generation - a
boltffidependency for the binding surface - dependencies we need for the code generation
And since we've declared the codegen target, we need to add the code for it.
// shared/src/bin/codegen.rs
use std::path::PathBuf;

use anyhow::Result;
use clap::{Parser, ValueEnum};
use crux_core::type_generation::facet::{Config, TypeRegistry};
use log::info;

use shared::Counter;

#[derive(Copy, Clone, PartialEq, Eq, PartialOrd, Ord, ValueEnum)]
enum Language {
    Swift,
    Kotlin,
    Csharp,
    Typescript,
}

#[derive(Parser)]
#[command(version, about, long_about = None)]
struct Args {
    #[arg(short, long, value_enum)]
    language: Language,
    #[arg(short, long)]
    output_dir: PathBuf,
}

fn main() -> Result<()> {
    pretty_env_logger::init();
    let args = Args::parse();

    let typegen_app = TypeRegistry::new().register_app::<Counter>()?.build()?;

    let name = match args.language {
        Language::Swift => "App",
        Language::Kotlin => "com.crux.examples.counter",
        Language::Csharp => "CounterApp.Shared",
        Language::Typescript => "app",
    };
    let config = Config::builder(name, &args.output_dir).build();

    match args.language {
        Language::Swift => {
            info!("Typegen for Swift");
            typegen_app.swift(&config)?;
        }
        Language::Kotlin => {
            info!("Typegen for Kotlin");
            typegen_app.kotlin(&config)?;
        }
        Language::Csharp => {
            info!("Typegen for C#");
            typegen_app.csharp(&config)?;
        }
        Language::Typescript => {
            info!("Typegen for TypeScript");
            typegen_app.typescript(&config)?;
        }
    }

    Ok(())
}
This is essentially boilerplate for a CLI we can use to run type generation. But it's also a place where you can customize type generation if you have more advanced needs.
It uses the Facet-based type generation from crux_core to scan the App for
types that cross the FFI boundary, collect them, and write the requested
language output into the specified output_dir directory.
We will call this CLI from the shell projects shortly.
Codegen, typegen, bindgen, which is it?
You'll hear these terms thrown around here and there in the docs, so let's clarify what we mean:
bindgen – "bindings generation" – provides APIs in the foreign language to call the core's Rust FFI APIs. Crux uses BoltFFI for native, web, and C# bindings.
typegen – "type generation" – The core's FFI interface operates on bytes, but both Rust and the languages we're targeting are generally strongly typed. To support serialization and deserialization, we generate foreign type definitions that reflect the Rust types from the core (Swift, Kotlin, TypeScript, ...), all with consistent serialization behavior.
codegen – you guessed it, "code generation" – combines the two.
The BoltFFI config file
One more file is worth calling out before we move on:
shared/boltffi.toml.
# shared/boltffi.toml
[package]
name = "shared"
crate = "shared"
version = "0.1.0"
repository = "https://github.com/redbadger/crux/"
license = "Apache-2.0"

[targets.apple]
output = "../apple/generated/Shared"
include_macos = true

[targets.apple.swift]
module_name = "Shared"

[targets.apple.spm]
package_name = "Shared"
layout = "ffi-only"

[targets.android]
output = "../Android/generated"
min_sdk = 34

[targets.android.kotlin]
package = "com.crux.examples.counter"
output = "../Android/generated/kotlin"

[targets.android.pack]
output = "../Android/generated/jniLibs"

[targets.wasm]
output = "../web-nextjs/generated"
profile = "release"
artifact_path = "../target/wasm32-unknown-unknown/release/shared.wasm"

[targets.wasm.typescript]
output = "../web-nextjs/generated/pkg"

[targets.wasm.npm]
package_name = "shared"

[targets.csharp]
enabled = true
namespace = "CounterApp.Shared"
output = "../windows/generated/boltffi"
package_output = "../windows/generated/nuget"
package_id = "CounterApp.Shared.Ffi"
target_framework = "net10.0"
runtime_identifiers = ["win-x64"]
BoltFFI reads this file when the shell recipes package Apple, Android, and wasm
targets, or generate C# bindings. The [package] table identifies the Rust
crate being packaged. The [targets.*] tables describe each shell package:
where to write generated artifacts, what Swift module or Kotlin package to use,
where to put the wasm/npm output, and how to configure the C# bindings.
These paths are relative to shared/, because the BoltFFI commands run from
that directory. If you rename the crate or move a shell, update this file and
the matching shell project together.
Updating our app.rs
There's a few things we need to do to our app.rs module to support typegen.
The first thing we need to do is update the annotation of the Effect type to
tell our effect attribute macro to use the Facet-based typegen path.
#[derive(Debug)]
#[effect(facet_typegen)] // previously #[effect]
pub enum Effect {
    Render(RenderOperation),
}
We also need to annotate the other types that cross the FFI boundary with the
Facet derive macro. We are using Facet v0.44 (with crux_core v0.17), and so
we also need to specify a layout for enums, e.g. repr(C) or repr(u8).
use facet::Facet;

// derive Facet and specify layout
#[derive(Facet, Serialize, Deserialize, Clone, Debug)]
#[repr(C)]
pub enum Event {
    Increment,
    Decrement,
    Reset,
}

// derive Facet
#[derive(Facet, Serialize, Deserialize, Clone, Default)]
pub struct ViewModel {
    pub count: String,
}
Bindings code
Now we need to add the Rust side of the bindings into our code. Update your lib.rs to look like this:
// shared/src/lib.rs
#![allow(clippy::unsafe_derive_deserialize)]

mod app;
pub mod ffi;

pub use app::*;
pub use crux_core::Core;
This code exposes the ffi.rs module, where BoltFFI sees the byte-oriented
CoreFFI class. Let's look at it closer:
// shared/src/ffi.rs
#![allow(clippy::used_underscore_items)]

use crux_core::{
    Core,
    bridge::{Bridge, EffectId},
};

use crate::Counter;

/// The main interface used by the shell
pub struct CoreFFI {
    core: Bridge<Counter>,
}

impl Default for CoreFFI {
    fn default() -> Self {
        Self::new()
    }
}

#[boltffi::export]
impl CoreFFI {
    #[must_use]
    pub fn new() -> Self {
        Self {
            core: Bridge::new(Core::new()),
        }
    }

    /// Send an event to the app and return the effects.
    /// # Panics
    /// If the event cannot be deserialized.
    /// In production you should handle the error properly.
    #[must_use]
    pub fn update(&self, data: &[u8]) -> Vec<u8> {
        let mut effects = Vec::new();
        match self.core.update(data, &mut effects) {
            Ok(()) => effects,
            Err(e) => panic!("{e}"),
        }
    }

    /// Resolve an effect and return the effects.
    /// # Panics
    /// If the `data` cannot be deserialized into an effect or the `effect_id` is invalid.
    /// In production you should handle the error properly.
    #[must_use]
    pub fn resolve(&self, id: u32, data: &[u8]) -> Vec<u8> {
        let mut effects = Vec::new();
        match self.core.resolve(EffectId(id), data, &mut effects) {
            Ok(()) => effects,
            Err(e) => panic!("{e}"),
        }
    }

    /// Send an event to the app using owned bytes for generated C# bindings.
    /// # Panics
    /// If the event cannot be deserialized.
    /// In production you should handle the error properly.
    #[must_use]
    #[allow(clippy::needless_pass_by_value)]
    pub fn update_bytes(&self, data: Vec<u8>) -> Vec<u8> {
        self.update(&data)
    }

    /// Resolve an effect using owned bytes for generated C# bindings.
    /// # Panics
    /// If the `data` cannot be deserialized into an effect or the `effect_id` is invalid.
    /// In production you should handle the error properly.
    #[must_use]
    #[allow(clippy::needless_pass_by_value)]
    pub fn resolve_bytes(&self, id: u32, data: Vec<u8>) -> Vec<u8> {
        self.resolve(id, &data)
    }

    /// Get the current `ViewModel`.
    /// # Panics
    /// If the view cannot be serialized.
    /// In production you should handle the error properly.
    #[must_use]
    pub fn view(&self) -> Vec<u8> {
        let mut view_model = Vec::new();
        match self.core.view(&mut view_model) {
            Ok(()) => view_model,
            Err(e) => panic!("{e}"),
        }
    }
}
Broad strokes: CoreFFI holds a Bridge wrapping Counter and exposes the
core API as methods taking and returning byte buffers.
The translation between Rust types and byte buffers is the bridge's job. It also holds the effect requests inside the core under an id, which can be sent out to the Shell and used to resolve the effect, but more on that later.
Notice the Shell is in charge of creating the instance of this type, so in theory your Shell can have several instances of the app if it wants to.
The #[boltffi::export] attribute marks the Rust class and methods that should
be made available to shell languages. BoltFFI can support richer shapes, but Crux
keeps this layer deliberately tiny: app data is serialized with Serde and
bincode, and facet_generate creates matching host-language types so behavior stays
consistent across platforms.
It's not essential for you to understand the detail of the above code now. You won't need to change it unless you're doing something fairly advanced, by which time you'll understand it.
Platform native part
Okay, with that plumbing in place, the Core side of adding a shell is complete. It's not a one-liner, but you will only set it up once, and most likely won't touch it again.
Now we can proceed to the actual shell for your platform of choice:
- iOS with Swift and SwiftUI
- Android with Kotlin and Jetpack Compose
- Web with TypeScript, React and Next.js
- Rust in WebAssembly with Leptos
iOS/macOS with SwiftUI
In this section, we'll set up Xcode to build and run the simple counter app we built so far, targeting both iOS and macOS from a single project.
We think that using XcodeGen may be the simplest way to create an Xcode project to build and run a simple Apple app that calls into a shared core.
If you'd rather set up Xcode manually, you can do that, but most of this section will still apply. You just need to add the Swift package dependencies into your project by hand.
When we use Crux to build Apple apps, the Core API bindings are generated in Swift and packaged as an xcframework/Swift package with BoltFFI.
The shared core, which we built in previous chapters, is compiled to a static library and linked into the app binary.
The shared types are generated by Crux as a Swift package, which we can add to our project as a dependency. The Swift code to serialize and deserialize these types across the boundary is also generated by Crux as Swift packages.
flowchart TD
    subgraph shared["shared/ (Rust crate)"]
        app_rs["`app.rs
Event · Effect · ViewModel
#[derive(Facet)]
#[effect(facet_typegen)]`"]

        ffi_rs["`ffi.rs
CoreFfi
#[boltffi::export]`"]
    end

    app_rs --> tg[/"cargo run --bin codegen --language swift"/]
    ffi_rs --> bg[/"boltffi pack apple"/]

    tg -->|typegen| sw_t[Swift types]
    bg -->|bindgen| sw_b[Swift package and xcframework]

    sw_t --> apple["Apple + Swift + SwiftUI"]
    sw_b --> apple
Compile our Rust shared library
When we build our app, we also want to build the Rust core as a static library so that it can be linked into the binary that we're going to ship.
Other than Xcode and the Apple developer tools, we will use BoltFFI to generate a Swift package for our shared library, which we can add in Xcode. Install the matching CLI with
cargo install boltffi_cli --version '=0.25.2' --locked
To run the various steps, we'll also use the Just task runner.
cargo install just
Let's write the Justfile and we can look at what happens. Here are the key tasks (the full Justfile also includes linting, CI and cleanup targets):
# /apple/Justfile

# generates Swift types via codegen binary
typegen:
    cargo run --package shared --bin codegen \
        --features codegen,facet_typegen \
        -- --language swift --output-dir generated

# builds the shared library as a Swift package using BoltFFI
package:
    cd ../shared && boltffi pack apple

# rebuilds the Xcode project from project.yml
generate-project:
    xcodegen

# generates types, builds shared package, and regenerates Xcode project
generate: typegen package generate-project

# builds the project (generates first)
build: generate
    xcodebuild \
        -project CounterApp.xcodeproj \
        -scheme CounterApp-macOS \
        -configuration Debug \
        build

# local development workflow
dev: build
The main task is dev which we'll use shortly. It runs build,
which in turn runs typegen, package and generate-project.
typegen will use the codegen CLI we
prepared earlier, and package will use
boltffi pack apple to create a Shared package with the native
library and Swift bindings. That package will be our Swift interface to
the core.
Finally generate-project will run xcodegen to give us an Xcode
project file. They are famously fragile files and difficult to
version control, so generating it from a less arcane source of truth
seems like a good idea (yes, even if that source of truth is YAML).
Here's the project file:
# /apple/project.yml
name: CounterApp
packages:
  Shared:
    path: ./generated/Shared
  App:
    path: ./generated/App
options:
  bundleIdPrefix: com.crux.examples.counter
attributes:
  BuildIndependentTargetsInParallel: true

targetTemplates:
  app:
    type: application
    sources:
      - path: CounterApp
        excludes:
          - "Info-*.plist"
    scheme:
      management:
        shared: true
    dependencies:
      - package: Shared
      - package: App

targets:
  CounterApp-iOS:
    templates: [app]
    platform: iOS
    deploymentTarget: 18.0
    info:
      path: CounterApp/Info-iOS.plist
      properties:
        UISupportedInterfaceOrientations:
          - UIInterfaceOrientationPortrait
          - UIInterfaceOrientationLandscapeLeft
          - UIInterfaceOrientationLandscapeRight
        UILaunchScreen: {}

  CounterApp-macOS:
    templates: [app]
    platform: macOS
    deploymentTarget: "15.0"
    info:
      path: CounterApp/Info-macOS.plist
      properties:
        NSSupportsAutomaticGraphicsSwitching: true
    settings:
      OTHER_LDFLAGS: [-w]
      ENABLE_USER_SCRIPT_SANDBOXING: NO
Nothing too special, other than linking a couple packages and using them as dependencies.
With that, you can run
just dev
Simple - just dev! So what exactly happened?
The core built, including the FFI and the extra CLI binary, which was then called
to generate Swift code, and that was then packaged as a Swift package. You can
look at the generated directory, and you'll see two Swift packages - Shared and App,
just like we asked in project.yml. The Shared package has our app as a static lib and all the
generated FFI code for our FFI bindings, and the App package has the key types we will need.
No need to spend much time in here, but this is all the low-level glue code sorted out. Now we need to actually build some UI and we can run our app.
Building the UI
To add some UI, we need to do three things: wrap the core with a simple Swift interface, build a basic View to give us something to put on screen, and use that view as our main app view.
Wrap the core
The generated code still works with byte buffers, so lets give ourselves a nicer interface for it:
// apple/CounterApp/core.swift
import App
import Foundation
import Shared

@MainActor
class Core: ObservableObject {
    @Published var view: ViewModel

    private var core: CoreFFI

    init() {
        self.core = CoreFFI()
        // swiftlint:disable:next force_try
        self.view = try! .bincodeDeserialize(input: [UInt8](core.view()))
    }

    func update(_ event: Event) {
        // swiftlint:disable:next force_try
        let effects = [UInt8](core.update(data: Data(try! event.bincodeSerialize())))

        // swiftlint:disable:next force_try
        let requests = try! Requests.bincodeDeserialize(input: effects).value
        for request in requests {
            processEffect(request)
        }
    }

    func processEffect(_ request: Request) {
        switch request.effect {
        case .render:
            DispatchQueue.main.async {
                // swiftlint:disable:next force_try
                self.view = try! .bincodeDeserialize(input: [UInt8](self.core.view()))
            }
        }
    }
}
This is mostly just serialization code. But the processEffect method is interesting.
That is where effect execution goes. At the moment the switch statement has a single
lonely case updating the view model whenever the .render variant is requested,
but you can add more in here later, as you expand your Effect type.
Build a basic view
Xcode should've generated a ContentView file for you in apple/CounterApp/ContentView.swift.
Change it to look like this:
import App
import SwiftUI

struct ContentView: View {
    @ObservedObject var core: Core

    var body: some View {
        VStack {
            Image(systemName: "globe")
                .imageScale(.large)
                .foregroundColor(.accentColor)
            Text(core.view.count)
            HStack {
                ActionButton(label: "Reset", color: .red) {
                    core.update(.reset)
                }
                ActionButton(label: "Inc", color: .green) {
                    core.update(.increment)
                }
                ActionButton(label: "Dec", color: .yellow) {
                    core.update(.decrement)
                }
            }
        }
    }
}

struct ActionButton: View {
    var label: String
    var color: Color
    var action: () -> Void

    init(label: String, color: Color, action: @escaping () -> Void) {
        self.label = label
        self.color = color
        self.action = action
    }

    var body: some View {
        Button(action: action) {
            Text(label)
                .fontWeight(.bold)
                .font(.body)
                .padding(EdgeInsets(top: 10, leading: 15, bottom: 10, trailing: 15))
                .background(color)
                .cornerRadius(10)
                .foregroundColor(.white)
                .padding()
        }
    }
}

#Preview {
    ContentView(core: Core())
}
And finally, make sure apple/CounterApp/CounterApp.swift looks like this to use
the ContentView:
import SwiftUI

@main
struct CounterApp: App {
    var body: some Scene {
        WindowGroup {
            ContentView(core: Core())
        }
    }
}
The one interesting part of this is the @ObservedObject var core: Core. Since the Core is
an ObservableObject, we can subscribe to it to refresh our view. And we've marked the view
property as @Published, so whenever we set it, the View will draw.
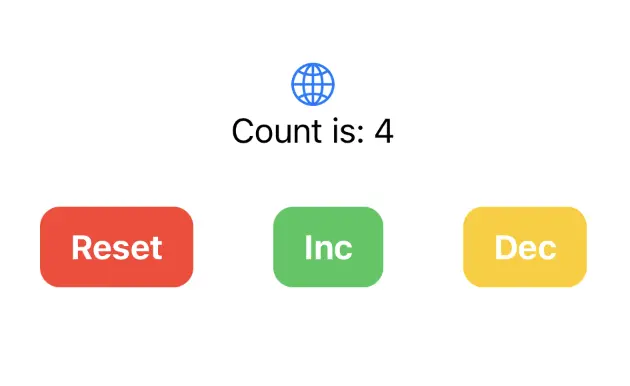
The view then simply shows the core.view.count in a Text and whenever we press a button, we directly
call core.update() with the appropriate action.
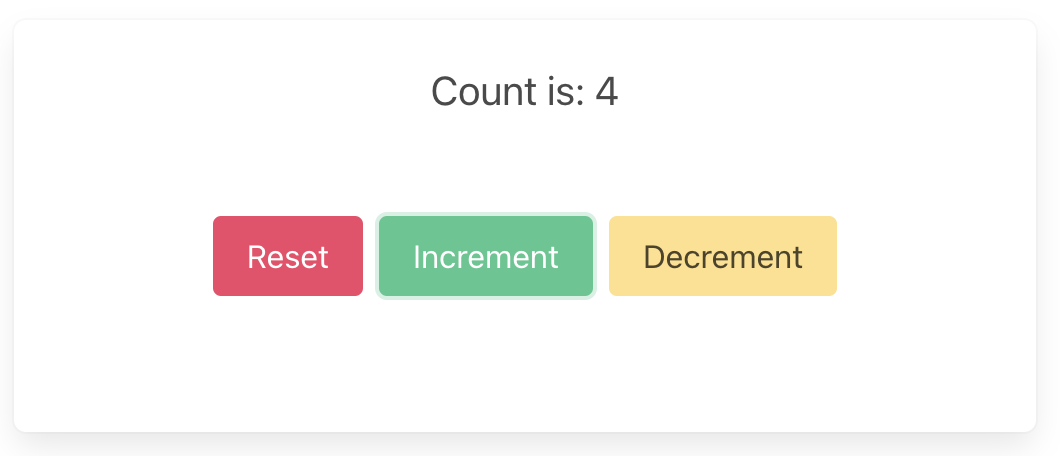
You should then be able to run the app in the simulator, on an iPhone, or as a macOS app, and it should look like this:
Android — Kotlin and Jetpack Compose
When we use Crux to build Android apps, the Core API bindings and native library assets are generated with BoltFFI.
The shared types are generated by Crux as Kotlin packages, which we
can add to our Android project using sourceSets. The Kotlin code
to serialise and deserialise these types across the boundary is also
generated by Crux.
flowchart TD
    subgraph shared["shared/ (Rust crate)"]
        app_rs["`app.rs
Event · Effect · ViewModel
#[derive(Facet)]
#[effect(facet_typegen)]`"]

        ffi_rs["`ffi.rs
CoreFfi
#[boltffi::export]`"]
    end

    app_rs --> tg[/cargo run --bin codegen --language kotlin/]
    ffi_rs --> bg[/boltffi pack android/]

    tg -->|typegen| kt_t[Kotlin types]
    bg -->|bindgen| kt_b[Kotlin bindings and JNI libraries]

    kt_t --> android["Android + Kotlin + Jetpack Compose"]
    kt_b --> android
These are the steps to set up Android Studio to build and run a simple Android app that calls into a shared core.
We want to make setting up Android Studio to work with Crux really easy. As time progresses we will try to simplify and automate as much as possible, but at the moment there is some manual configuration to do. This only needs doing once, so we hope it's not too much trouble. If you know of any better ways than those we describe below, please either raise an issue (or a PR) at https://github.com/redbadger/crux.
Create an Android App
The first thing we need to do is create a new Android app in Android Studio.
Open Android Studio and create a new project, for "Phone and Tablet", of type "Empty Activity". In this walk-through, we'll call it "SimpleCounter"
- "Name":
SimpleCounter - "Package name":
com.crux.examples.counter - "Save Location": a directory called
Androidat the root of our monorepo - "Minimum SDK"
API 34 - "Build configuration language":
Kotlin DSL (build.gradle.kts)
Your repo's directory structure might now look something like this (some files elided):
.
├── Android
│  ├── app
│  │  ├── build.gradle.kts
│  │  └── src
│  │     └── main
│  │        ├── AndroidManifest.xml
│  │        └── java/com/crux/examples/counter
│  │           ├── Core.kt
│  │           └── MainActivity.kt
│  ├── build.gradle.kts
│  ├── gradle.properties
│  ├── settings.gradle.kts
│  └── shared
│     └── build.gradle.kts
├── Cargo.lock
├── Cargo.toml
└── shared
   ├── Cargo.toml
   ├── boltffi.toml
   └── src
      ├── app.rs
      ├── bin
      │  └── codegen.rs
      ├── ffi.rs
      └── lib.rs
Add a Kotlin Android Library
This shared Android library (aar) is going to wrap our shared Rust library.
Under File -> New -> New Module, choose "Android Library" and give it the "Module name"
shared. Set the "Package name" to match your Android namespace.
Again, set the "Build configuration language" to Kotlin DSL (build.gradle.kts).
For more information on how to add an Android library see https://developer.android.com/studio/projects/android-library.
We can now add this library as a dependency of our app.
Edit the app's build.gradle.kts (/Android/app/build.gradle.kts) to look like
this:
import org.jetbrains.kotlin.gradle.dsl.JvmTarget

plugins {
    alias(libs.plugins.android.application)
    alias(libs.plugins.kotlin.android)
    alias(libs.plugins.kotlin.compose)
}

android {
    namespace = "com.crux.examples.counter"
    compileSdk {
        version = release(36)
    }

    defaultConfig {
        applicationId = "com.crux.examples.counter"
        minSdk = 34
        targetSdk = 36
        versionCode = 1
        versionName = "1.0"

        testInstrumentationRunner = "androidx.test.runner.AndroidJUnitRunner"
    }

    buildTypes {
        release {
            isMinifyEnabled = false
            proguardFiles(
                getDefaultProguardFile("proguard-android-optimize.txt"),
                "proguard-rules.pro"
            )
        }
    }
    compileOptions {
        sourceCompatibility = JavaVersion.VERSION_11
        targetCompatibility = JavaVersion.VERSION_11
    }
    kotlin {
        compilerOptions {
            jvmTarget = JvmTarget.JVM_11
        }
    }
    buildFeatures {
        compose = true
    }
}

dependencies {
    // our shared library
    implementation(project(":shared"))

    // added dependencies
    implementation(libs.lifecycle.viewmodel.compose)

    // original dependencies
    implementation(libs.androidx.core.ktx)
    implementation(libs.androidx.lifecycle.runtime.ktx)
    implementation(libs.androidx.activity.compose)
    implementation(platform(libs.androidx.compose.bom))
    implementation(libs.androidx.compose.ui)
    implementation(libs.androidx.compose.ui.graphics)
    implementation(libs.androidx.compose.ui.tooling.preview)
    implementation(libs.androidx.compose.material3)
    testImplementation(libs.junit)
    androidTestImplementation(libs.androidx.junit)
    androidTestImplementation(libs.androidx.espresso.core)
    androidTestImplementation(platform(libs.androidx.compose.bom))
    androidTestImplementation(libs.androidx.compose.ui.test.junit4)
    debugImplementation(libs.androidx.compose.ui.tooling)
    debugImplementation(libs.androidx.compose.ui.test.manifest)
}
In our Gradle files, we are referencing a "Version Catalog" to manage our dependency versions, so you will need to ensure this is kept up to date.
Our catalog (Android/gradle/libs.versions.toml) will end up looking like this:
[versions]
agp = "8.13.2"
kotlin = "2.3.0"
coreKtx = "1.17.0"
junit = "4.13.2"
junitVersion = "1.3.0"
espressoCore = "3.7.0"
lifecycleRuntimeKtx = "2.10.0"
activityCompose = "1.12.3"
composeBom = "2026.01.01"
lifecycle = "2.10.0"

[libraries]
androidx-core-ktx = { group = "androidx.core", name = "core-ktx", version.ref = "coreKtx" }
junit = { group = "junit", name = "junit", version.ref = "junit" }
androidx-junit = { group = "androidx.test.ext", name = "junit", version.ref = "junitVersion" }
androidx-espresso-core = { group = "androidx.test.espresso", name = "espresso-core", version.ref = "espressoCore" }
androidx-lifecycle-runtime-ktx = { group = "androidx.lifecycle", name = "lifecycle-runtime-ktx", version.ref = "lifecycleRuntimeKtx" }
androidx-activity-compose = { group = "androidx.activity", name = "activity-compose", version.ref = "activityCompose" }
androidx-compose-bom = { group = "androidx.compose", name = "compose-bom", version.ref = "composeBom" }
androidx-compose-ui = { group = "androidx.compose.ui", name = "ui" }
androidx-compose-ui-graphics = { group = "androidx.compose.ui", name = "ui-graphics" }
androidx-compose-ui-tooling = { group = "androidx.compose.ui", name = "ui-tooling" }
androidx-compose-ui-tooling-preview = { group = "androidx.compose.ui", name = "ui-tooling-preview" }
androidx-compose-ui-test-manifest = { group = "androidx.compose.ui", name = "ui-test-manifest" }
androidx-compose-ui-test-junit4 = { group = "androidx.compose.ui", name = "ui-test-junit4" }
androidx-compose-material3 = { group = "androidx.compose.material3", name = "material3" }
lifecycle-viewmodel-compose = { module = "androidx.lifecycle:lifecycle-viewmodel-compose", version.ref = "lifecycle" }

[plugins]
android-application = { id = "com.android.application", version.ref = "agp" }
kotlin-android = { id = "org.jetbrains.kotlin.android", version.ref = "kotlin" }
kotlin-compose = { id = "org.jetbrains.kotlin.plugin.compose", version.ref = "kotlin" }
android-library = { id = "com.android.library", version.ref = "agp" }
The Rust shared library
We'll use the following tools to incorporate our Rust shared library into the Android library added above. This includes compiling and linking the Rust dynamic library and generating the runtime bindings and the shared types.
- The Android NDK
- BoltFFI builds the native libraries, generates
the Kotlin bindings, and writes the
jniLibs - The
codegenbinary (with thefacet_typegenfeature) generates the Kotlin app data types
The NDK can be installed from "Tools, SDK Manager, SDK Tools" in Android Studio.
Let's get started.
Add the four Rust Android toolchains to your system:
$ rustup target add aarch64-linux-android armv7-linux-androideabi i686-linux-android x86_64-linux-android
Edit the project's build.gradle.kts (/Android/build.gradle.kts) to look like
this:
// Top-level build file where you can add configuration options common to all sub-projects/modules.
plugins {
    alias(libs.plugins.android.application) apply false
    alias(libs.plugins.kotlin.android) apply false
    alias(libs.plugins.kotlin.compose) apply false
    alias(libs.plugins.android.library) apply false
}
Edit the library's build.gradle.kts (/Android/shared/build.gradle.kts) to look
like this:
import org.jetbrains.kotlin.gradle.dsl.JvmTarget

plugins {
    alias(libs.plugins.android.library)
    alias(libs.plugins.kotlin.android)
}

android {
    namespace = "com.crux.examples.counter"

    compileSdk {
        version = release(36)
    }

    defaultConfig {
        minSdk = 34
    }

    compileOptions {
        sourceCompatibility = JavaVersion.VERSION_11
        targetCompatibility = JavaVersion.VERSION_11
    }

    kotlin {
        compilerOptions {
            jvmTarget = JvmTarget.JVM_11
        }
    }

    sourceSets {
        getByName("main") {
            kotlin.srcDirs("${projectDir}/../generated")
            jniLibs.srcDirs("${projectDir}/../generated/jniLibs")
        }
    }
}
You will need to set the ndkVersion to one you have installed, go to "Tools, SDK Manager, SDK Tools" and check "Show Package Details" to get your installed version, or to install the version matching build.gradle.kts above.
As you can see, The sourceSets directive in the shared library Gradle
file points both kotlin.srcDirs and jniLibs.srcDirs at the generated
directory. Let's populate it.
First generate the data types using codegen:
$ # In `/Android`
$ cargo run --package shared --bin codegen --features codegen,facet_typegen -- --language kotlin --output-dir generated
Then generate the bindings and native libraries using BoltFFI:
$ # In `/shared`
$ boltffi pack android
Now your generated directory should look like this:
$ ls --tree Android/generated
Android/generated
├── build.gradle.kts
├── com
│  ├── crux
│  │  └── examples
│  │     └── counter
│  │        └── Counter.kt
│  └── novi
│     ├── bincode
│     │  ├── BincodeDeserializer.kt
│     │  └── BincodeSerializer.kt
│     └── serde
│        ├── BinaryDeserializer.kt
│        ├── BinarySerializer.kt
│        ├── ...
│        └── UInt128.kt
├── include
│  └── shared.h
├── jniLibs
│  ├── arm64-v8a
│  │  └── libshared.so
│  ├── armeabi-v7a
│  │  └── libshared.so
│  ├── x86
│  │  └── libshared.so
│  └── x86_64
│     └── libshared.so
└── kotlin
   ├── com
   │  └── crux
   │     └── examples
   │        └── counter
   │           └── Shared.kt
   └── jni
      └── jni_glue.c
codegen will generate a build.gradle.kts that we won't be using in this setup.
Any error reported by the IDE in this file can be ignored, and if the file prevents
buiding it can safely be deleted.
Create some UI and run in the Simulator
Wrap the core to support capabilities
First, let's add some boilerplate code to wrap our core and handle the
capabilities that we are using. For this example, we only need to support the
Render capability, which triggers a render of the UI.
Let's create a file "File, New, Kotlin Class/File, File" called Core.
This code that wraps the core only needs to be written once — it only grows when we need to support additional capabilities.
Edit Android/app/src/main/java/com/crux/examples/counter/Core.kt to look like
the following. This code sends our (UI-generated) events to the core, and
handles any effects that the core asks for. In this simple example, we aren't
calling any HTTP APIs or handling any side effects other than rendering the UI,
so we just handle this render effect by updating the published view model from
the core.
package com.crux.examples.counter

import androidx.compose.runtime.getValue
import androidx.compose.runtime.mutableStateOf
import androidx.compose.runtime.setValue
open class Core : androidx.lifecycle.ViewModel() {
    private var core: CoreFfi = CoreFfi()

    var view: ViewModel by mutableStateOf(
        ViewModel.bincodeDeserialize(core.view())
    )
        private set

    fun update(event: Event) {
        val effects = core.update(event.bincodeSerialize())

        val requests = Requests.bincodeDeserialize(effects).value
        for (request in requests) {
            processEffect(request)
        }
    }

    private fun processEffect(request: Request) {
        when (val effect = request.effect) {
            is Effect.Render -> {
                this.view = ViewModel.bincodeDeserialize(core.view())
            }
        }
    }
}
That when statement, above, is where you would handle any other
effects that your core might ask for. For example, if your core needs
to make an HTTP request, you would handle that here.
Edit /Android/app/src/main/java/com/crux/examples/counter/MainActivity.kt to
look like the following:
package com.crux.examples.counter
import android.os.Bundle
import androidx.activity.ComponentActivity
import androidx.activity.compose.setContent
import androidx.compose.foundation.layout.Arrangement
import androidx.compose.foundation.layout.Column
import androidx.compose.foundation.layout.Row
import androidx.compose.foundation.layout.fillMaxSize
import androidx.compose.foundation.layout.padding
import androidx.compose.material3.Button
import androidx.compose.material3.ButtonDefaults
import androidx.compose.material3.MaterialTheme
import androidx.compose.material3.Surface
import androidx.compose.material3.Text
import androidx.compose.runtime.Composable
import androidx.compose.runtime.rememberCoroutineScope
import androidx.compose.ui.Alignment
import androidx.compose.ui.Modifier
import androidx.compose.ui.graphics.Color
import androidx.compose.ui.tooling.preview.Preview
import androidx.compose.ui.unit.dp
import androidx.lifecycle.viewmodel.compose.viewModel
import com.crux.examples.counter.ui.theme.CounterTheme
import kotlinx.coroutines.launch
class MainActivity : ComponentActivity() {
override fun onCreate(savedInstanceState: Bundle?) {
super.onCreate(savedInstanceState)
setContent {
CounterTheme {
Surface(
modifier = Modifier.fillMaxSize(),
color = MaterialTheme.colorScheme.background
) { View() }
}
}
}
}
@Composable
fun View(core: Core = viewModel()) {
val scope = rememberCoroutineScope()
Column(
horizontalAlignment = Alignment.CenterHorizontally,
verticalArrangement = Arrangement.Center,
modifier = Modifier.fillMaxSize().padding(10.dp),
) {
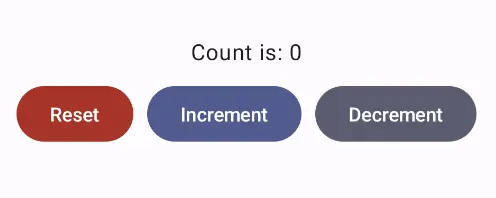
Text(text = core.view.count, modifier = Modifier.padding(10.dp))
Row(horizontalArrangement = Arrangement.spacedBy(10.dp)) {
Button(
onClick = { scope.launch { core.update(Event.RESET) } },
colors =
ButtonDefaults.buttonColors(
containerColor = MaterialTheme.colorScheme.error
)
) { Text(text = "Reset", color = Color.White) }
Button(
onClick = { scope.launch { core.update(Event.INCREMENT) } },
colors =
ButtonDefaults.buttonColors(
containerColor = MaterialTheme.colorScheme.primary
)
) { Text(text = "Increment", color = Color.White) }
Button(
onClick = { scope.launch { core.update(Event.DECREMENT) } },
colors =
ButtonDefaults.buttonColors(
containerColor = MaterialTheme.colorScheme.secondary
)
) { Text(text = "Decrement", color = Color.White) }
}
}
}
@Preview(showBackground = true)
@Composable
fun DefaultPreview() {
CounterTheme { View() }
}
Web — TypeScript and React (Next.js)
These are the steps to set up and run a simple TypeScript Web app that calls into a shared core.
This walk-through assumes you have already set up the
shared library and codegen as described in
Shared core and types.
flowchart TD
    subgraph shared["shared/ (Rust crate)"]
        app_rs["`app.rs
Event · Effect · ViewModel
#[derive(Facet)]
#[effect(facet_typegen)]`"]

        ffi_rs["`ffi.rs
CoreFfi · #[boltffi::export]`"]
    end

    app_rs --> tg[/"cargo run --bin codegen --language typescript"/]
    ffi_rs --> bg[/"boltffi pack wasm"/]

    tg -->|typegen| ts_t[TypeScript types]
    bg -->|bindgen| wasm_b[WASM package and JS bindings]

    ts_t --> webts["Web / TypeScript
React · Next.js"]
    wasm_b --> webts
Create a Next.js App
For this walk-through, we'll use the
pnpm package manager for no
reason other than we like it the most!
Let's create a simple Next.js app for TypeScript,
using pnpx (from pnpm). You can probably accept
the defaults.
pnpx create-next-app@latest
Compile our Rust shared library
When we build our app, we also want to compile the Rust core to WebAssembly so that it can be referenced from our code.
To do this, we'll use BoltFFI, which you can install like this:
cargo install boltffi_cli --version '=0.25.2' --locked
brew install binaryen # provides wasm-opt
The crate is boltffi_cli; it installs the boltffi binary used below.
Now that we have boltffi installed, we can build
our shared library to WebAssembly for the browser.
cd ../shared
boltffi pack wasm
Generate the Shared Types
To generate the shared types for TypeScript, we use the codegen CLI we prepared earlier:
cargo run --package shared --bin codegen \
    --features codegen,facet_typegen \
    -- --language typescript \
       --output-dir generated/types
Both the Wasm package and the generated types are
referenced as local dependencies in package.json:
{
  "dependencies": {
    "shared": "file:generated/pkg",
    "shared_types": "file:generated/types"
  }
}
Install the dependencies:
pnpm install
Create some UI
Counter example
A simple app that increments, decrements and resets a counter.
Wrap the core to handle effects
First, let's add some boilerplate code to wrap our core
and handle the effects that it produces. For this
example, we only need to support the Render effect,
which triggers a render of the UI.
This code that wraps the core only needs to be written once — it only grows when we need to support additional effects.
Edit src/app/core.ts to look like the following.
This code sends our (UI-generated) events to the core,
and handles any effects that the core asks for. In this
example, we aren't calling any HTTP APIs or handling
any side effects other than rendering the UI, so we
just handle this render effect by updating the
component's view hook with the core's ViewModel.
Notice that we have to serialize and deserialize the data that we pass between the core and the shell. This is because the core is running in a separate WebAssembly instance, and so we can't just pass the data directly.
import type { Dispatch, SetStateAction } from "react";
import { CoreFFI } from "shared";
import * as sharedWasm from "shared";
import type { Effect, Event } from "shared_types/app";
import { EffectVariantRender, Request, ViewModel } from "shared_types/app";
import { BincodeDeserializer, BincodeSerializer } from "shared_types/bincode";

const wasmInitialized = (sharedWasm as unknown as { initialized: Promise<void> })
  .initialized;

export class Core {
  core: CoreFFI | null = null;
  initializing: Promise<void> | null = null;
  setState: Dispatch<SetStateAction<ViewModel>>;

  constructor(setState: Dispatch<SetStateAction<ViewModel>>) {
    // Don't initialize CoreFFI here - wait for WASM to be loaded
    this.setState = setState;
  }

  initialize(shouldLoad: boolean): Promise<void> {
    if (this.core) {
      return Promise.resolve();
    }

    if (!this.initializing) {
      const load = shouldLoad ? wasmInitialized : Promise.resolve();

      this.initializing = load
        .then(() => {
          this.core = CoreFFI.new();
          this.setState(this.view());
        })
        .catch((error) => {
          this.initializing = null;
          console.error("Failed to initialize wasm core:", error);
        });
    }

    return this.initializing;
  }

  view(): ViewModel {
    if (!this.core) {
      throw new Error("Core not initialized. Call initialize() first.");
    }
    return deserializeView(this.core.view());
  }

  update(event: Event) {
    if (!this.core) {
      throw new Error("Core not initialized. Call initialize() first.");
    }
    const serializer = new BincodeSerializer();
    event.serialize(serializer);

    const effects = this.core.update(serializer.getBytes());

    const requests = deserializeRequests(effects);
    for (const { effect } of requests) {
      this.processEffect(effect);
    }
  }

  private processEffect(effect: Effect) {
    switch (effect.constructor) {
      case EffectVariantRender: {
        this.setState(this.view());
        break;
      }
    }
  }
}

function deserializeRequests(bytes: Uint8Array | number[]): Request[] {
  const deserializer = new BincodeDeserializer(asBytes(bytes));
  const len = deserializer.deserializeLen();
  const requests: Request[] = [];
  for (let i = 0; i < len; i++) {
    const request = Request.deserialize(deserializer);
    requests.push(request);
  }
  return requests;
}

function deserializeView(bytes: Uint8Array | number[]): ViewModel {
  return ViewModel.deserialize(new BincodeDeserializer(asBytes(bytes)));
}

function asBytes(bytes: Uint8Array | number[]): Uint8Array {
  return bytes instanceof Uint8Array ? bytes : new Uint8Array(bytes);
}
That switch statement, above, is where you would
handle any other effects that your core might ask for.
For example, if your core needs to make an HTTP
request, you would handle that here. To see an example
of this, take a look at the
counter example
in the Crux repository.
Create a component to render the UI
Edit src/app/page.tsx to look like the following.
This code loads the WebAssembly core and sends it an
initial event. Notice that we pass the setState hook
to the update function so that we can update the state
in response to a render effect from the core.
"use client";

import type { NextPage } from "next";
import { useEffect, useRef, useState } from "react";

import {
  ViewModel,
  EventVariantReset,
  EventVariantIncrement,
  EventVariantDecrement,
} from "shared_types/app";

import { Core } from "./core";

const Home: NextPage = () => {
  const [view, setView] = useState(new ViewModel(""));
  const core = useRef(new Core(setView));

  useEffect(() => {
    void core.current.initialize(true);
  }, []);

  return (
    <main>
      <section className="box container has-text-centered m-5">
        <p className="is-size-5">{view.count}</p>
        <div className="buttons section is-centered">
          <button
            className="button is-primary is-danger"
            onClick={() => core.current.update(new EventVariantReset())}
          >
            {"Reset"}
          </button>
          <button
            className="button is-primary is-success"
            onClick={() => core.current.update(new EventVariantIncrement())}
          >
            {"Increment"}
          </button>
          <button
            className="button is-primary is-warning"
            onClick={() => core.current.update(new EventVariantDecrement())}
          >
            {"Decrement"}
          </button>
        </div>
      </section>
    </main>
  );
};

export default Home;
Now all we need is some CSS. First add the Bulma
package, and then import it in layout.tsx.
pnpm add bulma
import "bulma/css/bulma.min.css";
import type { Metadata } from "next";
import { Inter } from "next/font/google";

const inter = Inter({ subsets: ["latin"] });

export const metadata: Metadata = {
  title: "Crux Simple Counter Example",
  description: "Rust Core, TypeScript Shell (NextJS)",
};

export default function RootLayout({
  children,
}: {
  children: React.ReactNode;
}) {
  return (
    <html lang="en">
      <body className={inter.className}>{children}</body>
    </html>
  );
}
Build and serve our app
We can build our app, and serve it for the browser, in one simple step.
pnpm dev
Web — Rust and Leptos
These are the steps to set up and run a simple Rust Web app that calls into a shared core.
This walk-through assumes you have already set up the
shared library and codegen as described in
Shared core and types.
There are many frameworks available for writing Web applications in Rust. Here we're choosing Leptos for this walk-through as a way to demonstrate how Crux can work with web frameworks that use fine-grained reactivity rather than the conceptual full re-rendering of React. However, a similar setup would work for other frameworks that compile to WebAssembly.
flowchart TD
    subgraph shared["shared/ (Rust crate)"]
        app_rs["`app.rs
App · Event · Effect · ViewModel`"]
    end

    shared -->|"Cargo.toml dependency (no codegen)"| shell

    subgraph shell["Rust web shell crate"]
        src_rs["uses shared types natively (no FFI or serialization needed)"]
    end

    shell -->|"trunk build → WASM"| dist["`dist/
browser-ready app`"]
Create a Leptos App
Our Leptos app is just a new Rust project, which we
can create with Cargo. For this example we'll call it
web-leptos.
cargo new web-leptos
We'll also want to add this new project to our Cargo
workspace, by editing the root Cargo.toml file.
[workspace]
members = ["shared", "web-leptos"]
Now we can cd into the web-leptos directory and
start fleshing out our project. Let's add some
dependencies to web-leptos/Cargo.toml.
[package]
name = "web-leptos"
version = "0.1.0"
authors.workspace = true
repository.workspace = true
edition.workspace = true
license.workspace = true
keywords.workspace = true
rust-version.workspace = true

[dependencies]
shared = { path = "../shared" }
leptos = { version = "0.8.20", features = ["csr"] }

[lints]
workspace = true
If using nightly Rust, you can enable the "nightly" feature for Leptos. When you do this, the signals become functions that can be called directly.
However in our examples we are using the stable
channel and so have to use the get() and update()
functions explicitly.
We'll also need a file called index.html, to serve
our app.
<!DOCTYPE html>
<html>
  <head>
    <meta charset="utf-8">
    <meta name="viewport" content="width=device-width, initial-scale=1">
    <title>Leptos Counter</title>
    <link rel="stylesheet" href="https://cdn.jsdelivr.net/npm/bulma@0.9.4/css/bulma.min.css">
  </head>
  <body></body>
</html>
Create some UI
We will use the
counter example,
which has a shared library that will work with the
following example code.
Counter example
A simple app that increments, decrements and resets a counter.
Wrap the core to handle effects
First, let's add some boilerplate code to wrap our core
and handle the effects that it produces. For this
example, we only need to support the Render effect,
which triggers a render of the UI.
This code that wraps the core only needs to be written once — it only grows when we need to support additional effects.
Edit src/core.rs to look like the following. This
code sends our (UI-generated) events to the core, and
handles any effects that the core asks for. In this
example, we aren't calling any HTTP APIs or handling
any side effects other than rendering the UI, so we
just handle this render effect by sending the new
ViewModel to the relevant Leptos signal.
Also note that because both our core and our shell are written in Rust (and run in the same memory space), we do not need to serialize and deserialize the data that we pass between them. We can just pass the data directly.
use std::rc::Rc;

use leptos::prelude::{Update as _, WriteSignal};
use shared::{Counter, Effect, Event, ViewModel};

pub type Core = Rc<shared::Core<Counter>>;

pub fn new() -> Core {
    Rc::new(shared::Core::new())
}

pub fn update(core: &Core, event: Event, render: WriteSignal<ViewModel>) {
    for effect in &core.process_event(event) {
        process_effect(core, effect, render);
    }
}

pub fn process_effect(core: &Core, effect: &Effect, render: WriteSignal<ViewModel>) {
    match effect {
        Effect::Render(_) => {
            render.update(|view| *view = core.view());
        }
    }
}That match statement, above, is where you would
handle any other effects that your core might ask for.
For example, if your core needs to make an HTTP
request, you would handle that here. To see an example
of this, take a look at the
counter example
in the Crux repository.
Edit src/main.rs to look like the following. This
code creates two signals — one to update the view
(which starts off with the core's current view), and
the other to capture events from the UI (which starts
off by sending the reset event). We also create an
effect that sends these events into the core whenever
they are raised.
mod core;

use leptos::prelude::*;
use shared::Event;

#[component]
fn RootComponent() -> impl IntoView {
    let core = core::new();
    let (view, render) = signal(core.view());
    let (event, set_event) = signal(Event::Reset);

    Effect::new(move |_| {
        core::update(&core, event.get(), render);
    });

    view! {
        <section class="box container has-text-centered m-5">
            <p class="is-size-5">{move || view.get().count}</p>
            <div class="buttons section is-centered">
                <button class="button is-primary is-danger"
                    on:click=move |_| set_event.set(Event::Reset)
                >
                    {"Reset"}
                </button>
                <button class="button is-primary is-success"
                    on:click=move |_| set_event.set(Event::Increment)
                >
                    {"Increment"}
                </button>
                <button class="button is-primary is-warning"
                    on:click=move |_| set_event.set(Event::Decrement)
                >
                    {"Decrement"}
                </button>
            </div>
        </section>
    }
}

fn main() {
    leptos::mount::mount_to_body(|| {
        view! { <RootComponent /> }
    });
}
Build and serve our app
The easiest way to compile the app to WebAssembly and
serve it in our web page is to use
trunk, which we can install
with Homebrew
(brew install trunk) or Cargo
(cargo install trunk).
We can build our app, serve it and open it in our browser, in one simple step.
trunk serve --open
The Weather App
So far, we've explained the basics on a very simple counter app. So simple in fact, that it barely demonstrated any of the key features of Crux.
Time to ditch the training wheels and dive into something real. We'll need to demonstrate a few key concepts. How the Elm architecture works at a larger scale, how we manage navigation in a multi-screen app, and the main focus will be on managed effects and capabilities. To that end, we'll need an app that does enough interesting things, while staying reasonably small.
So we're going to build a Weather app. It needs to call an API, store data and secrets locally, and use location APIs to show local weather. That's plenty of effects for us to play with and see how Crux supports this.
Here's the same app — one shared core — running on iOS, Android, macOS, and the web:
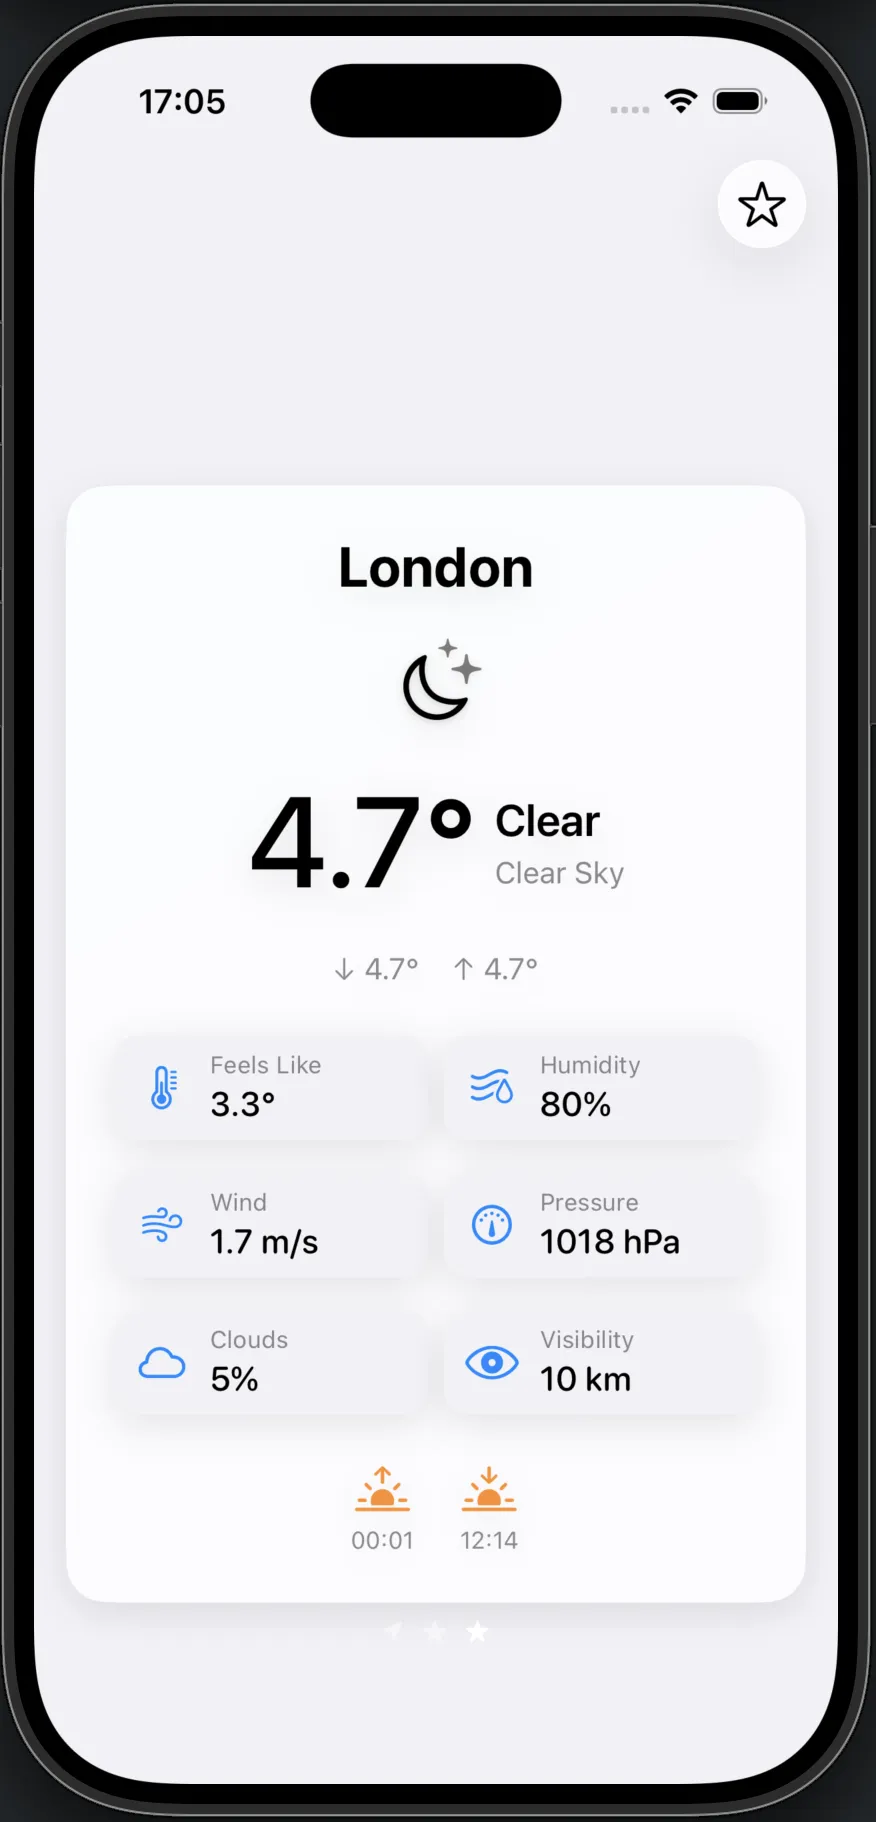
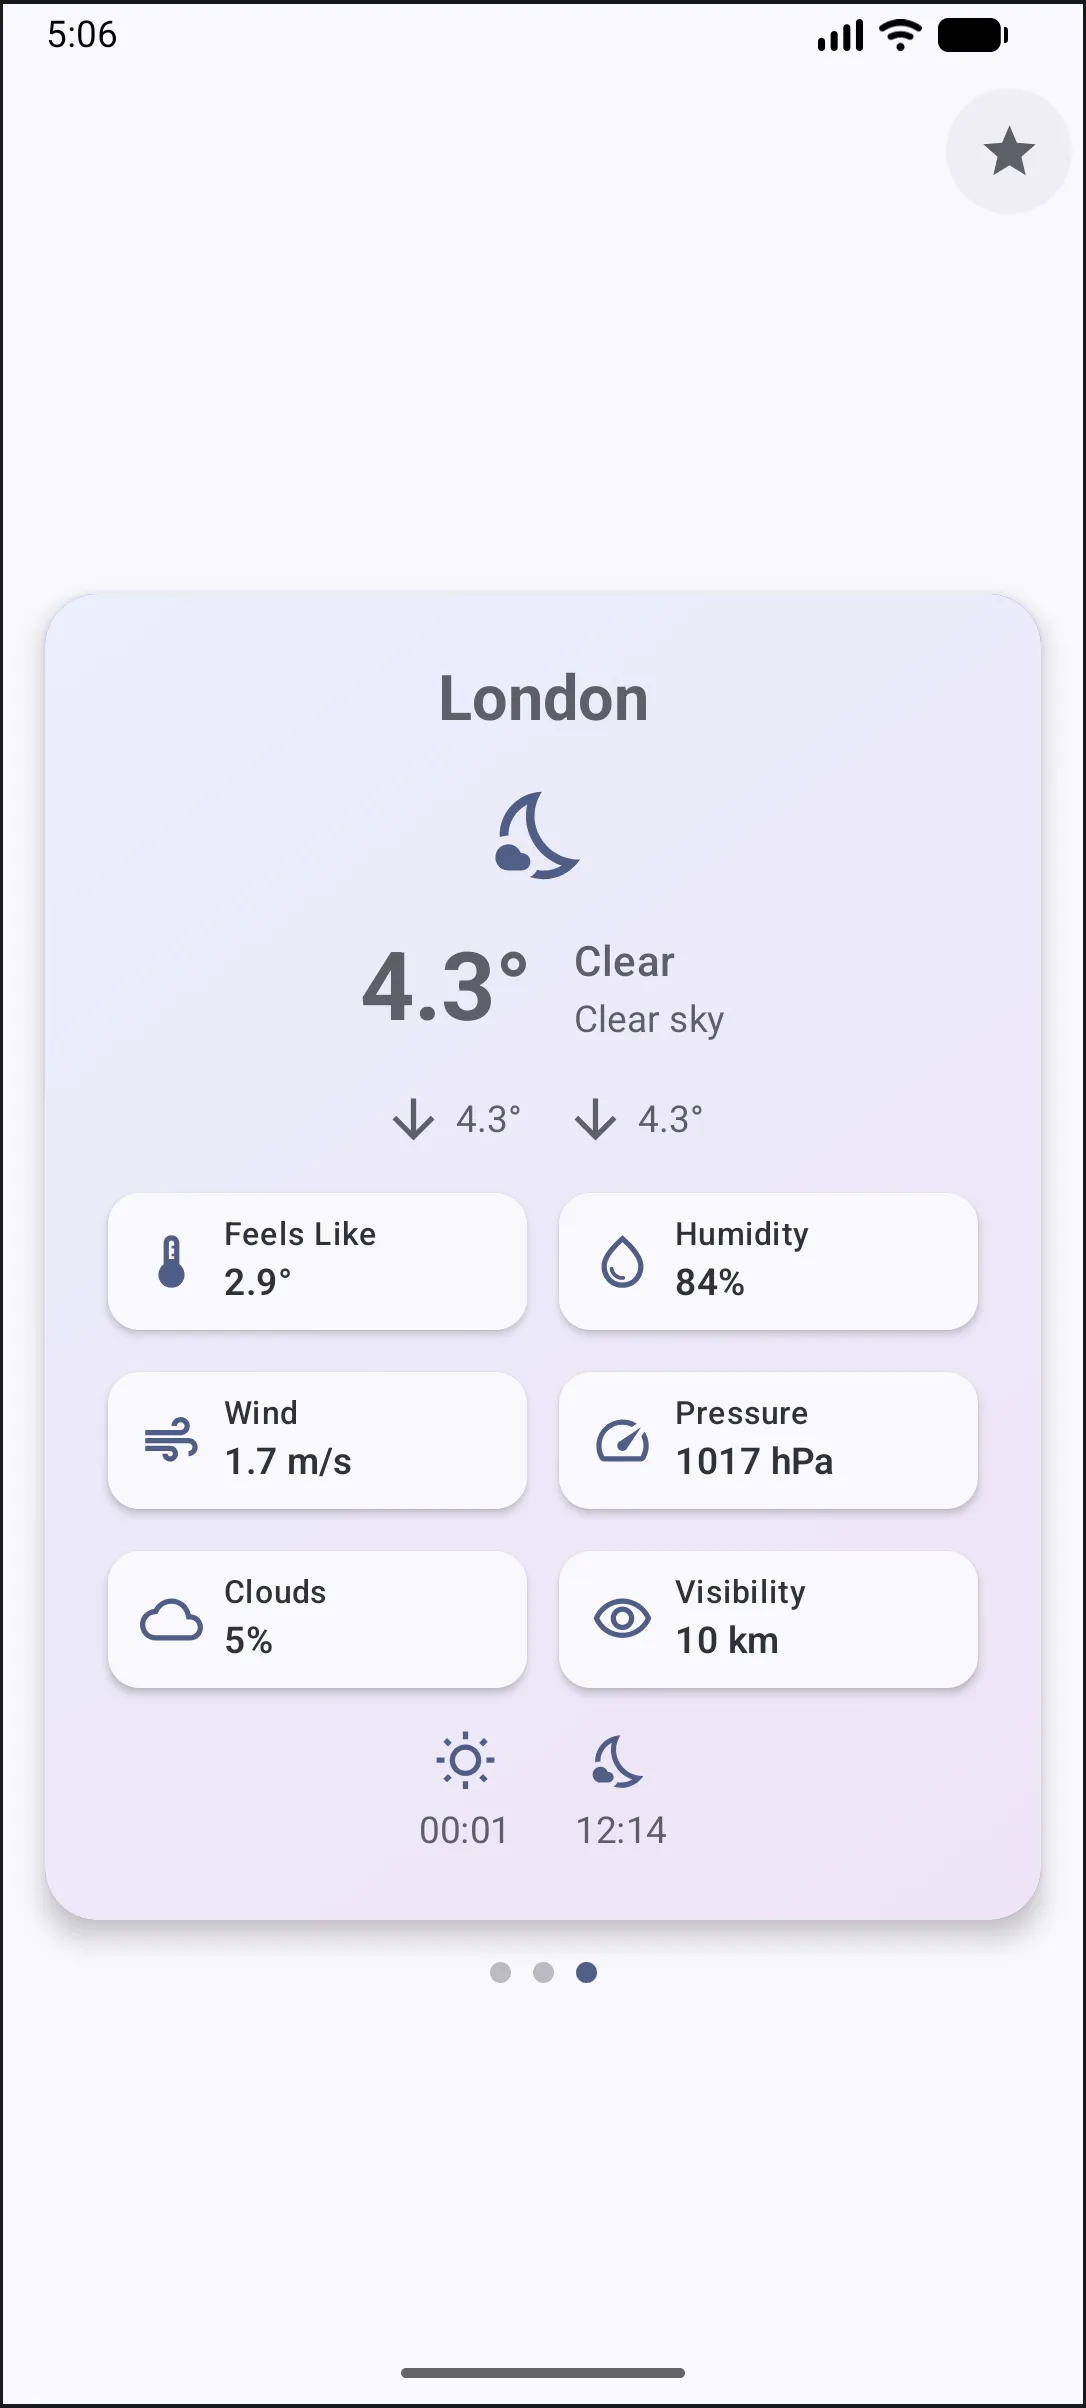
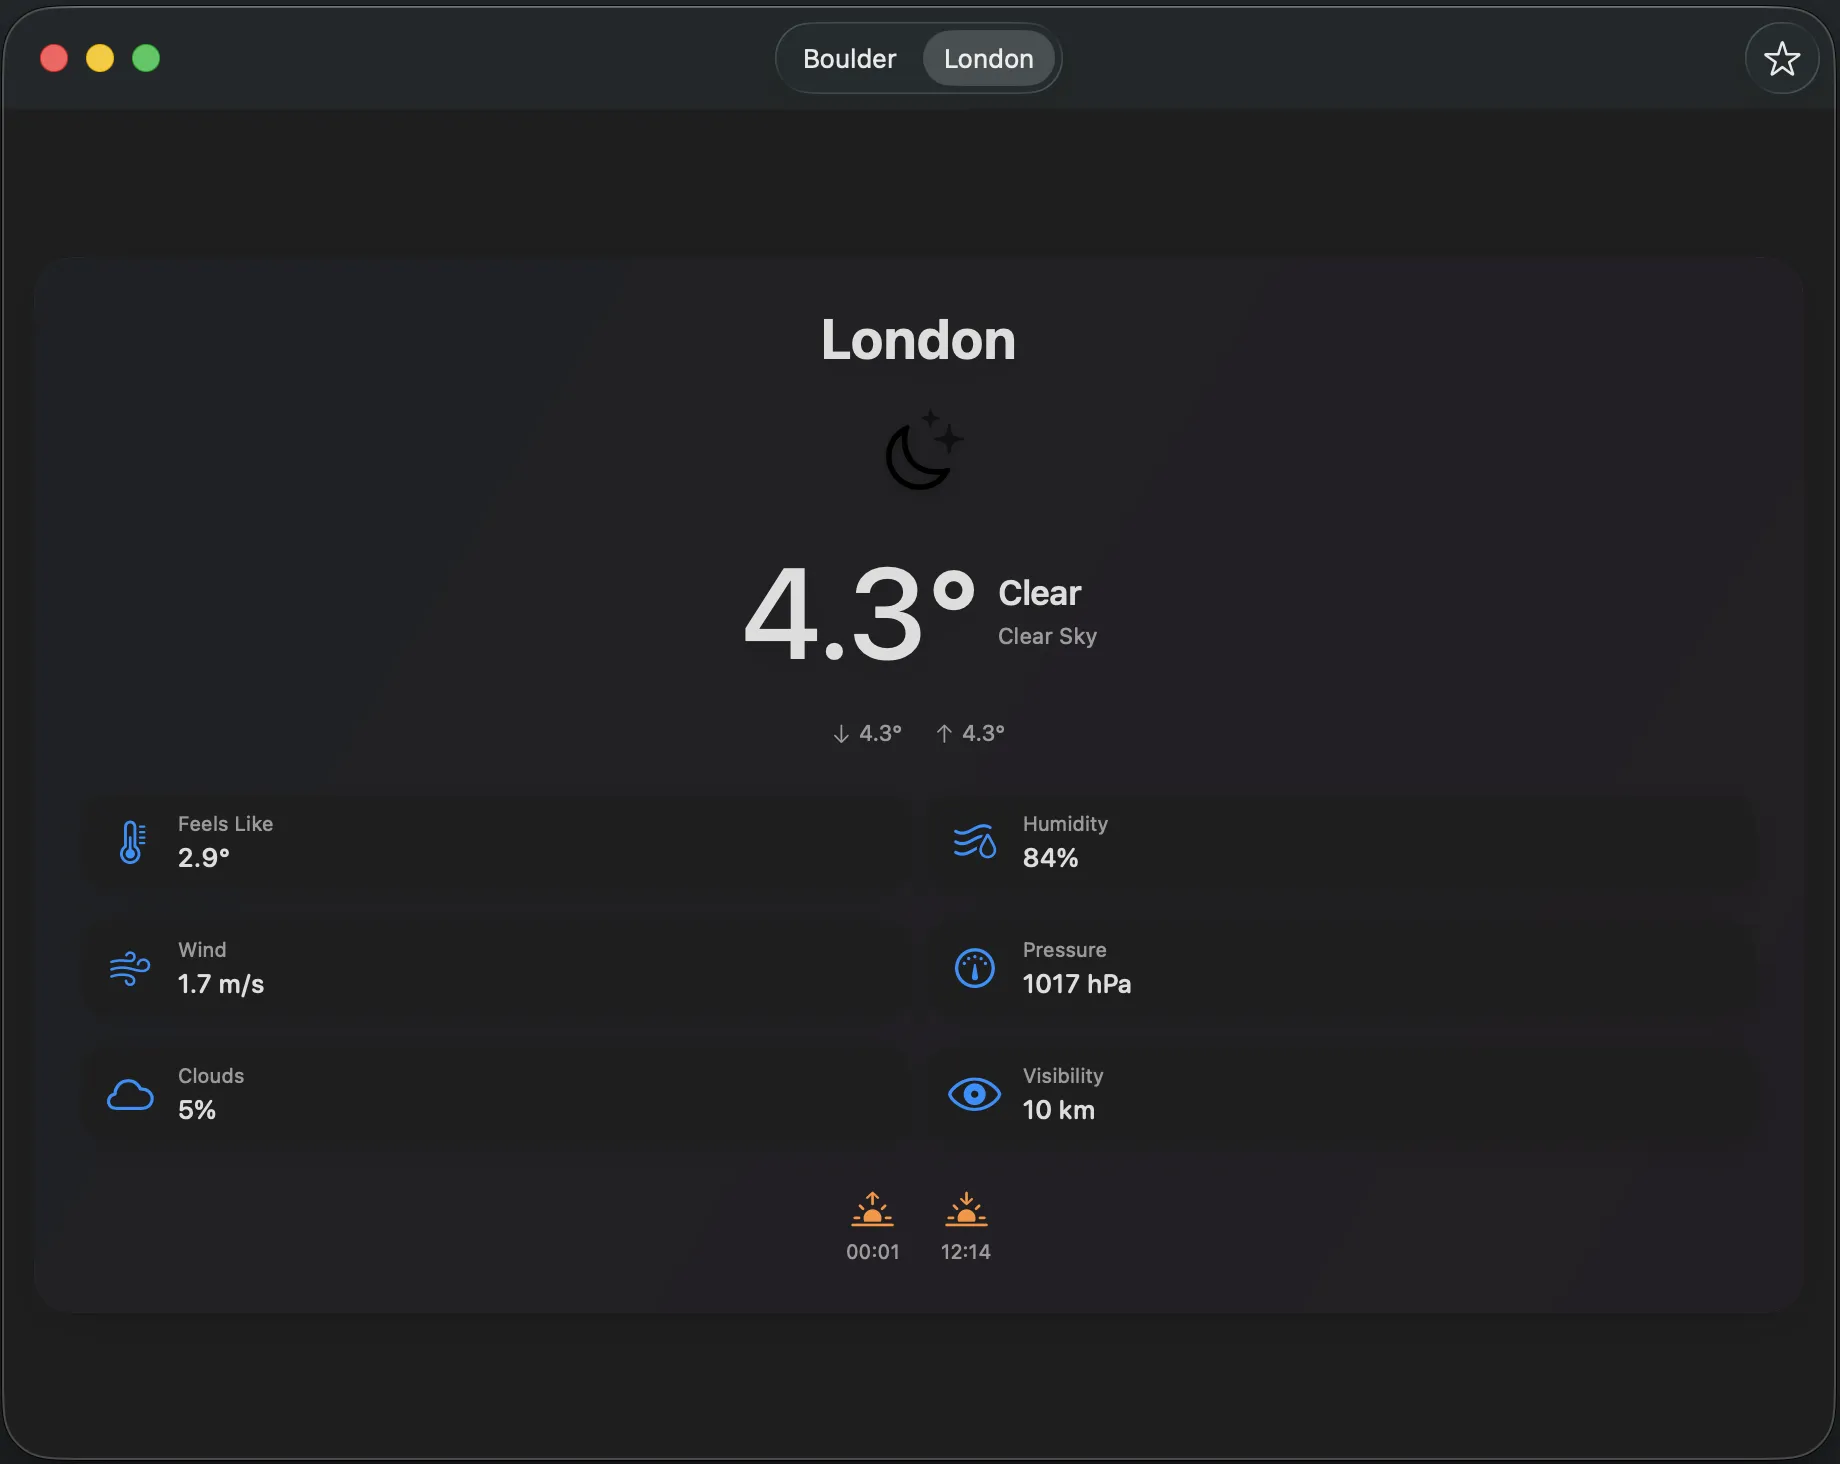

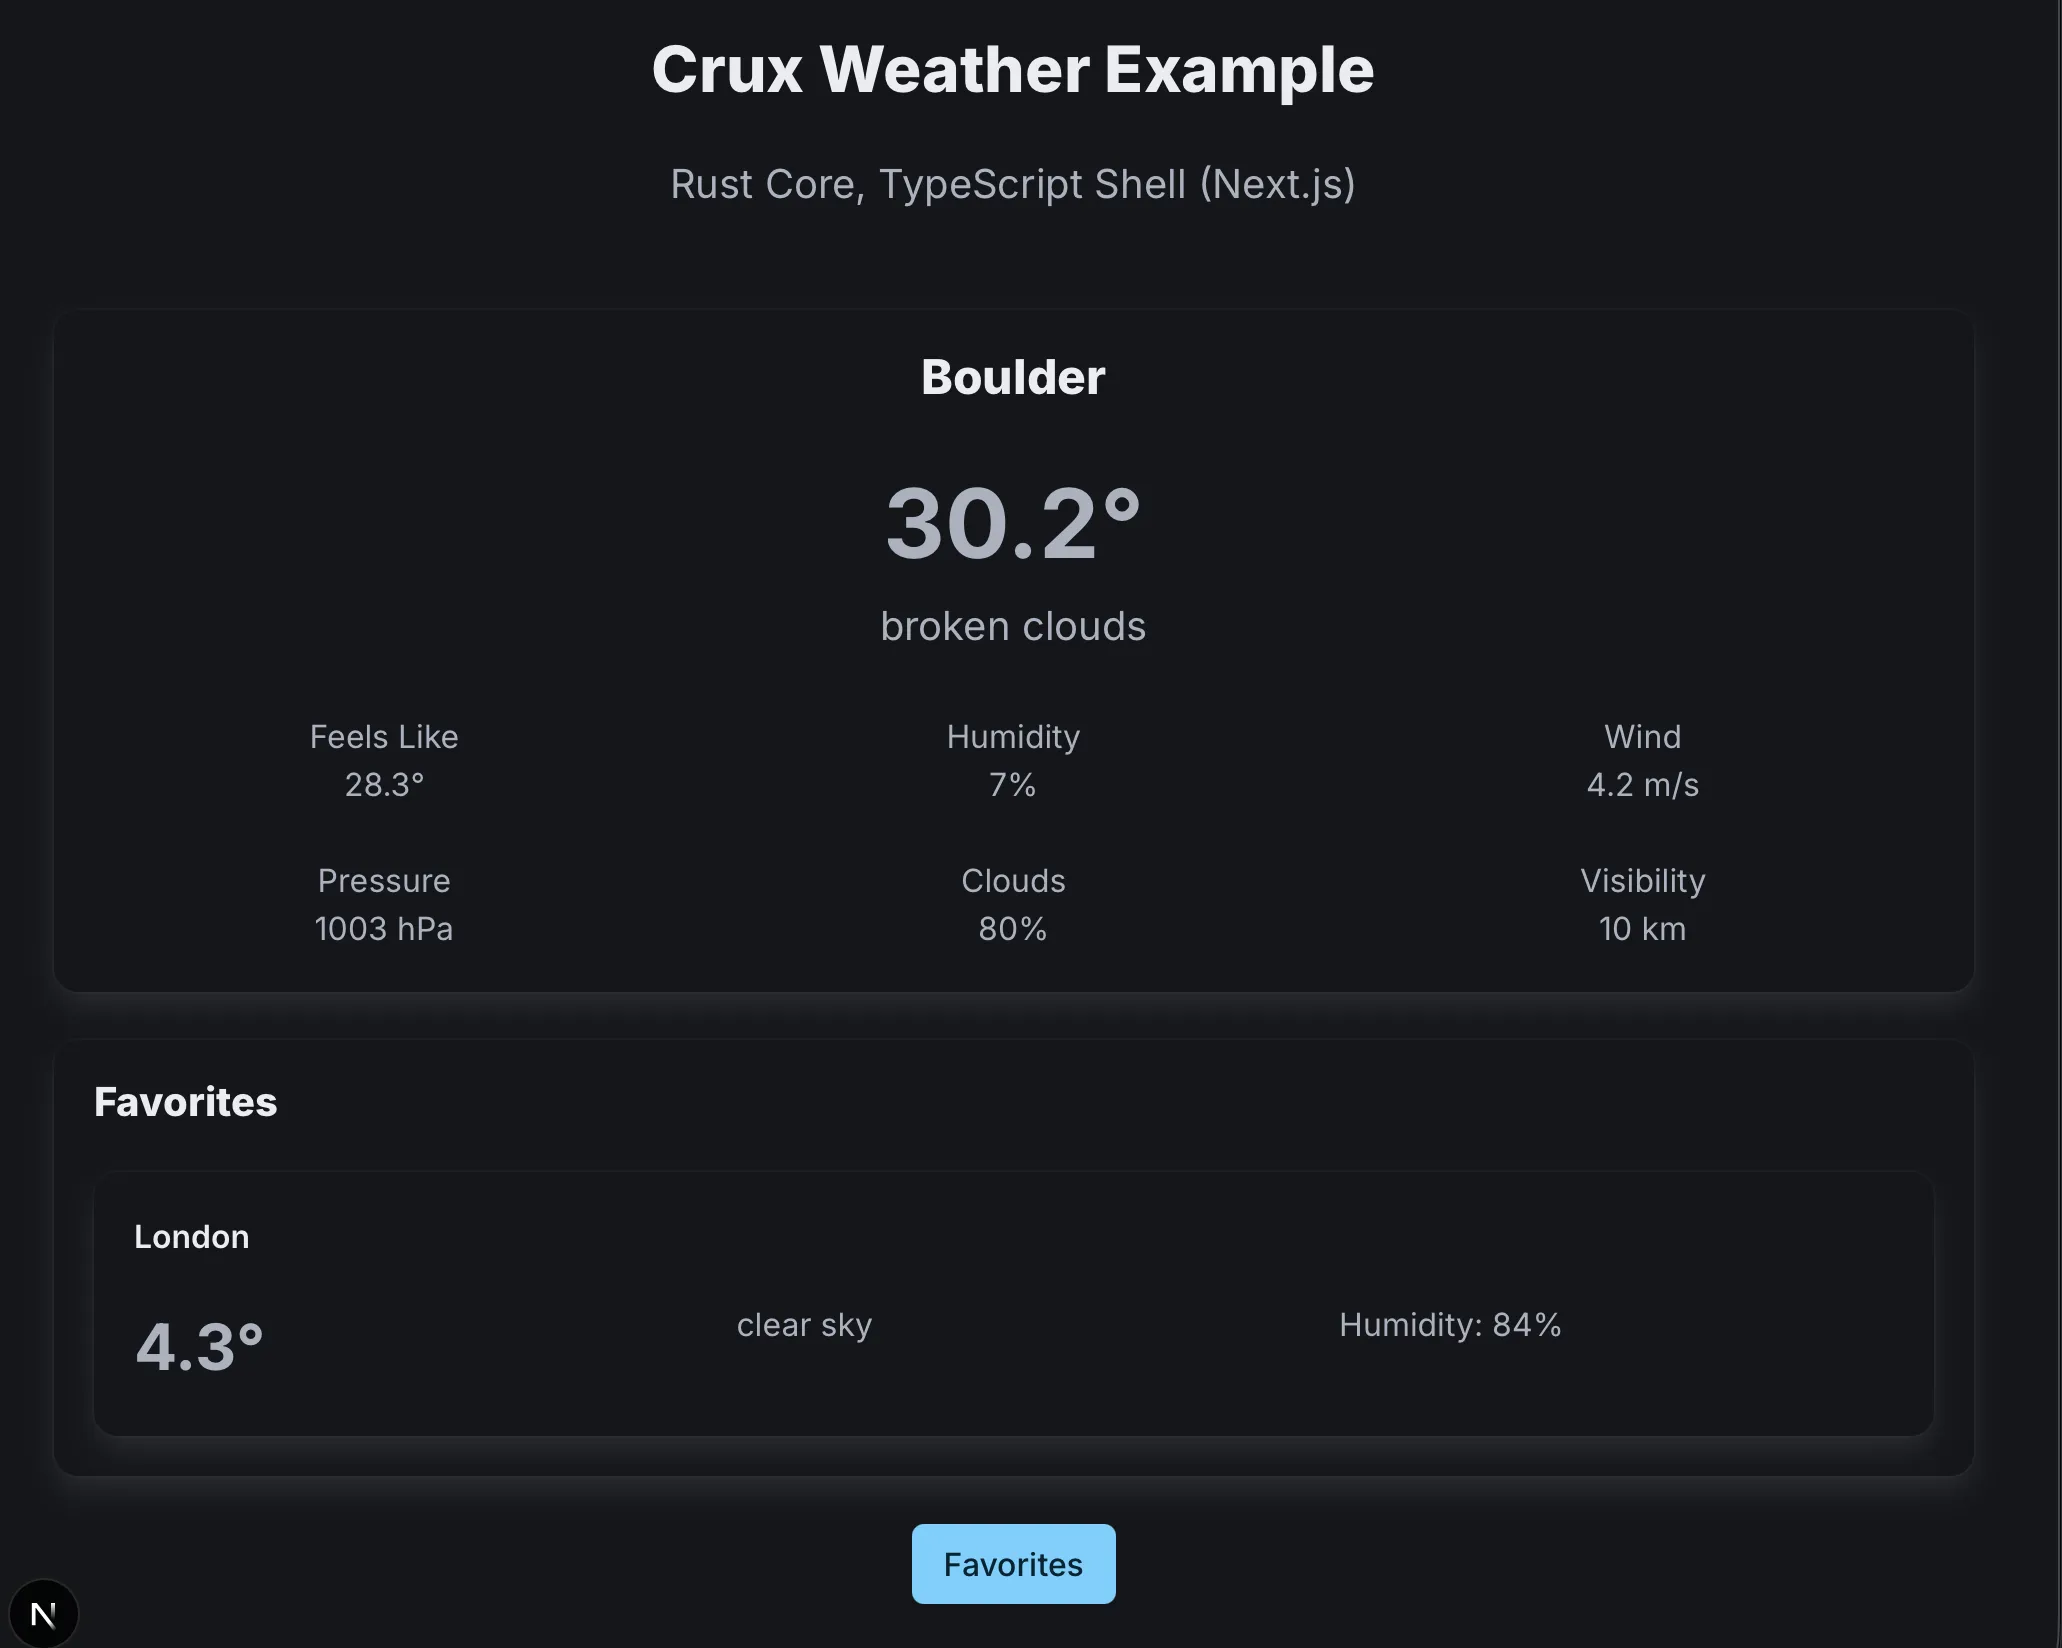
The app is a small weather client: local weather on the home screen, search for other locations, and a favourites list — all backed by a real API.
You can look at the full example code in the Crux GitHub repo, but we'll walk through the key parts. As before, we're going to start with the core and, once we have it, look at the shells.
The chapters that follow walk through the Weather app one concept at a time: lifecycle states, nested state machines, effects, testing, capabilities, and shells.
Before we dive in though, let's quickly establish some foundations about the app architecture Crux follows, known most widely as the Elm architecture, based on the language which popularised it.
Elm Architecture
Now we've had a bit of a feel for what writing Crux apps is like, we'll add more context to the different components and the overall architecture of Crux apps. The architecture is heavily inspired by Elm, and if you'd like to compare, the Architecture page of their guide is an excellent starting point.
Event Sourcing as a model for UI
User Interface is fundamentally event-driven. Unlike batch or stream processing, all changes in apps with UI are driven by events happening in the outside world, most commonly the user interface itself – the user touching the screen, typing on a keyboard, executing a CLI command, etc. In response, the app updates its internal state, changes what's shown on the screen, starts an interaction with the outside world, or all of the above.
The Elm architecture is a very direct translation of this pattern in code. User interactions (along with other changes in the outside world, such as time passing) are represented by events, and in response to them, the app updates its internal state represented by a model. The link between them is a simple, pure function which takes the model and the event, and updates the model based on the events. The actual UI on screen is a projection of (i.e "is built only from") the model. Because there is virtually no other state in the app, the model must contain enough information to decide what should be on screen. As a more direct representation of the information, we can use the view model as a step between the model and the UI.
That gives us two functions:
fn update(event: Event, model: &mut Model);

fn view(model: &Model) -> ViewModel;
That's enough for a Counter app, but not for our Weather app. What we're missing is for the app to be able to interact with the outside world and respond to events in it. We can't perform side-effects yet. Conceptually, we need to extend the update function to not only mutate the model, but also to emit some side-effects (or just "effects" for short).
fn update(event: Event, model: &mut Model) -> Vec<Effect>

fn view(model: &Model) -> ViewModel;
This more complete model is a function which takes an event and a model, mutates the model and optionally produces some effects. This is still quite a simple and pure (well, there is an &mut... call it pure enough) function, and is completely predictable, for the same inputs, it will always yield the same outputs (and changes to the model, guaranteed by Rust's borrow checker), and that is a very important design choice. It enables very easy testability, and that is what we need to build quality apps.
UI, effects and testability
User interface and effects are normally where testing gets very difficult.
If the application logic can directly cause changes in the outside world (or input/output — I/O, in computer parlance), the only way to verify the logic completely is to look at the result of those changes. The results, however, are pixels on screen, elements in the DOM, packets going over the network and other complex, difficult to inspect and often short-lived things. The only viable strategy to test them in this direct scenario is to take on the role of the particular device the app is working with, and pretending to be that device – a practice known as mocking (or stubbing, or faking, depending who you talk to). The APIs used to interact with these things are really complicated though, and rarely built with testing in mind. Even if you emulate them well, tests based on this approach won't be stable against changes in that API. When the API changes, your code and your tests will both have to change, taking any confidence they gave you in the first place with them. What's more, they also differ across platforms. Now we have that problem twice or more times.
The problem is in how apps are normally written (when written in a direct, imperative style). When it comes time to perform an effect, the most straightforward code just performs it straight away. The solution, as usual, is to add indirection. What Crux does (inspired by Elm, Haskell and others) is separate the intent from the execution, with a managed effects system.
Crux's effect approach focuses on capturing the intent of the effect, not the specific implementation of executing it. The intent is captured as data to benefit from type checking and from all the tools the language already provides for working with data. The business logic can stay pure, but express all the behaviour: state changes and effects. The intent is also the thing that needs to be tested. We can reasonably afford to trust that the authors of an HTTP client library, for example, have tested it and it does what it promises to do — all we need to check is that we're sending the right requests1.
Executing the effects: the runtime Shell
In Elm, the responsibility to execute the requested effects falls on the Elm runtime. Crux is very similar, except both the app and (some of) the runtime is your responsibility. This means some more work, but it also means you only bring what you need and nothing more, both in terms of supported platforms and the necessary APIs.
In Crux, business logic written in Rust is captured in the update function mentioned above and the other pieces that the function needs: events, model and effects, each represented by a type. This code forms a Core, which is portable, and really easily testable.
The execution of effects, including drawing the user interface, is done in a native Shell. Its job is to draw the appropriate UI on screen, translate user interactions into events to send to the Core, and when requested, perform effects and return their outcomes back to the Core.

The Shell thus has two sides: the driving side – the interactions causing events which push the Core to action, and the driven side, which services the Core's requests for side effects. The Core itself is also driven — Without being prompted by the Shell, the Core does nothing, it can't – with no other I/O, there are no other triggers which could cause the Core code to run. To the Shell, the Core is a simple library, providing some computation. From the perspective of the Core, the Shell is a platform the Core runs on.
Managed effects: the complex interactions between the core and the shell
While the basic effects are quite simple (e.g. "fetch a response over HTTP"), real world apps tend to compose them in quite complicated patterns with data dependencies between them, and we need to support this use well. In a later chapter, we'll introduce the Command API used to compose the basic effects into more complex interactions, and later we'll build on this with Capabilities, which provide an abstraction on top of these basic building blocks with a more ergonomic API.
Capabilities not only provide a nicer API for creating effects and effect orchestrations; in the future, they will likely also provide implementations of the effect execution for the various supported platforms.
With commands, our API evolves one final time, to the signature in the App trait:
fn update(&self, event: Event, model: &mut Model) -> Command<Effect, Event>;

fn view(&self, model: &Model) -> ViewModel;
The Commands are generic over two types: an Effect describing the interactions with the outside world we want to do, and our Event, acting as a callback when those interactions are complete and return a value of some kind.
We will look at how effects are created and passed to the shell in a later chapter. First, the next chapter covers how a real app's state is shaped — as a lifecycle with distinct stages, each composed of smaller state machines.
-
In reality, we do need to check that at least one of our HTTP requests executes successfully, but once one does, it is very likely that so long as they are described correctly, all of them will. ↩
App lifecycle
As we think about the weather app, there's an overall workflow it moves through:
Uninitialized— the default; the core exists, but the shell hasn't kicked things off yet.Initializing— triggered byEvent::Start: retrieves resources that may have been saved previously (the API key, saved favourites).Onboard— if there's no API key, ask the user for one.Active— we have everything we need; the app is running normally.Failed— something went wrong that we can't recover from.
These phases are mutually exclusive — the app is always in exactly one of them — which makes a Rust enum the natural fit. Each variant holds the state for its phase, and we can focus on one at a time with its own events and transitions.
The shape of the lifecycle
#![allow(unused)]
fn main() {
/// The app's top-level lifecycle state machine.
///
/// The app moves between mutually exclusive phases: it starts uninitialised,
/// fetches stored data during initialisation, then either onboards the user
/// (if no API key is stored) or activates. From active, a 401 response or a
/// user-initiated reset sends it back to onboarding.
#[derive(Default, Debug)]
pub enum Model {
    /// The default state before the shell sends `Event::Start`. The core
    /// exists but has not begun any work yet.
    #[default]
    Uninitialized,
    /// Shell sent `Event::Start`; fetching the API key and favourites in
    /// parallel.
    Initializing(InitializingModel),
    /// No API key available; prompting the user for one. Entered on first
    /// run, after a 401, or on explicit reset.
    Onboard(OnboardModel),
    /// API key and favourites loaded; running the main app.
    Active(ActiveModel),
    /// Unrecoverable error; carrying a message for the UI.
    Failed(String),
}
}
The events driving it are namespaced by stage:
#![allow(unused)]
fn main() {
/// The top-level event type, namespaced by lifecycle stage.
///
/// `Start` kicks the app out of `Uninitialized`. The remaining variants carry
/// sub-events for the stage currently in progress. `Initializing` is internal
/// to the core and not visible to the shell.
#[derive(Facet, Serialize, Deserialize, Clone, Debug, PartialEq)]
#[repr(C)]
pub enum Event {
    /// Sent by the shell once, at launch. Triggers initialisation.
    Start,
    /// Sub-events for the onboarding flow.
    Onboard(OnboardEvent),
    /// Sub-events for the active app (home and favourites).
    Active(ActiveEvent),
    /// Internal events resolving the parallel initialisation fetches.
    #[serde(skip)]
    #[facet(skip)]
    Initializing(InitializingEvent),
}
}
Event::Start is the only event that kicks the app out of Uninitialized; the rest carry sub-events for a specific stage. Initializing is marked #[serde(skip)] and #[facet(skip)] because those events are internal to the core — the shell never sends them.
Kicking things off
The top-level update function is small — it just decides which handler to dispatch to:
#![allow(unused)]
fn main() {
    pub fn update(&mut self, event: Event) -> Command<Effect, Event> {
        match event {
            Event::Start => {
                let (initializing, cmd) = InitializingModel::start().into_parts();
                *self = Self::Initializing(initializing);
                cmd
            }
            Event::Initializing(event) => self.update_initializing(event),
            Event::Onboard(event) => self.update_onboard(event),
            Event::Active(event) => self.update_active(event),
        }
    }
}
Event::Start builds the Initializing state by calling InitializingModel::start(), which returns the initial model and the commands to run. Everything else is routed to a stage-specific update_* method.
But the core doesn't run itself — the shell has to send that Event::Start to begin with. Here are the iOS and Android shells doing exactly that:
    init() {
        let bridge = LiveBridge()
        let core = Core(bridge: bridge)
        _core = State(wrappedValue: core)
        updater = CoreUpdater { core.update($0) }
        core.update(.start)
    }
        init {
            update(Event.Start)
        }
In both cases the shell constructs the core, wires up its dependencies, and then immediately sends Event::Start — nothing else happens until the shell makes that first call. That's the "core is driven" point from chapter 2 in practice: the core is just a library until the shell pokes it.
The transition pattern
Event::Start does its own transition right in the top-level update — it constructs the Initializing model and assigns it directly. For the other events, the top-level update delegates to a stage-specific handler. Those handlers all share the same shape, and it's worth looking at once before we dive into initialising.
Here's update_initializing:
#![allow(unused)]
fn main() {
    fn update_initializing(&mut self, event: InitializingEvent) -> Command<Effect, Event> {
        let owned = std::mem::take(self);
        let Self::Initializing(initializing) = owned else {
            *self = owned;
            return Command::done();
        };
        let (status, command) = initializing
            .update(event)
            .map_event(Event::Initializing)
            .into_parts();
        match status {
            outcome::Status::Continue(initializing) => {
                *self = Self::Initializing(initializing);
                command
            }
            outcome::Status::Complete(initializing::InitializingTransition::Onboard(favorites)) => {
                let (onboard, start_cmd) =
                    OnboardModel::start(onboard::OnboardReason::default(), favorites)
                        .map_event(Event::Onboard)
                        .into_parts();
                *self = Self::Onboard(onboard);
                command.and(start_cmd)
            }
            outcome::Status::Complete(initializing::InitializingTransition::Active(
                api_key,
                favorites,
            )) => {
                let (active, start_cmd) = ActiveModel::start(api_key, &favorites)
                    .map_event(Event::Active)
                    .into_parts();
                *self = Self::Active(active);
                command.and(start_cmd)
            }
        }
    }
}
Three moves:
- Take ownership of the current model with
std::mem::take. BecauseModelderivesDefault, this leavesselftemporarily asUninitialized— we're about to replace it, so that's fine. - Delegate to the stage-specific update, which returns an
Outcome<State, Transition, Event>. TheOutcomepairs aStatus— eitherContinue(State)to stay in this phase orComplete(Transition)to exit — with aCommandthat represents the effects of the update. - Put a model back. For
Continue, wrap the updated state back into the current phase. ForComplete, construct the next phase's model and swap to it.
This mem::take → delegate → reassign shape takes advantage of Rust's ownership model. The stage-specific update takes self by value, so the model moves in, transforms, and comes back through Outcome — no cloning, with the type system enforcing that we reconstruct a model to put back. The Outcome itself is the protocol that tells the top level which phase comes next. We'll apply it to initialising in the next section, and in chapter 4 we'll see it used at every level inside Active too.
Initialising: two fetches in parallel
Constructing an InitializingModel isn't just about the state — we also need to fire off the two fetches. A Default impl would give us the state, but nothing would actually start running. So instead we have a start() method that returns both the initial model and the commands to run alongside it, paired up as a Started<Self, Event>:
#![allow(unused)]
fn main() {
    pub(crate) fn start() -> Started<Self, Event> {
        tracing::debug!("starting initialization, fetching API key and favorites");

        let fetch_secret = secret::command::fetch(secret::API_KEY_NAME)
            .then_send(|r| Event::Initializing(InitializingEvent::SecretFetched(r)));
        let fetch_favorites = KeyValue::get(FAVORITES_KEY)
            .then_send(|r| Event::Initializing(InitializingEvent::FavoritesLoaded(r)));

        Started::new(
            Self::default(),
            Command::all([fetch_secret, fetch_favorites]),
        )
    }
}
Two commands, kicked off in parallel with Command::all: one to fetch the API key, one to read the favourites list from the KV store. Each binds its response to a specific InitializingEvent variant. We'll see more of the Started pattern in the next chapter.
Meanwhile, the state we're waiting in:
#![allow(unused)]
fn main() {
/// A value that's either still being fetched or has been fetched.
#[derive(Default, Debug)]
enum InitializingValue<T> {
    #[default]
    Fetching,
    Fetched(T),
}

/// The state held while the app is initialising.
///
/// Two fetches run in parallel — the API key from secure storage and the
/// favourites list from the KV store. Each is tracked independently so the
/// model knows when both have resolved.
#[derive(Default, Debug)]
pub struct InitializingModel {
    api_key: InitializingValue<Option<ApiKey>>,
    favorites: InitializingValue<Favorites>,
}
}
When a response comes back, it flows through update:
#![allow(unused)]
fn main() {
    pub(crate) fn update(
        mut self,
        event: InitializingEvent,
    ) -> Outcome<Self, InitializingTransition, InitializingEvent> {
        match event {
            InitializingEvent::SecretFetched(response) => {
                let api_key = match response {
                    SecretFetchResponse::Missing(_) => {
                        tracing::debug!("API key missing");
                        None
                    }
                    SecretFetchResponse::Fetched(api_key) => {
                        tracing::debug!("received API key");
                        Some(api_key.into())
                    }
                };
                self.api_key = InitializingValue::Fetched(api_key);
                self.resolve()
            }
            InitializingEvent::FavoritesLoaded(result) => {
                let favorites = result
                    .ok()
                    .flatten()
                    .and_then(|bytes| serde_json::from_slice::<Vec<Favorite>>(&bytes).ok())
                    .map(Favorites::from_vec)
                    .unwrap_or_default();

                tracing::debug!("loaded {} favorites", favorites.len());
                self.favorites = InitializingValue::Fetched(favorites);
                self.resolve()
            }
        }
    }
}
Each branch stores the result, then calls resolve() to see whether we have enough to move on:
#![allow(unused)]
fn main() {
    fn resolve(self) -> Outcome<Self, InitializingTransition, InitializingEvent> {
        match (self.api_key, self.favorites) {
            (InitializingValue::Fetched(Some(api_key)), InitializingValue::Fetched(favorites)) => {
                tracing::debug!("initialization complete, transitioning to active");
                Outcome::complete(
                    InitializingTransition::Active(api_key, favorites),
                    Command::done(),
                )
            }
            (InitializingValue::Fetched(None), InitializingValue::Fetched(favorites)) => {
                tracing::debug!("API key missing, transitioning to onboarding");
                Outcome::complete(InitializingTransition::Onboard(favorites), Command::done())
            }
            (api_key, favorites) => {
                tracing::debug!("waiting for remaining initialization data");
                Outcome::continuing(Self { api_key, favorites }, render())
            }
        }
    }
}
Three cases:
- Both fetched, key present →
Completewith a transition toActive. - Both fetched, key missing →
Completewith a transition toOnboard. - One still in flight →
Continuewith the updated state, and ask for a render so the loading screen keeps showing.
Back in the top-level update_initializing, both Complete cases follow the same shape: call the destination stage's start(), swap to the new Model variant, and compose the commands. OnboardModel::start returns a render so the onboarding screen appears; ActiveModel::start wraps HomeScreen::start to kick off the weather and location fetches.
Onboard, Active, and Failed
Onboard looks much like Initializing: its own model, its own events, its own update, and its own transitions. When the user enters an API key and it's stored successfully, it transitions to Active. If storage fails, it transitions to Failed.
Active is where most of the app lives — the home screen with local weather and favourites, and the favourites management screen. That's the subject of the next chapter.
Failed is a dead end. It just carries a message for the UI to show. There's no event that leaves it.
Back to onboarding
Not every lifecycle transition goes forward. Two things can send Active back to Onboard: the weather API returning a 401 (the stored key is bad), or the user explicitly asking to reset their key. Either way, Active completes with a transition carrying the current favourites and an OnboardReason — the onboarding flow is the same one we saw on first run; the reason is only used to pick the right message for the UI.
Next: the pattern underneath
Every stage in this lifecycle — Initializing, Onboard, Active — returned an Outcome. The top-level update_* methods all matched on Status::Continue vs Status::Complete(...), put the model back where it belongs, and composed commands. The same pattern runs all the way down to the individual screen workflows, which the next chapter covers.
Nested state machines
In the previous chapter we saw the top-level Model behave as a lifecycle state machine: each phase is its own variant, each transition is explicit, and the Outcome type is how a stage tells the parent what to do next. That pattern isn't reserved for the top level — it runs all the way down. Every screen inside Active, and every workflow inside those screens, is its own small state machine, composed the same way.
This chapter zooms in on that nesting: the Outcome protocol itself, a worked example of a small state machine, and how transitions from deep inside the hierarchy can bubble all the way back up to the lifecycle.
The Outcome pattern
Three types do all the work. First, the result of any sub-state-machine step:
#![allow(unused)]
fn main() {
/// The result of a state machine's `update()` method.
///
/// Pairs a [`Status`] — continue with an updated state, or complete with
/// a transition value — with a `Command` describing the effects produced
/// by the update. The parent destructures it, reacts to the status, and
/// runs the command.
///
/// Construct with [`Outcome::continuing`] or [`Outcome::complete`]. Use
/// [`Outcome::map_event`] to lift the inner command's event type before
/// returning it from the parent's own update.
pub(crate) struct Outcome<S, T, Event> {
    pub status: Status<S, T>,
    pub command: Command<Effect, Event>,
}

impl<S, T, Event> Outcome<S, T, Event> {
    /// Constructs an outcome that keeps the state machine running with the
    /// given updated state and command.
    pub const fn continuing(state: S, command: Command<Effect, Event>) -> Self {
        Self {
            status: Status::Continue(state),
            command,
        }
    }

    /// Constructs an outcome that exits the state machine with the given
    /// transition value and command.
    pub const fn complete(value: T, command: Command<Effect, Event>) -> Self {
        Self {
            status: Status::Complete(value),
            command,
        }
    }

    /// Destructures into the status and the command to run.
    pub fn into_parts(self) -> (Status<S, T>, Command<Effect, Event>) {
        (self.status, self.command)
    }

    /// Lifts the event type of the inner command.
    ///
    /// Typically used by a parent to wrap the child's event variant before
    /// returning the command from its own update.
    pub fn map_event<NewEvent>(
        self,
        f: impl Fn(Event) -> NewEvent + Send + Sync + 'static,
    ) -> Outcome<S, T, NewEvent>
    where
        Event: Send + Unpin + 'static,
        NewEvent: Send + Unpin + 'static,
    {
        Outcome {
            status: self.status,
            command: self.command.map_event(f),
        }
    }
}
}
An Outcome is a Status — either Continue(State) (the machine keeps running with the updated state) or Complete(Transition) (the machine has exited, here's the value telling the parent what happens next) — paired with a Command describing any effects the update produced.
#![allow(unused)]
fn main() {
/// Whether a state-machine step kept running or exited with a transition.
///
/// Returned inside an [`Outcome`], typically constructed indirectly via
/// [`Outcome::continuing`] or [`Outcome::complete`].
#[derive(Debug)]
pub(crate) enum Status<S, T> {
    /// The state machine is still running; this is the updated state to
    /// assign back into the parent.
    Continue(S),
    /// The state machine has exited; this is the transition value carrying
    /// whatever the parent needs to move to the next phase.
    Complete(T),
}
}
And the counterpart for starting a state machine up:
#![allow(unused)]
fn main() {
/// The result of a state machine's `start()` method.
///
/// A `start()` both constructs the initial state and returns the commands
/// that must run alongside it — HTTP fetches, permission checks, a render.
/// `Started` bundles those so the caller can destructure them in one step
/// with [`Started::into_parts`].
///
/// Use [`Started::map_event`] to lift the inner command's event type into
/// a wider parent event before returning it from the parent's own logic.
pub(crate) struct Started<S, Event> {
    pub state: S,
    pub command: Command<Effect, Event>,
}

impl<S, Event> Started<S, Event> {
    /// Creates a new `Started` from an initial state and its accompanying
    /// command.
    pub const fn new(state: S, command: Command<Effect, Event>) -> Self {
        Self { state, command }
    }

    /// Destructures into the initial state and the command to run.
    pub fn into_parts(self) -> (S, Command<Effect, Event>) {
        (self.state, self.command)
    }

    /// Lifts the event type of the inner command.
    ///
    /// Typically used by a parent to wrap the child's event variant, for
    /// example `child::start().map_event(ParentEvent::Child)`.
    pub fn map_event<NewEvent>(
        self,
        f: impl Fn(Event) -> NewEvent + Send + Sync + 'static,
    ) -> Started<S, NewEvent>
    where
        Event: Send + Unpin + 'static,
        NewEvent: Send + Unpin + 'static,
    {
        Started {
            state: self.state,
            command: self.command.map_event(f),
        }
    }
}
}
A start() returns a Started<Self, Event> — the initial state bundled with the commands that kick off the work. The map_event methods on both types lift a child's event variant into its parent's wider event type, so each layer only needs to know about its direct children, not the whole tree beneath them.
That's the whole protocol. Now let's see it in use.
A worked example: local weather
The home screen shows two things: local weather and weather for saved favourites. The local-weather half is a small state machine in its own right:
#![allow(unused)]
fn main() {
/// The state of the local-weather workflow.
///
/// The machine progresses through these states as events resolve:
/// `CheckingPermission` → `FetchingLocation` → `FetchingWeather` → `Fetched`.
/// Either permission or location can short-circuit to `LocationDisabled`,
/// and a failed weather fetch lands in `Failed`. All non-terminal states
/// accept `Retry` to restart from the beginning.
#[derive(Debug, Clone, Default)]
pub enum LocalWeather {
    /// Initial state: asking the shell whether location services are on.
    #[default]
    CheckingPermission,
    /// Location services are off or the user denied them; the UI shows a
    /// "location disabled" panel with a retry button.
    LocationDisabled,
    /// Location services are on; waiting for the shell to return the
    /// current coordinates.
    FetchingLocation,
    /// We have coordinates; waiting for the weather API response.
    FetchingWeather(Location),
    /// We have current weather for the user's location — terminal happy
    /// path until a `Retry`.
    Fetched(Location, Box<CurrentWeatherResponse>),
    /// Weather fetch failed for reasons other than unauthorized (network,
    /// malformed response). The UI shows an error with a retry button.
    Failed(Location),
}
}
The states map directly to what the UI shows: we're checking permissions, location is disabled, we're fetching coordinates, we're fetching weather, we have weather, or the fetch failed. Each state is moved forward by an event:
#![allow(unused)]
fn main() {
/// Events emitted as location permission, location fetch, and weather fetch
/// resolve — plus an explicit retry from the UI.
#[derive(Clone, Debug, PartialEq)]
pub enum LocalWeatherEvent {
    /// The shell reported whether location services are enabled.
    LocationEnabled(bool),
    /// The shell returned the current coordinates, or `None` if it couldn't
    /// determine them.
    LocationFetched(Option<Location>),
    /// The weather API responded with current conditions, or an error.
    WeatherFetched(Box<Result<CurrentWeatherResponse, WeatherError>>),
    /// The user tapped "retry" after a disabled or failed state.
    Retry,
}
}
Starting the state machine kicks off the first effect — asking the shell whether location services are enabled:
#![allow(unused)]
fn main() {
    /// Starts the state machine in `CheckingPermission` and asks the shell
    /// whether location services are enabled.
    pub(crate) fn start() -> Started<Self, LocalWeatherEvent> {
        tracing::debug!("checking location permissions");
        let cmd = crate::effects::location::command::is_location_enabled()
            .then_send(LocalWeatherEvent::LocationEnabled);
        Started::new(Self::CheckingPermission, cmd)
    }
}
This is the Started pattern we first saw in chapter 3, now at a lower level. The update function walks through each event and returns an Outcome:
#![allow(unused)]
fn main() {
    /// Advances the state machine on an event, using `api_key` to authorise
    /// the weather API call when needed.
    ///
    /// - `LocationEnabled(true)` → fetch location → `FetchingLocation`.
    /// - `LocationEnabled(false)` or `LocationFetched(None)` →
    ///   `LocationDisabled` with a render.
    /// - `LocationFetched(Some(_))` → request weather → `FetchingWeather`.
    /// - `WeatherFetched(Ok)` → `Fetched` with the response.
    /// - `WeatherFetched(Err(Unauthorized))` → `Complete` with
    ///   [`LocalWeatherTransition::Unauthorized`].
    /// - `WeatherFetched(Err(_))` → `Failed` (network or parse errors).
    /// - `Retry` → restart via [`Self::start`].
    pub(crate) fn update(
        self,
        event: LocalWeatherEvent,
        api_key: &ApiKey,
    ) -> Outcome<Self, LocalWeatherTransition, LocalWeatherEvent> {
        match event {
            LocalWeatherEvent::Retry => {
                let Started { state, command } = Self::start();
                Outcome::continuing(state, command)
            }
            LocalWeatherEvent::LocationEnabled(enabled) => {
                tracing::debug!("location enabled: {enabled}");
                if enabled {
                    tracing::debug!("fetching current location");
                    let cmd = get_location().then_send(LocalWeatherEvent::LocationFetched);
                    Outcome::continuing(Self::FetchingLocation, cmd)
                } else {
                    Outcome::continuing(Self::LocationDisabled, render())
                }
            }
            LocalWeatherEvent::LocationFetched(location) => {
                tracing::debug!("received location: {location:?}");
                location.map_or_else(
                    || Outcome::continuing(Self::LocationDisabled, render()),
                    |loc| {
                        let cmd = weather_api::fetch(loc, api_key.clone()).then_send(|result| {
                            LocalWeatherEvent::WeatherFetched(Box::new(result))
                        });
                        Outcome::continuing(Self::FetchingWeather(loc), cmd)
                    },
                )
            }
            LocalWeatherEvent::WeatherFetched(result) => {
                let Self::FetchingWeather(location) = self else {
                    return Outcome::continuing(self, Command::done());
                };

                match *result {
                    Ok(weather_data) => {
                        tracing::debug!("received weather data for {}", weather_data.name);
                        Outcome::continuing(
                            Self::Fetched(location, Box::new(weather_data)),
                            render(),
                        )
                    }
                    Err(WeatherError::Unauthorized) => {
                        tracing::warn!("weather API returned unauthorized");
                        Outcome::complete(LocalWeatherTransition::Unauthorized, render())
                    }
                    Err(ref e) => {
                        tracing::warn!("fetching weather failed: {e:?}");
                        Outcome::continuing(Self::Failed(location), render())
                    }
                }
            }
        }
    }
}
Most branches return Outcome::continuing — the machine keeps running with the new state, and a new command is attached (fetch location, fetch weather, render the disabled panel). Only one path completes the machine: a 401 from the weather API, which returns Outcome::complete with the single transition this machine exposes:
#![allow(unused)]
fn main() {
/// The exits from the local-weather state machine.
///
/// Only one today: the weather API rejected our key, so the parent should
/// bubble up to a reset/onboarding flow.
#[derive(Debug)]
pub(crate) enum LocalWeatherTransition {
    /// The weather API returned 401; the API key needs re-entry.
    Unauthorized,
}
}
That Unauthorized transition is how LocalWeather tells its parent: "I'm done; the API key is no longer valid."
Nesting: HomeScreen composes two sub-workflows
HomeScreen contains LocalWeather alongside a second workflow that fetches weather for each saved favourite. The home-screen events reflect that:
#![allow(unused)]
fn main() {
/// Events for the home screen: user navigation plus sub-workflow events.
///
/// The `Local` and `FavoritesWeather` variants are `#[serde(skip)]` /
/// `#[facet(skip)]` because the sub-workflows' events are internal to the
/// core — the shell only sends `GoToFavorites`.
#[derive(Facet, Serialize, Deserialize, Clone, Debug, PartialEq)]
#[repr(C)]
pub enum HomeEvent {
    /// The user tapped the favourites button in the home toolbar.
    GoToFavorites,

    /// Internal event routed to the local-weather state machine
    /// ([`LocalWeather`]).
    #[serde(skip)]
    #[facet(skip)]
    Local(#[facet(opaque)] LocalWeatherEvent),

    /// Internal event routed to the favourites weather workflow.
    #[serde(skip)]
    #[facet(skip)]
    FavoritesWeather(#[facet(opaque)] FavoriteWeatherEvent),
}
}
HomeEvent::Local(...) and HomeEvent::FavoritesWeather(...) are how the parent carries events for each sub-workflow. Shell-sent events go through HomeEvent::GoToFavorites; the others are internal routing, which is why they're marked #[serde(skip)] and #[facet(skip)].
Starting the home screen starts both sub-workflows in parallel:
#![allow(unused)]
fn main() {
    /// Starts the home screen by kicking off both sub-workflows in parallel:
    /// the local-weather permission check and the per-favourite weather
    /// fetches. The returned command combines both.
    pub(crate) fn start(favorites: &Favorites, api_key: &ApiKey) -> Started<Self, HomeEvent> {
        tracing::debug!("starting home screen");

        let (current_weather, local_cmd) = LocalWeather::start()
            .map_event(HomeEvent::Local)
            .into_parts();

        let (favorites_weather, fav_cmd) = self::favorites::start(favorites, api_key)
            .map_event(HomeEvent::FavoritesWeather)
            .into_parts();

        let screen = Self {
            current_weather,
            favorites_weather,
        };

        Started::new(screen, local_cmd.and(fav_cmd))
    }
}
Each child start() returns a Started<ChildState, ChildEvent>; map_event lifts the child's event type (LocalWeatherEvent, FavoriteWeatherEvent) into the parent's HomeEvent. The two commands are combined with Command::and and returned as a single Started<HomeScreen, HomeEvent>.
Updating is symmetric — unwrap the parent event, delegate to the child's update, match on the resulting status:
#![allow(unused)]
fn main() {
    /// Advances the home screen on an event, using `api_key` to authorise
    /// any weather API calls.
    ///
    /// - `GoToFavorites` → `Complete` with [`HomeTransition::GoToFavorites`].
    /// - `Local(event)` → delegated to [`LocalWeather::update`]. An
    ///   `Unauthorized` transition from the sub-machine is lifted to
    ///   [`HomeTransition::ApiKeyRejected`].
    /// - `FavoritesWeather(event)` → delegated to the favourites workflow;
    ///   same lifting from its `Unauthorized` transition.
    pub(crate) fn update(
        self,
        event: HomeEvent,
        api_key: &ApiKey,
    ) -> Outcome<Self, HomeTransition, HomeEvent> {
        match event {
            HomeEvent::GoToFavorites => Outcome::complete(
                HomeTransition::GoToFavorites(self.favorites_weather.into()),
                render(),
            ),

            HomeEvent::Local(local_event) => {
                let Self {
                    current_weather,
                    favorites_weather,
                } = self;

                let (status, cmd) = current_weather
                    .update(local_event, api_key)
                    .map_event(HomeEvent::Local)
                    .into_parts();

                match status {
                    Status::Continue(current_weather) => Outcome::continuing(
                        Self {
                            current_weather,
                            favorites_weather,
                        },
                        cmd,
                    ),
                    Status::Complete(LocalWeatherTransition::Unauthorized) => Outcome::complete(
                        HomeTransition::ApiKeyRejected(favorites_weather.into()),
                        cmd,
                    ),
                }
            }

            HomeEvent::FavoritesWeather(fav_event) => {
                let Self {
                    current_weather,
                    favorites_weather,
                } = self;

                let (status, cmd) = self::favorites::update(favorites_weather, fav_event)
                    .map_event(HomeEvent::FavoritesWeather)
                    .into_parts();

                match status {
                    Status::Continue(favorites_weather) => Outcome::continuing(
                        Self {
                            current_weather,
                            favorites_weather,
                        },
                        cmd,
                    ),
                    Status::Complete(FavoriteWeatherTransition::Unauthorized(favorites)) => {
                        Outcome::complete(HomeTransition::ApiKeyRejected(favorites), cmd)
                    }
                }
            }
        }
    }
}
For each sub-workflow branch, a Continue re-packages the updated state back into a fresh HomeScreen, while a Complete gets mapped to a HomeTransition. That's where the 401 path becomes interesting.
Propagating transitions upward
A LocalWeatherTransition::Unauthorized doesn't escape HomeScreen as-is. It's lifted to a HomeTransition:
#![allow(unused)]
fn main() {
/// The exits from the home screen.
#[derive(Debug)]
pub(crate) enum HomeTransition {
    /// The user navigated to the favourites screen; the current favourites
    /// list is carried over so the next screen has it.
    GoToFavorites(Favorites),
    /// The weather API rejected our key from one of the nested workflows;
    /// the parent should route back through onboarding.
    ApiKeyRejected(Favorites),
}
}
HomeTransition::ApiKeyRejected(Favorites) carries the current favourites list along, because whatever comes next still needs them. The active-model update does the same lift: it maps HomeTransition::ApiKeyRejected to ActiveTransition::Unauthorized, still carrying the favourites. The top-level update_active then sees Complete(Unauthorized) — exactly the handler we wrote in chapter 3 — and swaps Model::Active for Model::Onboard.
That's the full round trip: a 401 from the weather API, three levels below the top of the model tree, propagates up through three transition types until it becomes a lifecycle change. Each level decides what to do with its child's transition — either pass it along (lifted into its own transition type) or handle it locally.
Debouncing with VersionedInput
One more pattern comes up inside the favourites workflow. When the user types in the "add favourite" search box, we want to fetch geocoding results — but we don't want a response for "Londo" to replace a response for "London" that arrives moments later. The answer is a small helper:
#![allow(unused)]
fn main() {
/// A text input that tracks a version number, incremented on each update.
///
/// Used to correlate async responses (e.g. search results) with the input
/// that triggered them, so stale responses can be discarded. Capture the
/// version when an effect is started, then check it against the current
/// version via [`Self::is_current`] when the response arrives.
#[derive(Debug, Default)]
pub struct VersionedInput {
    version: usize,
    value: String,
}

impl VersionedInput {
    /// Updates the input value and bumps the version, returning the new
    /// version.
    pub fn update(&mut self, value: String) -> usize {
        self.version = self.version.wrapping_add(1);
        self.value = value;
        self.version
    }

    /// Returns the current input text.
    pub fn value(&self) -> &str {
        &self.value
    }

    /// Returns the current version number.
    pub const fn version(&self) -> usize {
        self.version
    }

    /// Whether the given version matches the current one — used to discard
    /// responses from stale inputs.
    pub const fn is_current(&self, version: usize) -> bool {
        self.version == version
    }
}
}
Every keystroke bumps the version. When we fire the geocoding request, we capture the current version. When the response arrives, we check whether the captured version still matches — if not, a newer search has happened, so we discard this result.
This isn't a state machine on its own, but the discipline is the same: make invalid states impossible to represent. Without a version, a stale response and a fresh one are both strings, and the code has to track out-of-band which is which. Tagging each response with the version it was fired against moves that distinction into the type. VersionedInput is used inside the add-favourite workflow, which is itself a nested state machine under favourites management.
Next: making it all happen
So far we've modelled the state machines and talked about the commands they return, but we've treated commands as a black box — just "the thing that makes effects happen." In the next chapter, we'll look at the Command type properly: how effects are expressed, how commands compose, and how the protocol between the core and the shell actually works.
Managed Effects
It's time to get the Weather app to actually fetch some weather information and let us store some favourites. And for that, we will need to interact with the outside world - we will need to perform side-effects.
As we mentioned before, the approach to side-effects Crux uses is sometimes called managed side-effects. Your app's core is not allowed to perform side-effects directly. Instead, whenever it wants to interact with the outside world, it needs to request the interaction from the shell.
It's not quite enough to do one side-effect at a time, however. In our weather app example we may want to load the list of favourite locations in parallel with checking the current location. We may also want to run a sequence, such as checking whether location services are enabled, then fetching a location if they are.
The abstraction Crux uses to capture the potentially complex orchestration of effects
in response to an event is a type called Command.
Think of your whole app as a robot, where the Core is the brain of the robot and the Shell is the body of the robot. The brain instructs the body through commands and the body passes information about the outside world back to it with Events.
In this chapter we will explore how commands are created and used; we'll come back to capabilities, which provide a convenient way to create common commands, in chapter 7.
Note on intent and execution
Managed effects are the key to Crux being portable across as many platforms as is sensible. Crux apps are, in a sense, built in the abstract, they describe what should happen in response to events, but not how it should happen. We think this is important both for portability, and for testing and general separation of concerns. What should happen is inherent to the product, and should behave the same way on any platform – it's part of what your app is. How it should be executed (and exactly what it looks like) often depends on the platform.
Different platforms may support different ways, for example a biometric authentication may work very differently on various devices and some may not even support it at all. Different platforms may also have different practical restrictions: while it may be perfectly appropriate to write things to disk on one platform, internet access can't be guaranteed (e.g. on a smart watch); on another, writing to disk may not be possible, but internet connection is virtually guaranteed (e.g. in an API service, or on an embedded device in a factory). The specific storage solution for persistent caching would be implemented differently on different platforms, but would potentially share the key format and eviction strategy across them.
The hard part of designing effects is working out exactly where to draw the line between what is the intent and what is the implementation detail, what's common across platforms and what may be different on each, and implementing the former in Rust as a set of types, and the latter on the native side in the Shell, however is appropriate.
Because Effects define the "language" used to express intent, your Crux application code can be portable onto any platform capable of executing the intent in some way. Clearly, the number of different effects we can think of, and platforms we can target is enormous, and Crux doesn't want to force you to implement the entire portfolio of them on every platform.
Instead, your app is expected to define an Effect type which covers the kinds of
effects which your app needs in order to work, and every time it responds to an Event,
it is expected to return a Command.
Here is the Weather app's Effect type:
#![allow(unused)]
fn main() {
/// Every side-effect the core can ask the shell to perform.
///
/// Each variant is a request the shell fulfils and then resolves, producing
/// an event that the model handles. The `#[effect(facet_typegen)]` macro
/// generates the FFI glue that drives that exchange.
#[effect(facet_typegen)]
pub enum Effect {
    /// Ask the shell to re-read the [`ViewModel`](crate::ViewModel) and
    /// repaint.
    Render(RenderOperation),
    /// Read, write, or delete a value in the shell's key-value store.
    /// Used to persist the favourites list.
    KeyValue(KeyValueOperation),
    /// Perform an HTTP request — weather and geocoding API calls.
    Http(HttpRequest),
    /// Check location permissions or fetch the device's coordinates.
    Location(LocationOperation),
    /// Store, fetch, or delete a secret (the OpenWeatherMap API key).
    Secret(SecretRequest),
    /// Schedule a timer — used to debounce the search input on the
    /// add-favourite screen.
    Time(TimeRequest),
}
}
The six variants are every side effect the app can produce: rendering the UI, storing key-value data, making HTTP requests, checking location, storing secrets, and setting timers. To add a new kind of effect, you extend this enum.
What is a Command
The Command is a recipe for a side-effects workflow which may perform several effects and also send events back to the app.

Crux expects a Command to be returned by the update function. A basic Command will result in an effect request to the Shell, and when the request is resolved by the Shell, the Command will pass the output to the app in an Event. The interaction can be more complicated than this, however. You can imagine a command running a set of Effects concurrently (say a few http requests and a timer), then follow some of them with additional effects based on their outputs, and finally send an event with the result of some of the outputs combined. So in principle, Command is a state machine which emits effects (for the Shell) and Events (for the app) according to the internal logic of what needs to be accomplished.
Command provides APIs to iterate over the effects and events emitted so far. This API can be used both in tests and in Rust-based shells, and for some advanced use cases when composing applications.
Effects and Events
Let's look closer at Effects. Each effect carries a request for an Operation (e.g. a HTTP request), which can be inspected and resolved with an operation output (e.g. a HTTP response). After effect requests are resolved, the command may have further effect requests or events, depending on the recipe it's executing.
Types acting as an Operation must implement the crux_core::capability::Operation trait, which ties them to the type of output. These two types are the protocol between the core and the shell when requesting and resolving the effects. The other types involved in the exchange are various wrappers to enable the operations to be defined in separate crates. The operation is first wrapped in a Request, which can be resolved, and then again with an Effect, like we saw above. This allows multiple Operation types from different crates to coexist, and also enables the Shells to "dispatch" to the right implementation to handle them.
The Effect type is typically defined with the help of the #[effect] macro. Here is the Weather app's effect again:
#![allow(unused)]
fn main() {
/// Every side-effect the core can ask the shell to perform.
///
/// Each variant is a request the shell fulfils and then resolves, producing
/// an event that the model handles. The `#[effect(facet_typegen)]` macro
/// generates the FFI glue that drives that exchange.
#[effect(facet_typegen)]
pub enum Effect {
    /// Ask the shell to re-read the [`ViewModel`](crate::ViewModel) and
    /// repaint.
    Render(RenderOperation),
    /// Read, write, or delete a value in the shell's key-value store.
    /// Used to persist the favourites list.
    KeyValue(KeyValueOperation),
    /// Perform an HTTP request — weather and geocoding API calls.
    Http(HttpRequest),
    /// Check location permissions or fetch the device's coordinates.
    Location(LocationOperation),
    /// Store, fetch, or delete a secret (the OpenWeatherMap API key).
    Secret(SecretRequest),
    /// Schedule a timer — used to debounce the search input on the
    /// add-favourite screen.
    Time(TimeRequest),
}
}
The six operations it carries are actually defined by six different Capabilities, so let's talk about those.
Capabilities
Capabilities are developer-friendly, ergonomic APIs to construct commands, from very basic ones all the way to complex stateful orchestrations. Capabilities are an abstraction layer that bundles related operations together with code to create them, and cover one kind of a side-effect (e.g. HTTP, or timers).
We will look at writing capabilities in chapter 7, but for now, it's useful to know that their API often doesn't return Commands straight away, but instead returns command builders, which can be converted into a Command, or converted into a future and used in an async context.
To help that make more sense, let's look at how Commands are typically used.
Working with Commands
The command API aims to cover most effect orchestration without asking developers to use async Rust. We'll come to async in a minute; first, let's look at what can be done without it.
A typical use of a Command in an update function will look something like this:
Http::get(API_URL)
    .expect_json()
    .build()
    .then_send(Event::ReceivedResponse),
This code is using a HTTP capability and its API up to the .build() call which returns a CommandBuilder. This is a lot like a Future – its type carries the output type, and it represents the eventual result of the effect. The difference is that it can be converted either into a Command or into a Future to be used in an async context. In this case, the .then_send part is building the command by binding it to an Event to send the output of the request back to the app.
Here's an example of the same from the Weather app:
#![allow(unused)]
fn main() {
        let fetch_favorites = KeyValue::get(FAVORITES_KEY)
            .then_send(|r| Event::Initializing(InitializingEvent::FavoritesLoaded(r)));
}
The get() call again returns a command builder, which is used to create a command with .then_send(). The Command is now fully baked and bound to the specific callback event, and can no longer be meaningfully chained into an "effect pipeline".
One special, but common case of creating a command is creating a Command which does nothing, because there are no more side-effects:
#![allow(unused)]
fn main() {
Command::done()
}
Soon enough, your app will get a little more complicated, you will need to run multiple commands concurrently, but your update function only returns a single value. To get around this, you can combine existing commands into one using either the all function, or the .and method.
We've seen an example of this already, but here it is again:
#![allow(unused)]
fn main() {
    pub(crate) fn start() -> Started<Self, Event> {
        tracing::debug!("starting initialization, fetching API key and favorites");

        let fetch_secret = secret::command::fetch(secret::API_KEY_NAME)
            .then_send(|r| Event::Initializing(InitializingEvent::SecretFetched(r)));
        let fetch_favorites = KeyValue::get(FAVORITES_KEY)
            .then_send(|r| Event::Initializing(InitializingEvent::FavoritesLoaded(r)));

        Started::new(
            Self::default(),
            Command::all([fetch_secret, fetch_favorites]),
        )
    }
}
The two capability calls each produce a command, and we want to run them concurrently. Command::all combines them into a single Command, which start() returns as part of its Started bundle.
Commands (or more precisely command builders) can be created without capabilities. That's what capabilities do internally. You shouldn't really need this in your app code, so we will cover that side of Commands in chapter 7, when we look at building Capabilities.
You might also want to run effects in a sequence, passing output of one as the input of another. This is another thing the command builders can facilitate. Let's look at that.
Command builders
Command builders come in three flavours:
- RequestBuilder - the most common, builds a request expecting a single response from the shell (think HTTP client)
- StreamBuilder - builds a request expecting a (possibly infinite) sequence of responses from the shell (think WebSockets)
- NotificationBuilder - builds a shell notification, which does not expect a response. The best example is notifying the shell that a new view model is available
All builders share a common API. Request and stream builder can be converted into commands with a .then_send.
Both also support .then_request and .then_stream calls, for chaining on a function which takes the output of the first builder and returns a new builder. This can be used to build things like automatic pagination through an API for example.
You can also .map the output of the request/stream to a new value.
Here's an example of a more complicated chaining from the Command test suite:
#![allow(unused)]
fn main() {
#[test]
fn complex_concurrency() {
    fn increment(output: AnOperationOutput) -> AnOperation {
        let AnOperationOutput::Other([a, b]) = output else {
            panic!("bad output");
        };

        AnOperation::More([a, b + 1])
    }

    let mut cmd = Command::all([
        Command::request_from_shell(AnOperation::More([1, 1]))
            .then_request(|out| Command::request_from_shell(increment(out)))
            .then_send(Event::Completed),
        Command::request_from_shell(AnOperation::More([2, 1]))
            .then_request(|out| Command::request_from_shell(increment(out)))
            .then_send(Event::Completed),
    ])
    .then(Command::request_from_shell(AnOperation::More([3, 1])).then_send(Event::Completed));

// ... the assertions are omitted for brevity, see crux_core/src/command/tests/combinators.rs
}
Forgive the abstract nature of the operations involved, these constructions are relatively uncommon in real code, and have not been used anywhere in our example code yet.
For more details of this, we recommend the Command API docs.
Combining all these tools provides a fair bit of flexibility to create fairly complex orchestrations of effects. Sometimes, you might want to go more complex than that, however. In such cases, Crux attempting to create more APIs trying to achieve every conceivable orchestration with closures would have diminishing returns. In such cases, you probably just want to write async code instead.
Notice that nowhere in the above examples have we mentioned working with the model during the execution of the command. This is very much by design: Once started, commands do not have model access, because they execute asynchronously, possibly in parallel, and access to model would introduce data races, which are very difficult to debug.
In order to update state, you should pass the result of the effect orchestration back to your app using an Event (as a kind of callback). It's relatively typical for apps to have a number of "internal" events, which handle results of effects. Sometimes these are also useful in tests, if you want to start a particular journey "from the middle".
Commands with async
The real power of commands comes from the fact that they build on async Rust. Each Command is a little async executor, which runs a number of tasks. The tasks get access to the crux context (represented by CommandContext), which gives them the ability to communicate with the shell and with the app.
You can create a raw command like this:
Command::new(|ctx| async move {
    let output = ctx.request_from_shell(AnOperation::One).await;
    ctx.send_event(Event::Completed(output));
    let output = ctx.request_from_shell(AnOperation::Two).await;
    ctx.send_event(Event::Completed(output));
});
Command::new takes a closure, which receives the CommandContext and returns a future, which will become the Command's main task (it is not expected to return anything, its Output is (). The provided context can be used to start shell requests, streams, and send events back to the app.
The Context can also be used to spawn more tasks in the command.
There is a very similar async API in command builders too, except the returned future/stream is expected to return a value.
Builders can be converted into a future/stream for use in the async blocks with .into_future(ctx) and .into_stream(ctx), so long as you hold an instance of a CommandContext (otherwise those futures/streams would have no ability to communicate with the shell or the app).
While commands do execute on an async runtime, the runtime does not run on its own - it's part of the core and needs to be driven by the Shell calling the Core APIs. We use async rust as a convenient way to build the cooperative multi-tasking state machines involved in managing side effects.
This is also why combining the Crux async runtime with something like Tokio will appear to somewhat work (because the futures involved are mostly compatible), but it will have odd stop-start behaviours, because the Crux runtime doesn't run all the time, and some futures won't work, because they require specific Tokio support.
That said, a lot of universal async code (like async channels for example), work just fine.
Cancelling commands
Commands can be cancelled using an AbortHandle. Call cmd.abort_handle() to get
a handle, store it in your model, and call handle.abort() later to cancel all
tasks in the command. This is useful for things like cancelling an in-flight search
when the user types a new query.
// In one event handler, start a command and store its abort handle
let mut cmd = Http::get(url).expect_json().build().then_send(Event::Response);
model.search_handle = Some(cmd.abort_handle());
return cmd;

// In a later event handler, cancel the previous command
if let Some(handle) = model.search_handle.take() {
    handle.abort();
}
There is more to the async effect API than we can or should cover here. Most of what you'd expect in async rust is supported – join handles, aborting tasks (and even Commands), spawning tasks and communicating between them, etc. Again, we recommend the Command API docs for the full coverage.
Migrating from previous versions of Crux
If you're new to Crux, it's unlikely you need to read this section. The original API for side-effects was very different from Commands and this section is kept to help migrate from that API
The change to Command is a breaking one for all Crux apps. The previous API used Capabilities to perform side-effects via callbacks. The new API removes Capabilities and caps from the App trait entirely, replacing them with a Command return value from update.
There are three parts to the migration:
- Remove the
Capabilitiesassociated type and thecapsparameter fromupdate - Declare the
Effectassociated type on your App - Return
Commandfromupdate
Here's what the end state looks like:
#![allow(unused)]
fn main() {
impl crux_core::App for App {
    type Event = Event;
    type Model = Model;
    type ViewModel = ViewModel;
    type Effect = Effect;

    fn update(
        &self,
        event: Event,
        model: &mut Model,
    ) -> crux_core::Command<Effect, Event> {
        crux_core::Command::done() // return a Command
    }
}
}
To begin with, you can return Command::done() (a no-op) from update and
incrementally migrate your effect handling to use Commands and capability APIs
that return command builders.
Testing with managed effects
We have seen how to use effects, and we have seen a little bit about the testing, but we should look at that closer.
Crux was expressly designed to support easy, fast, comprehensive testing of your application. Everyone is generally on board with unit tests and TDD when it comes to basic pure logic. But as soon as any I/O or UI gets involved, the dread sets in. We're going to have to set up some fakes, introduce additional traits just to test things, or just bite the bullet and build tests around a fully integrated app and wait for them to run (and probably fail on a race condition sometimes). So most people give up.
Managed effects smooth over that big hump. You pay for it a little bit in how the code is written, but you reap the reward in testing it. This is because the core that uses managed effects is pure and therefore completely deterministic — all the side effects are pushed to the shell.
It's straightforward to write an exhaustive set of unit tests that give you complete confidence in the correctness of your application code — you can test the behavior of your application independently of platform-specific UI and API calls.
There is no need to mock/stub anything, and there is no need to write integration tests.
Not only are the unit tests easy to write, but they run extremely quickly, and can be run in parallel.
For example, here's a test that drives LocalWeather through a full weather fetch — checking location permission, resolving the location, then handling the weather response. A setup helper advances the state machine through the first two events by resolving each effect with a canned response:
#![allow(unused)]
fn main() {
    /// Drives the state machine from `FetchingLocation` through to `FetchingWeather`,
    /// resolving location and returning the state + command ready for a weather response.
    fn drive_to_fetching_weather() -> (LocalWeather, Command<Effect, LocalWeatherEvent>) {
        let local = LocalWeather::default();
        let key = api_key();

        let (local, mut cmd) = local
            .update(LocalWeatherEvent::LocationEnabled(true), &key)
            .expect_continue()
            .into_parts();

        let event = cmd
            .resolve_location(|_op| LocationResult::Location(Some(phoenix_location())))
            .expect_event();

        local.update(event, &key).expect_continue().into_parts()
    }
}
The test itself picks up from FetchingWeather, resolves the HTTP effect, and asserts that the final state is Fetched with the expected data:
#![allow(unused)]
fn main() {
    #[test]
    fn weather_fetched_stores_data() {
        let (local, mut cmd) = drive_to_fetching_weather();
        assert!(matches!(local, LocalWeather::FetchingWeather(_)));

        let event = cmd
            .resolve_http(|_op| {
                HttpResult::Ok(
                    HttpResponse::ok()
                        .body(phoenix_weather_json().as_bytes())
                        .build(),
                )
            })
            .expect_event();
        let (local, _cmd) = local
            .update(event, &api_key())
            .expect_continue()
            .into_parts();

        let LocalWeather::Fetched(loc, ref data) = local else {
            panic!("Expected Fetched state, got {local:?}");
        };
        assert_eq!(loc, phoenix_location());
        assert_eq!(data.as_ref(), &phoenix_weather_response());
        insta::assert_yaml_snapshot!(data.as_ref());
    }
}
It's a test of a whole interaction with multiple kinds of effects — location services and HTTP — and it runs in a couple of milliseconds, entirely deterministic. The code being tested is LocalWeather::update from chapter 4; managed effects let us verify the whole transaction without executing any of it.
The full suite of 57 tests of the Weather app runs in around 20 milliseconds on a Mac Mini M4 Pro. In practice, it's rare for a test suite of a Crux app to take longer than compiling it (even incrementally). Apps with thousands of tests usually run them in seconds, though compilation takes longer.
cargo nextest run
    Finished `test` profile [unoptimized + debuginfo] target(s) in 0.28s
────────────
    Starting 57 tests across 1 binary
    ...
     Summary [   0.020s] 57 tests run: 57 passed, 0 skipped
The test steps
Crux gives us a chainable test API that keeps assertions concise, but you still drive the event → update → effect → resolve cycle yourself. You'll see methods like .expect_only_render() and .resolve_http(|op| ...) on Command throughout this chapter. They come from an EffectTestExt trait the #[effect] macro generates next to your Effect enum when crux_core's testing feature is enabled, and auto-implements for Command<Effect, E> where E is an event.
Let's walk through a simpler test from the Weather app step by step:
#![allow(unused)]
fn main() {
    #[test]
    fn location_enabled_fetches_location() {
        let local = LocalWeather::default();

        let (local, mut cmd) = local
            .update(LocalWeatherEvent::LocationEnabled(true), &api_key())
            .expect_continue()
            .into_parts();

        assert!(matches!(local, LocalWeather::FetchingLocation));

        cmd.expect_only_location_with(|op| {
            assert_eq!(op, &LocationOperation::GetLocation);
        });
    }
}
First, we build a fresh LocalWeather::default(). Its starting state is CheckingPermission.
We then call update with LocationEnabled(true), as if the shell had just reported that location services are available. update returns an Outcome, which we destructure with .expect_continue().into_parts(). We know this event doesn't complete the state machine, so we assert on Continue and get back the updated state plus any command.
We assert the new state is FetchingLocation. Then we call .expect_only_location_with(|op| ...) on the command. That one chained call says "the only effect on this command is a Location effect, and here's a closure to inspect its operation." Inside the closure we check the operation is GetLocation.
That's the whole test. update is a pure function, so there's nothing to set up beyond the initial state and nothing to tear down.
More integrated tests and deterministic simulation testing
We could test the key-value storage in a more integrated fashion too - instead of asserting
on the key value operation, we can provide a very basic implementation of a key value store
to use in tests, using a HashMap as storage for example. Then we could simply forward the
key-value effects to it and make sure the storage is managed correctly. Similarly, we could
build a predictable replica of an API service we need to test against, etc.
While that's all starting to sound a lot like mocking, remember that we're not implementing Redis or building an actual HTTP server. It's all very simple code. And if we do that for all the different effects our app needs and provide a realistic enough implementation to mimic the real things, a very interesting thing happens - we get the entire app stack, with the nitty gritty technical details taken out, running in a unit test.
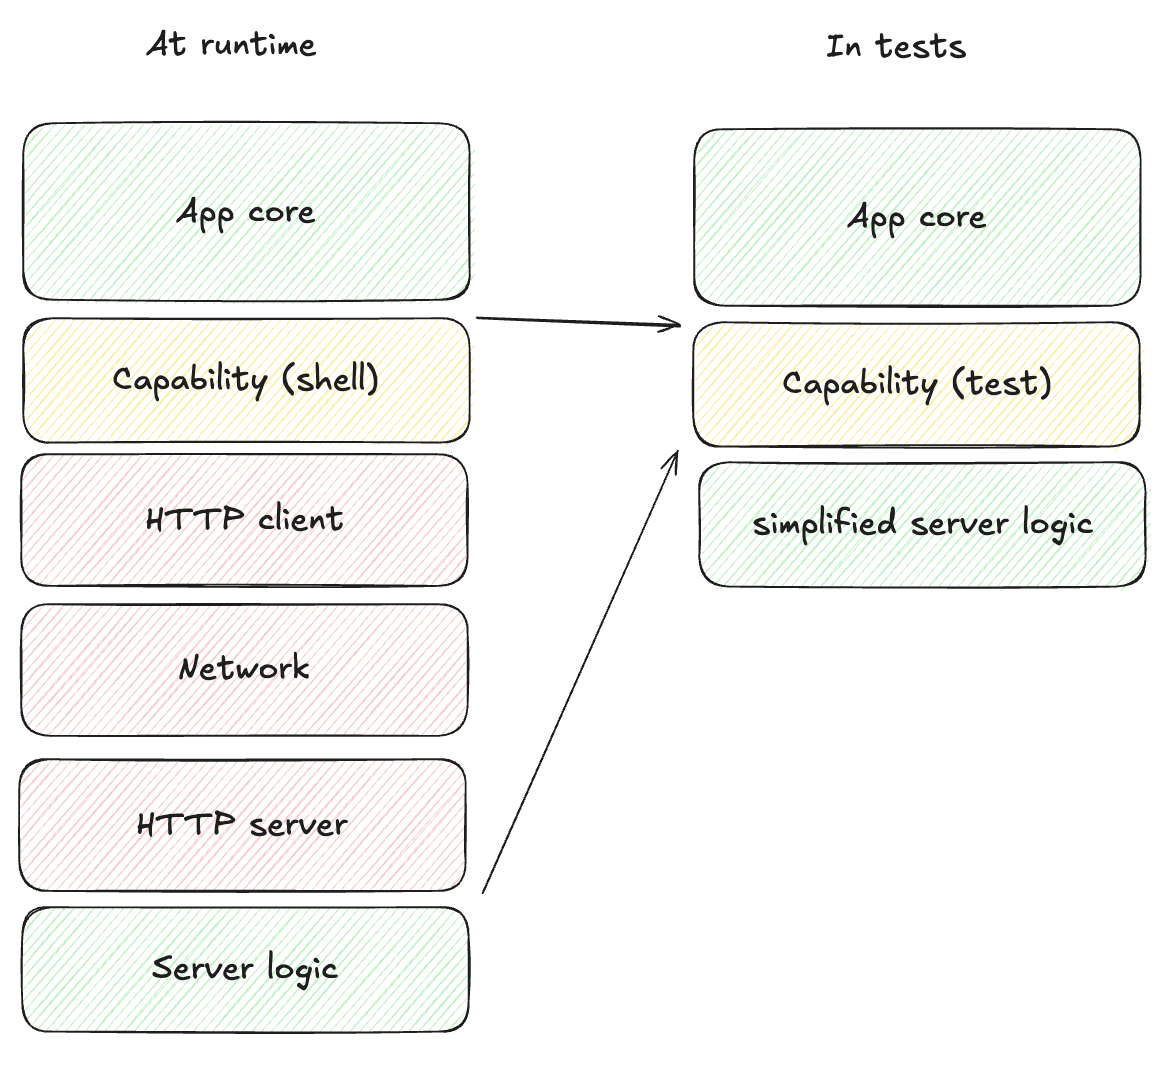
With that, we can create an app instance and send it completely random (but deterministic) events, and make sure "nothing bad happens". The definition of what that means is specific to each app, but just to illustrate some options:
- Introduce randomised errors to your fake API and see they are handled correctly
- Randomly lose data in storage and make sure the app recovers
- Make sure timeouts work correctly by randomly firing them first
- Check that any other invariants hold, e.g. anything time-related only moves forward (counters count up), storage remains referentially consistent, logically impossible states do not happen (ideally they would be impossible to represent, but sometimes that's too hard)
When we do that, we can then run this pseudo random process, for hours if we like, and let it find any bugs for us. To reproduce them, all we need is the random seed used for the specific test run.
In practice, Crux apps will mostly be able to run at thousands of events a second, and these tests will explore more of the state space than we ever could with manual unit tests.
This type of testing is usually reserved to consensus algorithms and network protocols (where anything that can happen will happen and they have to be rock solid), because setting up the test harness is just too much work. But with managed effects it is a few hundred lines of additional code. For a modestly sized app, a testing harness like that will only take a few days to write. We may even ship building blocks of such test harness with Crux in the future.
Building capabilities
We covered effects and commands in detail, and hinted throughout at capabilities — the developer-friendly APIs you actually use when writing core code. Time to look at them directly, both using them and building our own.
In practice, apps need a fairly limited number of capabilities — typically around seven, almost certainly fewer than ten. The weather app uses six: Render, KeyValue, Http, Location, Secret, and Time. Capabilities are reusable across apps — if you build one that others would benefit from, the Crux team would like to hear about it.
Using a capability
Capabilities don't return a Command directly — they return a command builder, which lets you chain behaviour before committing to a specific event. We saw the abstract shape in chapter 5: Http::get(...).expect_json().build().then_send(Event::ReceivedResponse).
The weather app's current-weather fetch shows the same pattern in production code:
#![allow(unused)]
fn main() {
/// Fetch current weather for a specific location
#[must_use]
pub fn fetch<Effect, Event>(
    location: Location,
    api_key: ApiKey,
) -> RequestBuilder<
    Effect,
    Event,
    impl std::future::Future<Output = Result<CurrentWeatherResponse, WeatherError>>,
>
where
    Effect: From<Request<HttpRequest>> + Send + 'static,
    Event: Send + 'static,
{
    Http::get(WEATHER_URL)
        .expect_json::<CurrentWeatherResponse>()
        .query(&CurrentWeatherQuery {
            lat: location.lat.to_string(),
            lon: location.lon.to_string(),
            units: "metric",
            appid: api_key.into(),
        })
        .expect("could not serialize query string")
        .build()
        .map(|result| match result {
            Ok(mut response) => response
                .take_body()
                .map_or(Err(WeatherError::ParseError), |weather_data| {
                    Ok(weather_data)
                }),
            Err(crux_http::HttpError::Http { code, .. })
                if code == StatusCode::UNAUTHORIZED || code == StatusCode::FORBIDDEN =>
            {
                Err(WeatherError::Unauthorized)
            }
            Err(_) => Err(WeatherError::NetworkError),
        })
}
}
Http::get(...) starts a builder, .expect_json::<T>() pins down the response type, .query(...) adds URL parameters, .build() produces a RequestBuilder, and .map(...) translates the shell's Result<Response, HttpError> into the more convenient Result<CurrentWeatherResponse, WeatherError>. The caller finishes it off with .then_send(SomeEvent) — fetch returns a builder, not a command, so callers can hook it into their own event type.
That's how a capability gets used. But where do these APIs come from? Let's build one.
A simple custom capability: Location
Render ships in crux_core; crux_http, crux_kv, and crux_time are separate crates Crux publishes. Location services aren't — they work differently enough across platforms that a cross-platform crate would do more harm than good, and they're specific enough that we didn't want to maintain an official one either. So the weather app defines its own.
If you're upgrading an existing app, note that
crux_http0.19 switched fromhttp-typesto the standardhttpcrate — see the Migratingcrux_httpto nativehttptypes guide.
A capability is two things:
- A protocol for talking to the shell — an operation type and a response type.
- An ergonomic API for the core developer — usually a handful of command-builder functions.
Here's the whole protocol for Location:
#![allow(unused)]
fn main() {
//! A custom capability for accessing the device's location.
//!
//! Two operations — checking whether location services are enabled and
//! fetching the current coordinates — exchanged with the shell through
//! [`LocationOperation`] and [`LocationResult`]. The developer-facing
//! command builders live in the [`command`] submodule.

pub mod command;

use crux_core::capability::Operation;
use facet::Facet;
use serde::{Deserialize, Serialize};

/// Geographic coordinates as returned by the shell.
#[derive(Facet, Serialize, Deserialize, Clone, Copy, Debug, PartialEq)]
pub struct Location {
    pub lat: f64,
    pub lon: f64,
}

/// Operations the core can ask the shell to perform.
#[derive(Facet, Clone, Serialize, Deserialize, Debug, PartialEq, Eq)]
#[repr(C)]
pub enum LocationOperation {
    /// Ask whether location services are currently enabled and authorised.
    IsLocationEnabled,
    /// Ask for the device's current coordinates.
    GetLocation,
}

/// Values the shell can return in response to a [`LocationOperation`].
#[derive(Facet, Clone, Serialize, Deserialize, Debug, PartialEq)]
#[repr(C)]
pub enum LocationResult {
    /// Whether location services are enabled and authorised.
    Enabled(bool),
    /// The current location, or `None` if the shell couldn't determine it.
    Location(Option<Location>),
}

impl Operation for LocationOperation {
    type Output = LocationResult;
}
}
Two operation variants (IsLocationEnabled, GetLocation), two result variants (Enabled(bool), Location(Option<Location>)), and an impl Operation for LocationOperation pairing them. The Operation trait is Crux's way of saying "when you see this operation, expect this response type" — the macro-generated Effect type uses it so the core and shell agree on the wire format.
The developer API is equally small:
#![allow(unused)]
fn main() {
//! Command builders for the [location capability](super).
//!
//! Each builder issues one [`LocationOperation`] and narrows the shell's
//! [`LocationResult`] to the specific type the caller cares about. They're
//! generic over `Effect` and `Event` so they can be reused from any Crux
//! app whose `Effect` type can wrap a location request.

use std::future::Future;

use crux_core::{Command, Request, command::RequestBuilder};

use super::{Location, LocationOperation, LocationResult};

/// Asks the shell whether location services are currently enabled.
#[must_use]
pub fn is_location_enabled<Effect, Event>()
-> RequestBuilder<Effect, Event, impl Future<Output = bool>>
where
    Effect: Send + From<Request<LocationOperation>> + 'static,
    Event: Send + 'static,
{
    Command::request_from_shell(LocationOperation::IsLocationEnabled).map(|result| match result {
        LocationResult::Enabled(val) => val,
        LocationResult::Location(_) => false,
    })
}

/// Asks the shell for the device's current coordinates.
#[must_use]
pub fn get_location<Effect, Event>()
-> RequestBuilder<Effect, Event, impl Future<Output = Option<Location>>>
where
    Effect: Send + From<Request<LocationOperation>> + 'static,
    Event: Send + 'static,
{
    Command::request_from_shell(LocationOperation::GetLocation).map(|result| match result {
        LocationResult::Location(loc) => loc,
        LocationResult::Enabled(_) => None,
    })
}
}
Each function issues one operation and narrows the response. is_location_enabled returns bool; get_location returns Option<Location>. The shared LocationResult carries both variants, so each .map(...) pins the response to the one that operation expects and falls back to a safe default for the other — false for the enabled check, None for the location fetch. Secret, later in the chapter, uses unreachable!() for the same situation; both patterns have their place.
Notice the generic signatures: both functions are generic over Effect and Event. The trait bound Effect: From<Request<LocationOperation>> says the caller's Effect type must be able to wrap a location request — every #[effect]-generated enum implements this automatically, so the bound is always satisfied in practice. Being generic lets us drop this capability into any Crux app, not just this one.
A richer example: Secret
Location is about as minimal as a capability gets. Secret — storing, fetching, and deleting an API key — has a bit more going on, and it shows a pattern worth calling out.
Narrowing the shell's response
The shell's SecretResponse is a single enum with six variants: Missing, Fetched, Stored, StoreError, Deleted, DeleteError. Each operation has its own pair: Fetch produces Missing or Fetched, Store produces Stored or StoreError, and Delete produces Deleted or DeleteError. If a caller holds a SecretResponse directly, the type doesn't tell them which operation it's responding to — they'd have to handle variants that can't apply to their call.
The capability fixes this by defining three narrower response types — SecretFetchResponse, SecretStoreResponse, SecretDeleteResponse — and having each command builder return its own. The wide SecretResponse stays as the shell protocol; the core developer only ever sees the narrowed versions.
Here's the protocol:
#![allow(unused)]
fn main() {
//! A custom capability for storing and retrieving secrets (e.g. API keys).
//!
//! The shell-facing protocol is intentionally simple: three operations
//! (fetch, store, delete) with one [`SecretResponse`] enum covering all
//! outcomes. The developer-facing command builders in the [`command`]
//! submodule narrow that wide response into smaller per-operation types
//! ([`SecretFetchResponse`], [`SecretStoreResponse`],
//! [`SecretDeleteResponse`]) so callers only see the variants that apply.

pub mod command;

use crux_core::capability::Operation;
use facet::Facet;
use serde::{Deserialize, Serialize};

/// The key under which the weather API key is stored.
pub const API_KEY_NAME: &str = "openweather_api_key";

/// Operations the core can ask the shell to perform.
#[derive(Facet, Clone, Debug, Serialize, Deserialize, PartialEq, Eq)]
#[repr(C)]
pub enum SecretRequest {
    /// Fetch the secret stored under the given key (if any).
    Fetch(String),
    /// Store `value` under `key`, replacing any existing value.
    Store(String, String),
    /// Delete the secret stored under the given key.
    Delete(String),
}

impl Operation for SecretRequest {
    type Output = SecretResponse;
}

/// The shell-facing response — every variant any operation might produce.
///
/// The developer-facing command builders narrow this down to the variants
/// a specific operation can actually return.
#[derive(Facet, Clone, Debug, Serialize, Deserialize, PartialEq, Eq)]
#[repr(C)]
pub enum SecretResponse {
    /// Fetch: no secret stored under this key.
    Missing(String),
    /// Fetch: here's the key and its stored value.
    Fetched(String, String),
    /// Store: the secret was stored successfully.
    Stored(String),
    /// Store: storing failed — the string carries the error message.
    StoreError(String),
    /// Delete: the secret was removed.
    Deleted(String),
    /// Delete: deletion failed — the string carries the error message.
    DeleteError(String),
}

/// The developer-facing response for [`command::fetch`].
#[derive(Facet, Clone, Debug, Serialize, Deserialize, PartialEq, Eq)]
#[repr(C)]
pub enum SecretFetchResponse {
    /// No secret is stored under this key.
    Missing(String),
    /// The stored secret value.
    Fetched(String),
}

/// The developer-facing response for [`command::store`].
#[derive(Facet, Clone, Debug, Serialize, Deserialize, PartialEq, Eq)]
#[repr(C)]
pub enum SecretStoreResponse {
    /// The secret was stored successfully under `key`.
    Stored(String),
    /// Storage failed; the string carries the error message.
    StoreError(String),
}

/// The developer-facing response for [`command::delete`].
#[derive(Facet, Clone, Debug, Serialize, Deserialize, PartialEq, Eq)]
#[repr(C)]
pub enum SecretDeleteResponse {
    /// The secret was removed.
    Deleted(String),
    /// Deletion failed; the string carries the error message.
    DeleteError(String),
}
}
And the developer API:
#![allow(unused)]
fn main() {
//! Command builders for the [secret capability](super).
//!
//! Each builder issues one [`SecretRequest`] and narrows the shell's wide
//! [`SecretResponse`] down to the [`SecretFetchResponse`],
//! [`SecretStoreResponse`], or [`SecretDeleteResponse`] that's relevant
//! to that operation. They're generic over `Effect` and `Event` so any
//! Crux app can adopt them.

use std::future::Future;

use crux_core::Request;
use crux_core::command::RequestBuilder;

use super::{
    SecretDeleteResponse, SecretFetchResponse, SecretRequest, SecretResponse, SecretStoreResponse,
};

/// Fetches the secret stored under `key`, if any.
#[must_use]
pub fn fetch<Ef, Ev>(
    key: impl Into<String>,
) -> RequestBuilder<Ef, Ev, impl Future<Output = SecretFetchResponse>>
where
    Ef: From<Request<SecretRequest>> + Send + 'static,
    Ev: Send + 'static,
{
    let key = key.into();
    crux_core::Command::request_from_shell(SecretRequest::Fetch(key)).map(|response| match response
    {
        SecretResponse::Missing(key) => SecretFetchResponse::Missing(key),
        SecretResponse::Fetched(_, value) => SecretFetchResponse::Fetched(value),
        _ => unreachable!("fetch only produces Missing or Fetched"),
    })
}

/// Stores `value` under `key`, replacing any existing secret.
#[must_use]
pub fn store<Ef, Ev>(
    key: impl Into<String>,
    value: impl Into<String>,
) -> RequestBuilder<Ef, Ev, impl Future<Output = SecretStoreResponse>>
where
    Ef: From<Request<SecretRequest>> + Send + 'static,
    Ev: Send + 'static,
{
    let key = key.into();
    let value = value.into();
    crux_core::Command::request_from_shell(SecretRequest::Store(key, value)).map(|response| {
        match response {
            SecretResponse::Stored(key) => SecretStoreResponse::Stored(key),
            SecretResponse::StoreError(msg) => SecretStoreResponse::StoreError(msg),
            _ => unreachable!("store only produces Stored or StoreError"),
        }
    })
}

/// Deletes the secret stored under `key`.
#[must_use]
pub fn delete<Ef, Ev>(
    key: impl Into<String>,
) -> RequestBuilder<Ef, Ev, impl Future<Output = SecretDeleteResponse>>
where
    Ef: From<Request<SecretRequest>> + Send + 'static,
    Ev: Send + 'static,
{
    let key = key.into();
    crux_core::Command::request_from_shell(SecretRequest::Delete(key)).map(
        |response| match response {
            SecretResponse::Deleted(key) => SecretDeleteResponse::Deleted(key),
            SecretResponse::DeleteError(msg) => SecretDeleteResponse::DeleteError(msg),
            _ => unreachable!("delete only produces Deleted or DeleteError"),
        },
    )
}
}
Each builder issues a request, then .map(...) narrows the wide SecretResponse down to the operation-specific type. The unreachable!() calls document an invariant: because the shell only ever produces the "right" variants for a given operation, the other arms should never fire. If they do, there's a bug in the shell's handler that the panic surfaces rather than hides.
Using these builders looks no different to the location ones: call secret::command::fetch(API_KEY_NAME) and finish with .then_send(...) to bind the eventual SecretFetchResponse to an event.
What capabilities provide
Putting it together, a capability gives you two things:
- A protocol — operation and response types marked with the
Operationtrait, which define the wire format between core and shell. - A developer API — small command-builder functions that speak in convenient Rust types rather than the raw protocol.
In ports-and-adapters vocabulary, capabilities are the ports; the shell-side code that actually carries out each operation is the adapter. The core expresses what it wants done; the shell decides how to do it. Keeping that separation tight is what makes the core portable.
Speaking of the shell — it's time to look at how these operations get carried out on each platform. That's the next chapter.
The shell
We've looked at how the Weather app's core fits together, how it's structured into nested state machines, and how managed effects make it testable end-to-end. Time to build the UI around it.
(In practice, you wouldn't write the whole core before touching the UI — you'd go feature by feature. But the shape is the same: a tested core first, then a shell that drives it and handles its effects.)
The shell will have two responsibilities:
- Laying out the UI components, like we've already seen in Part I
- Supporting the app's capabilities. This will be new to us
Like in Part I, you can choose which Shell language you'd like to see this in, but first let's talk about what they all have in common.
Message interface between core and shell
In Part I, we learned to use the update and view APIs of the core. We also learned that
in their raw form, they take serialized values as byte buffers.
We skimmed over the return value of update very quickly. In that case it only ever
returned a request for a RenderOperation - a signal that a new view model is available.
In the Weather's case, more options are possible. Recall the effect type:
#![allow(unused)]
fn main() {
/// Every side-effect the core can ask the shell to perform.
///
/// Each variant is a request the shell fulfils and then resolves, producing
/// an event that the model handles. The `#[effect(facet_typegen)]` macro
/// generates the FFI glue that drives that exchange.
#[effect(facet_typegen)]
pub enum Effect {
    /// Ask the shell to re-read the [`ViewModel`](crate::ViewModel) and
    /// repaint.
    Render(RenderOperation),
    /// Read, write, or delete a value in the shell's key-value store.
    /// Used to persist the favourites list.
    KeyValue(KeyValueOperation),
    /// Perform an HTTP request — weather and geocoding API calls.
    Http(HttpRequest),
    /// Check location permissions or fetch the device's coordinates.
    Location(LocationOperation),
    /// Store, fetch, or delete a secret (the OpenWeatherMap API key).
    Secret(SecretRequest),
    /// Schedule a timer — used to debounce the search input on the
    /// add-favourite screen.
    Time(TimeRequest),
}
}
Those are the six possible variants we'll see in the return from update. It
is essentially telling us "I did the state update, and here are some side-effects
for you to perform".
Let's say that the effect is an HTTP request. We execute it, get a response, and
what do we do then? Well, that's what the third core API, resolve, is for:
#![allow(unused)]
fn main() {
pub fn update(data: &[u8]) -> Vec<u8>
pub fn resolve(id: u32, data: &[u8]) -> Vec<u8>
pub fn view() -> Vec<u8>
}
Each effect request comes with an identifier. We use resolve to return the
output of the effect back to the app, alongside the identifier, so that it can
be paired correctly.
Let's look at how this works in practice.
Platforms
You can continue with your platform of choice:
iOS/macOS
This is the first of the shell chapters. We'll walk through how the Swift side talks to the Rust core, how each effect gets carried out, and how the views consume the view model. The other shell chapters follow the same structure in their own idioms.
The WeatherKit package
The Apple shell is split into two Swift targets:
WeatherApp(the app target) — just a few files: the@mainstruct, theLiveBridgethat talks to Rust, andContentViewas the root view.WeatherKit(a local Swift Package) — everything else:Core, every effect handler, every screen.
The split exists because building Swift is much faster than rebuilding the whole Rust framework, and SPM gives you the kind of iteration loop you'd expect from cargo. When you're tweaking a view, you only recompile the package. When you're iterating on effect handlers, same — the Rust library (and the Swift bindings it emits) only recompile when the core changes.
Everything in WeatherKit is written against a CoreBridge protocol rather than talking to the Rust FFI directly. That's what lets SwiftUI previews construct a Core with a FakeBridge; they don't need the Rust framework loaded. More on that at the end.
Booting the Core
Here's the app entry point:
    init() {
        let bridge = LiveBridge()
        let core = Core(bridge: bridge)
        _core = State(wrappedValue: core)
        updater = CoreUpdater { core.update($0) }
        core.update(.start)
    }
Five lines: construct the bridge, build the Core, bind it to SwiftUI state, wire up an updater, and send Event::Start to kick the lifecycle. After that, the core starts fetching the API key and favourites — everything we described in chapter 3.
The FFI bridge
LiveBridge is the thin Swift type that carries events and effect responses across the FFI boundary:
import App
import Foundation
import Shared
import WeatherKit
import os

private let logger = Logger(subsystem: "com.crux.examples.weather", category: "live-bridge")

/// Wraps `CoreFFI` to communicate with the Rust core. Handles bincode
/// serialization/deserialization so that `Core` works with Swift types only.
/// This lives in the app target (not WeatherKit) so that SwiftUI previews
/// don't need to load the Rust framework.
struct LiveBridge: CoreBridge {
    private let ffi: CoreFFI

    init() {
        ffi = CoreFFI()
    }

    func processEvent(_ event: Event) -> [Request] {
        let eventBytes = try! event.bincodeSerialize()  // swiftlint:disable:this force_try
        logger.debug("sending \(eventBytes.count) event bytes")

        let effects = [UInt8](ffi.update(data: Data(eventBytes)))
        logger.debug("received \(effects.count) effect bytes")

        return deserializeRequests(effects)
    }

    func resolve(requestId: UInt32, responseBytes: [UInt8]) -> [Request] {
        logger.debug("resolve: id=\(requestId) sending \(responseBytes.count) bytes")

        let effects = [UInt8](ffi.resolve(id: requestId, data: Data(responseBytes)))
        return deserializeRequests(effects)
    }

    func currentView() -> ViewModel {
        // swiftlint:disable:next force_try
        try! .bincodeDeserialize(input: [UInt8](ffi.view()))
    }

    private func deserializeRequests(_ bytes: [UInt8]) -> [Request] {
        if bytes.isEmpty { return [] }
        if bytes.count < 8 {
            logger.error("response too short (\(bytes.count) bytes)")
            return []
        }
        return try! Requests.bincodeDeserialize(input: bytes).value  // swiftlint:disable:this force_try
    }
}
Three responsibilities:
processEvent(_:)serialises a SwiftEventwith bincode, callsCoreFFI.update(data:), and deserialises the returned effect requests.resolve(requestId:responseBytes:)does the same for effect responses — and, importantly, can return further effect requests (async commands produce more effects after each resolve).currentView()deserialises the current view model.
This is the only place that knows about bincode or CoreFFI. Everything else in the Swift code works with Swift types.
Handling effects
The Core class in WeatherKit owns the bridge and dispatches effect requests:
    func processEffect(_ request: Request) {
        switch request.effect {
        case .render:
            view = bridge.currentView()
        case let .time(timeRequest):
            resolveTime(request: timeRequest, requestId: request.id)
        case let .secret(secretRequest):
            resolveSecret(request: secretRequest, requestId: request.id)
        case let .http(httpRequest):
            resolveHttp(request: httpRequest, requestId: request.id)
        case let .keyValue(kvRequest):
            resolveKeyValue(request: kvRequest, requestId: request.id)
        case let .location(locationRequest):
            resolveLocation(request: locationRequest, requestId: request.id)
        }
    }
An exhaustive match on the effect type. Each branch delegates to a resolve<Capability> function defined in its own file (http.swift, kv.swift, location.swift, secret.swift, time.swift). The handlers are implemented as Swift extensions on Core, so they share state (like the KeyValueStore and the active timer list) without needing to pass it around.
Here's the HTTP handler in full:
import App
import Foundation

private let logger = Log.http

extension Core {
    func resolveHttp(request: HttpRequest, requestId: UInt32) {
        Task {
            logger.debug("sending \(request.method) \(request.url)")
            let result = await performHttpRequest(request)
            resolve(requestId: requestId, serialize: { try result.bincodeSerialize() })
        }
    }

    private func performHttpRequest(_ request: HttpRequest) async -> HttpResult {
        guard let url = URL(string: request.url) else {
            return .err(.url("Invalid URL"))
        }

        var urlRequest = URLRequest(url: url)
        urlRequest.httpMethod = request.method
        for header in request.headers {
            urlRequest.addValue(header.value, forHTTPHeaderField: header.name)
        }
        if !request.body.isEmpty {
            urlRequest.httpBody = Data(request.body)
        }

        do {
            let (data, response) = try await URLSession.shared.data(for: urlRequest)
            guard let httpResponse = response as? HTTPURLResponse else {
                return .err(.io("Not an HTTP response"))
            }
            logger.debug("received \(httpResponse.statusCode) from \(request.url)")
            let headers = (httpResponse.allHeaderFields as? [String: String] ?? [:])
                .map { HttpHeader(name: $0.key, value: $0.value) }
            return .ok(
                HttpResponse(
                    status: UInt16(httpResponse.statusCode),
                    headers: headers,
                    body: [UInt8](data)
                )
            )
        } catch let error as URLError where error.code == .timedOut {
            logger.debug("request timed out: \(request.url)")
            return .err(.timeout)
        } catch {
            logger.warning("request failed: \(error.localizedDescription)")
            return .err(.io(error.localizedDescription))
        }
    }
}
resolveHttp starts a Task to run off the main actor, performs the request with URLSession, serialises the result, and calls resolve(requestId:serialize:). That call is where things get interesting:
    func resolve(requestId: UInt32, serialize: () throws -> [UInt8]) {
        let responseBytes = try! serialize() // swiftlint:disable:this force_try
        let requests = bridge.resolve(requestId: requestId, responseBytes: responseBytes)
        for request in requests {
            processEffect(request)
        }
    }
It passes the bytes to the bridge and then loops over any new effect requests that came back. This is a direct consequence of Command's async nature: a command written with .await points produces its next effect only after the previous one is resolved. The shell has to keep processing until the command's task finishes.
The other effect handlers follow the same shape — run the work, serialise the response, call resolve(requestId:serialize:).
Views driven by the ViewModel
The Core class exposes its view model via @Observable, so SwiftUI views can read it directly. @Observable signals at the property level: when one property changes from render to render, only views attached to that property re-render. The rest of the view hierarchy stays exactly as it was, rather than rebuilding wholesale each time the model updates.
The root ContentView dispatches on the top-level ViewModel variants:
import SwiftUI
import WeatherKit

struct ContentView: View {
    @Environment(Core.self) var core

    var body: some View {
        switch core.view {
        case .loading:
            ProgressView("Loading...")

        case let .onboard(onboard):
            OnboardView(model: onboard)

        case let .active(active):
            ActiveView(model: active)

        case let .failed(message):
            FailedView(message: message)
        }
    }
}
Four lifecycle states, four views. ActiveView in turn dispatches on the active sub-variants (Home vs Favorites), and so on down the tree — each level of the model has a corresponding layer of view.
When the user taps a button, the view sends an event via the CoreUpdater that was injected into the environment at the app root. The event travels through the bridge, the core updates its state, and the @Observable property re-renders the view.
Previewing with FakeBridge
Because WeatherKit is written against CoreBridge, we can construct a Core for SwiftUI previews without loading the Rust framework:
import App
import Foundation

/// Abstraction over the Rust FFI boundary. Production uses `LiveBridge` (defined in the app);
/// previews use `FakeBridge` to avoid loading the Rust framework.
public protocol CoreBridge {
    func processEvent(_ event: Event) -> [Request]
    func resolve(requestId: UInt32, responseBytes: [UInt8]) -> [Request]
    func currentView() -> ViewModel
}

/// No-op bridge for SwiftUI previews. Returns a static view model
/// and ignores all events.
#if DEBUG
    public struct FakeBridge: CoreBridge {
        let view: ViewModel

        public init(view: ViewModel) {
            self.view = view
        }

        public func processEvent(_: Event) -> [Request] { [] }
        public func resolve(requestId _: UInt32, responseBytes _: [UInt8]) -> [Request] { [] }
        public func currentView() -> ViewModel { view }
    }
#endif
FakeBridge returns a static ViewModel and ignores everything else. Combined with the Core.forPreviewing helper, any view can be previewed with whatever ViewModel state you want — previews run as fast as regular SwiftUI previews, no FFI boundary to cross.
What's next
That's one shell end-to-end. The core doesn't know or care what platform it's on; everything platform-specific lives here. The other shell chapters walk through the same story — booting the core, the bridge, the effect handlers, the views — in Kotlin, Rust with Leptos, and TypeScript with React.
Happy building!
Android
The Android shell talks to the Rust core the same way the iOS shell does — serialise events, hand them across the FFI, deserialise effect requests, handle each effect, resolve with the response, repeat. The Kotlin and Compose idioms differ from Swift and SwiftUI, but the shape is the same.
Booting the Core with Hilt
The Android app uses Dagger Hilt to wire up the core and its dependencies. WeatherApplication is annotated @HiltAndroidApp, which bootstraps the DI graph, and MainActivity is @AndroidEntryPoint, which lets it receive @Inject field injection. Handlers and the core itself use constructor injection — so the Hilt module is small:
package com.crux.example.weather.di

import dagger.Module
import dagger.Provides
import dagger.hilt.InstallIn
import dagger.hilt.components.SingletonComponent
import okhttp3.OkHttpClient
import java.util.concurrent.TimeUnit
import javax.inject.Singleton

@Module
@InstallIn(SingletonComponent::class)
object AppModule {
    @Provides
    @Singleton
    fun provideOkHttpClient(): OkHttpClient =
        OkHttpClient
            .Builder()
            .connectTimeout(15, TimeUnit.SECONDS)
            .readTimeout(30, TimeUnit.SECONDS)
            .writeTimeout(30, TimeUnit.SECONDS)
            .build()
}
The only explicit provider is OkHttpClient, since it isn't under our control. Core and every handler get @Inject constructor(...) — Hilt figures out the graph from there.
Core itself takes five injected dependencies — one per capability that needs a real-world implementation: HttpHandler (OkHttp), LocationHandler (Fused Location Provider + permission flow), KeyValueHandler (DataStore-backed), SecretStore (AndroidKeyStore-backed), and TimeHandler (coroutine timers).
One thing to flag upfront: the word "ViewModel" shows up in two senses on Android. Crux's own ViewModel is the state projection produced by the core — what the UI ultimately consumes. Android's androidx.lifecycle.ViewModel is the lifecycle-aware class that survives configuration changes. The per-screen Android VMs (HomeViewModel, FavoritesViewModel, OnboardViewModel) sit between them: they observe a flow of Crux view models from Core and map each one to a Compose-friendly UI state. All three are @HiltViewModel @Inject constructor(...).
Core kicks the lifecycle off right in its init block:
        init {
            update(Event.Start)
        }
The same Event.Start we saw in chapter 3 — the moment the core is constructed, it fetches the API key and favourites.
The FFI bridge
Kotlin doesn't have a separate bridge file like Swift's LiveBridge; the bridging is inline in Core.kt. Here's the top of the class with the FFI instance and the flow the view layer observes:
@Singleton
class Core
    @Inject
    constructor(
        private val httpHandler: HttpHandler,
        private val locationHandler: LocationHandler,
        private val keyValueHandler: KeyValueHandler,
        private val secretStore: SecretStore,
        private val timeHandler: TimeHandler,
    ) {
        private val coreFfi = CoreFfi()
        private val scope = CoroutineScope(SupervisorJob() + Dispatchers.Main.immediate)

        private val _viewModel: MutableStateFlow<ViewModel> = MutableStateFlow(getViewModel())
        val viewModel: StateFlow<ViewModel> = _viewModel.asStateFlow()

        init {
            update(Event.Start)
        }

        fun homeViewModel(): Flow<HomeViewModel> =
            viewModel.mapNotNull { vm ->
                (vm as? ViewModel.Active)?.let { (it.value as? ActiveViewModel.Home)?.value }
            }

        fun favoritesViewModel(): Flow<FavoritesViewModel> =
            viewModel.mapNotNull { vm ->
                (vm as? ViewModel.Active)?.let { (it.value as? ActiveViewModel.Favorites)?.value }
            }

        fun onboardViewModel(): Flow<OnboardViewModel> =
            viewModel.mapNotNull { (it as? ViewModel.Onboard)?.value }

        fun update(event: Event) {
            Log.d(TAG, "update: $event")
            scope.launch {
                val effects = coreFfi.update(event.bincodeSerialize())
                handleEffects(effects)
            }
        }
update(event) serialises the event with bincode, calls coreFfi.update(...), and hands the resulting bytes to handleEffects. The Crux view-model flow (_viewModel) is a MutableStateFlow<ViewModel> — a Kotlin coroutines type that always holds a current value, and conflates on equality: when you set the flow's .value, collectors are only notified if the new value differs from the previous one. That property keeps identical renders from rippling downstream.
Handling effects
handleEffects deserialises the list of effect requests and dispatches each one:
        private suspend fun processRequest(request: Request) {
            Log.d(TAG, "processRequest: $request")

            when (val effect = request.effect) {
                is Effect.Http -> {
                    handleHttpEffect(effect, request.id)
                }

                is Effect.KeyValue -> {
                    handleKeyValueEffect(effect, request.id)
                }

                is Effect.Location -> {
                    handleLocationEffect(effect, request.id)
                }

                is Effect.Secret -> {
                    handleSecretEffect(effect, request.id)
                }

                is Effect.Time -> {
                    // Fire-and-forget: the time handler launches its own coroutines
                    // and resolves asynchronously when timers fire.
                    timeHandler.handle(effect.value, request.id, ::resolveAndHandleEffects)
                }

                is Effect.Render -> {
                    render()
                }
            }
        }
An exhaustive when over the sealed Effect class — Kotlin's equivalent of the Swift match, and the compiler enforces the coverage. Each branch delegates to a per-capability handler method.
Here's the HTTP handler delegation:
        private suspend fun handleHttpEffect(
            effect: Effect.Http,
            requestId: UInt,
        ) {
            val result = httpHandler.request(effect.value)
            resolveAndHandleEffects(requestId, result.bincodeSerialize())
        }
httpHandler.request(...) is a suspend function that wraps OkHttp:
        suspend fun request(op: HttpRequest): HttpResult =
            withContext(Dispatchers.IO) {
                Log.d(TAG, "${op.method} ${op.url}")
                try {
                    val body =
                        when {
                            op.body.content.isNotEmpty() ->
                                op.body.content.toUByteArray().toByteArray().toRequestBody()
                            op.method.uppercase() in BODY_REQUIRED_METHODS -> ByteArray(0).toRequestBody()
                            else -> null
                        }

                    val okRequest =
                        Request
                            .Builder()
                            .url(op.url)
                            .method(op.method, body)
                            .apply { op.headers.forEach { addHeader(it.name, it.value) } }
                            .build()

                    client.newCall(okRequest).execute().use { response ->
                        val status = response.code.toUShort()
                        val headers = response.headers.toList().map { (name, value) -> HttpHeader(name, value) }
                        val responseBody = response.body?.bytes() ?: ByteArray(0)
                        Log.d(TAG, "${op.method} ${op.url} → $status")
                        HttpResult.Ok(HttpResponse(status, headers, Bytes(responseBody)))
                    }
                } catch (e: SocketTimeoutException) {
                    Log.d(TAG, "timeout: ${op.url}")
                    HttpResult.Err(HttpError.Timeout)
                } catch (e: UnknownHostException) {
                    Log.d(TAG, "unknown host: ${op.url}")
                    HttpResult.Err(HttpError.Io("Unknown host: ${e.message}"))
                } catch (e: IllegalArgumentException) {
                    Log.w(TAG, "invalid URL ${op.url}: ${e.message}")
                    HttpResult.Err(HttpError.Url(e.message ?: "Invalid URL"))
                } catch (e: Exception) {
                    Log.w(TAG, "request failed for ${op.url}: ${e.message}")
                    HttpResult.Err(HttpError.Io(e.message ?: "IO error"))
                }
            }
When it returns, we serialise the result and call resolveAndHandleEffects:
        private suspend fun resolveAndHandleEffects(
            requestId: UInt,
            data: ByteArray,
        ) {
            Log.d(TAG, "resolveAndHandleEffects for request id: $requestId")
            val effects = coreFfi.resolve(requestId, data)
            handleEffects(effects)
        }
Which calls coreFfi.resolve(...) and then recurses through handleEffects with the new effect requests. Same reason as in the iOS chapter: Command is async, and a command with multiple .await points produces its next effect only after the previous one is resolved. The shell has to keep looping.
The other handlers (handleKeyValueEffect, handleLocationEffect, handleSecretEffect, plus the timeHandler.handle(...) delegation) all follow the same pattern.
Views driven by the Crux view model
Core exposes the current view model as a StateFlow<ViewModel>, so Compose can collect it with collectAsState() and recompose when it changes. The root of the view tree lives in MainActivity.onCreate:
        setContent {
            WeatherTheme {
                val state by core.viewModel.collectAsState()

                BackHandler(enabled = state is ViewModel.Active) {
                    handleBackNavigation(state)
                }

                AnimatedContent(
                    targetState = state,
                    contentKey = { it::class },
                    transitionSpec = {
                        fadeIn(animationSpec = tween(200)).togetherWith(
                            fadeOut(animationSpec = tween(200))
                        )
                    },
                ) { viewModel ->
                    when (viewModel) {
                        is ViewModel.Loading -> LoadingScreen()

                        is ViewModel.Onboard -> OnboardScreen()

                        is ViewModel.Active -> {
                            when (viewModel.value) {
                                is ActiveViewModel.Home -> HomeScreen()
                                is ActiveViewModel.Favorites -> FavoritesScreen()
                            }
                        }

                        is ViewModel.Failed -> FailedScreen(message = viewModel.message)
                    }
                }
            }
        }
AnimatedContent cross-fades between screens as the lifecycle state changes. A when block dispatches on the top-level ViewModel variants, and ActiveViewModel gets a nested when for Home vs Favorites.
The individual screens (HomeScreen, FavoritesScreen, OnboardScreen) don't take the Crux view model directly — they get a per-screen Android ViewModel via hiltViewModel(), which owns a UiStateMapper that transforms the Crux data into a Compose-friendly UiState. This is standard Android MVVM and keeps the Compose layer free of Crux-specific types.
Two things keep that loop efficient. StateFlow suppresses equal emissions, so if a screen's mapper produces a UiState that equals the previous one, the flow doesn't emit at all. When it does emit, Compose's recomposition is equality-based — composables whose inputs haven't changed are skipped. The practical effect is the same as iOS's @Observable: a small change in the Crux model triggers a small recomposition, not a sweep of the whole tree.
What's next
That's the Android shell. Structure-wise it mirrors iOS: events go in, effects come out, the view layer collects the view model. The rest of the app is screens and view models — standard Compose work.
Happy building!
React (Next.js)
The Next.js shell is TypeScript talking to a WASM blob. Events serialise as bincode, cross the FFI, return effect requests; the shell handles each one, serialises the response, sends it back — the same Request/Response loop as iOS and Android, just in JavaScript. The interesting half of the chapter is how React's render model shapes the shell, because it's the opposite of Leptos's.
Components re-run on every render
In Leptos, a #[component] function runs once, at mount. Signals keep state alive across time; move || closures inside view! re-render fine-grained slots.
React is the other way round. A function component runs every time its state changes — top to bottom, from scratch. Each render produces a new virtual DOM; React diffs against the previous one and patches the actual DOM. Hooks — useState, useRef, useContext, useMemo, useCallback — exist to keep values alive across those reruns and to schedule work at specific moments rather than on every render.
Three consequences for the Crux shell:
- The
Coreinstance has to live in auseRef, not a plain local. A freshnew Core()on every render would break effect resolution mid-flight. - The view model becomes
useState<ViewModel>: React-owned state, whose setter triggers a re-render when the core hands us a new view model. - The dispatcher is wrapped in
useCallbackso its reference is stable across renders. Button handlers that capture it don't then capture a moving target.
Booting the Core
The root of the tree is a CoreProvider:
/**
 * Creates the Crux core once, drives its view model into React state, and
 * exposes `dispatch` as a stable callback via context.
 */
export function CoreProvider({ children }: { children: ReactNode }) {
  const [view, setView] = useState<ViewModel>(new ViewModelVariantLoading());
  const coreRef = useRef<Core | null>(null);
  const initialized = useRef(false);

  useEffect(() => {
    if (initialized.current) return;
    initialized.current = true;

    wasmInitialized.then(() => {
      if (!coreRef.current) {
        coreRef.current = new Core(setView);
      }
      coreRef.current.update(new EventVariantStart());
    });
  }, []);

  // Stable across renders — `useCallback` with empty deps keeps the same
  // reference, so context consumers don't cascade unnecessary renders.
  const dispatch = useCallback((event: Event) => {
    coreRef.current?.update(event);
  }, []);

  return (
    <DispatchContext.Provider value={dispatch}>
      <ViewModelContext.Provider value={view}>
        {children}
      </ViewModelContext.Provider>
    </DispatchContext.Provider>
  );
}
Three things happen in this component.
The useRef holds the Core across renders. coreRef.current points at the same instance every time the function runs; assigning once inside the init effect locks it in.
The init useEffect has an empty dep array, which React reads as "run on mount, once". It awaits the WASM module's initialized promise, then constructs the Core and fires Event::Start to kick off the lifecycle. The initialized.current guard is belt-and-braces for StrictMode (on by default in Next.js), which double-invokes effects in development to surface resource-leak bugs.
The dispatch callback is wrapped in useCallback(_, []) so its reference is stable. Consumers of useDispatch() get the same function every render, which matters when passing it into handlers — otherwise every view update would invalidate every handler and trigger spurious re-renders of memoised children.
The signal model — React edition
Same directional story as Leptos: state flows in, events flow out. The mechanisms are different, but the shape is the same. Two separate contexts:
/**
 * Two separate contexts so components that only need `dispatch` don't
 * re-render when the view model changes. Mirrors the Leptos split between
 * `Signal<ViewModel>` and `UnsyncCallback<Event>`.
 */
const ViewModelContext = createContext<ViewModel | null>(null);
const DispatchContext = createContext<((event: Event) => void) | null>(null);
Splitting them matters. With both view and dispatch in one context, every view change re-renders every consumer of either side — even a component that only needed dispatch. Two contexts means useDispatch() consumers only re-render when the stable callback reference changes, which it never does.
Consumers pull either side with a hook:
export function useViewModel(): ViewModel {
  const view = useContext(ViewModelContext);
  if (view === null) {
    throw new Error("useViewModel must be used within CoreProvider");
  }
  return view;
}

export function useDispatch(): (event: Event) => void {
  const dispatch = useContext(DispatchContext);
  if (dispatch === null) {
    throw new Error("useDispatch must be used within CoreProvider");
  }
  return dispatch;
}
Then components fire events with:
const dispatch = useDispatch();
dispatch(new EventVariantActive(new ActiveEventVariantResetApiKey()));
Both directions cross the FFI as bincode. dispatch is just a JS callback wrapping the serialise-and-call-update flow; setView is a React state setter the Core invokes after deserialising the response to Effect::Render.
Projecting with useMemo
The root reads the whole ViewModel and picks off per-stage slices for each screen:
const AppShell = () => {
  const view = useViewModel();

  // Project the top-level view model into per-stage slices. React's useMemo
  // is the coarse equivalent of Leptos's `Memo`: recomputes only when `view`
  // changes, but doesn't diff deeper than reference equality.
  const onboardVm = useMemo(
    () => (view instanceof ViewModelVariantOnboard ? view.value : null),
    [view],
  );
  const homeVm = useMemo(() => pickHome(view), [view]);
  const favoritesVm = useMemo(() => pickFavorites(view), [view]);
  const failedMessage = useMemo(
    () => (view instanceof ViewModelVariantFailed ? view.message : null),
    [view],
  );

  return (
    <main className="max-w-xl mx-auto px-4 py-8">
      <ScreenHeader
        title="Crux Weather"
        subtitle="Rust Core, TypeScript Shell (Next.js)"
        icon={CloudSun}
      />
      {view instanceof ViewModelVariantLoading && (
        <Card>
          <Spinner message="Loading..." />
        </Card>
      )}
      {onboardVm && <OnboardView model={onboardVm} />}
      {homeVm && <HomeView model={homeVm} />}
      {favoritesVm && <FavoritesView model={favoritesVm} />}
      {failedMessage !== null && (
        <Card>
          <StatusMessage
            icon={WarningCircle}
            message={failedMessage}
            tone="error"
          />
        </Card>
      )}
    </main>
  );
};
useMemo(() => …, [view]) is the React analogue of Leptos's Memo in intent: keep the projection logic explicit and rerun it when view changes. Coarser in one important way — React compares deps by reference, not value. Every Effect::Render produces a freshly deserialised ViewModel, so view is always a new object and the memo always recomputes. For Weather that's fine; the projection functions are cheap.
So the win here is mostly clarity: the stage-picking logic lives in one place, and each child receives the slice it cares about. It is not fine-grained reactivity, and it doesn't by itself make child handlers stable or suppress rerenders deeper in the tree. If you wanted that, you'd reach for React.memo and/or stable callbacks at the relevant component boundary — but this example doesn't need the extra machinery.
Handling effects
The FFI bridge is a single class:
export class Core {
  core: CoreFFI;
  callback: Dispatch<SetStateAction<ViewModel>>;

  constructor(callback: Dispatch<SetStateAction<ViewModel>>) {
    this.callback = callback;
    this.core = CoreFFI.new();
  }

  update(event: Event) {
    const serializer = new BincodeSerializer();
    event.serialize(serializer);

    const effects = this.core.update(serializer.getBytes());

    const requests = deserializeRequests(effects);
    for (const { id, effect } of requests) {
      this.resolve(id, effect);
    }
  }
update serialises an event with BincodeSerializer, calls CoreFFI.update (the WASM export), and deserialises the returned bytes into Request objects. Each request carries an id and an effect; we walk them and dispatch each to a per-capability branch.
HTTP looks like this:
      case EffectVariantHttp: {
        const request = (effect as EffectVariantHttp).value;
        const response = await http.request(request);
        this.respond(id, response);
        break;
      }
The handler in http.ts is a fetch wrapper that turns the shared HttpRequest into a browser Request and the Response back into the shared HttpResult. When it returns, we call respond:
  respond(id: number, response: Response) {
    const serializer = new BincodeSerializer();
    response.serialize(serializer);

    const effects = this.core.resolve(id, serializer.getBytes());

    const requests = deserializeRequests(effects);
    for (const { id, effect } of requests) {
      this.resolve(id, effect);
    }
  }
Same recursion as the other shells: serialise the response, call CoreFFI.resolve, and loop through any new effect requests that come back. A Crux command with .await points produces its next effect only after the previous one resolves, so the shell has to keep going until the command's task actually finishes.
The other capabilities — kv, location, secret, time — follow the same shape.
Shared components
Screens compose a set of Tailwind-styled presentational components in src/app/components/common/: Card, Button, IconButton, Spinner, StatusMessage, TextField, ScreenHeader, SectionTitle, Modal. Same names and variant set as the Leptos shell — Button takes primary | secondary | danger; StatusMessage takes neutral | error — so a reader who's seen both shells sees the same vocabulary twice in slightly different dialects. clsx handles the conditional-class plumbing.
The Home screen pulls its slice from props, calls useDispatch once, and wires buttons to events:
export function HomeView({ model }: { model: HomeViewModel }) {
  const dispatch = useDispatch();
  const lw = model.local_weather;

  return (
    <>
      <Card className="mb-4">
        {lw instanceof LocalWeatherViewModelVariantCheckingPermission && (
          <StatusMessage
            icon={MapPinLine}
            message="Checking location permission..."
          />
        )}
        {lw instanceof LocalWeatherViewModelVariantLocationDisabled && (
          <StatusMessage
            icon={MapPinLine}
            message="Location is disabled. Enable location access to see local weather."
          />
        )}
        {lw instanceof LocalWeatherViewModelVariantFetchingLocation && (
          <Spinner message="Getting your location..." />
        )}
        {lw instanceof LocalWeatherViewModelVariantFetchingWeather && (
          <Spinner message="Loading weather data..." />
        )}
        {lw instanceof LocalWeatherViewModelVariantFetched && (
          <WeatherDetail data={lw.value} />
        )}
        {lw instanceof LocalWeatherViewModelVariantFailed && (
          <StatusMessage
            icon={CloudSlash}
            message="Failed to load weather."
            tone="error"
          />
        )}
      </Card>
      {model.favorites.length > 0 && (
        <Card className="mb-4">
          <SectionTitle icon={Star} title="Favourites" />
          <div className="grid gap-2">
            {model.favorites.map((fav, i) => (
              <FavoriteWeatherCard key={i} fav={fav} />
            ))}
          </div>
        </Card>
      )}
      <div className="flex justify-center gap-2 mt-4">
        <Button
          label="Favourites"
          icon={Star}
          onClick={() =>
            dispatch(
              new EventVariantActive(
                new ActiveEventVariantHome(
                  new HomeEventVariantGoToFavorites(),
                ),
              ),
            )
          }
        />
        <Button
          label="Reset API Key"
          icon={Key}
          variant="secondary"
          onClick={() =>
            dispatch(
              new EventVariantActive(new ActiveEventVariantResetApiKey()),
            )
          }
        />
      </div>
    </>
  );
}
Icons come from @phosphor-icons/react as typed components (<Key size={18} />). The icon prop on Button takes a phosphor component directly; inside the component it's destructured as { icon: Icon } so JSX can render it with a PascalCase tag.
What's next
That's the Next.js shell. Structurally the same as the other shells — events in, effects out, view model drives the tree. What's distinctive is the render model (top-to-bottom on every state change, hooks as the persistence mechanism) and the two-context split that keeps dispatch-only consumers off the re-render path.
Happy building!
Leptos
In Leptos the shell and the core are both Rust, so there's no FFI boundary — Effect values flow directly, no bincode in between. The handshake is simpler than iOS or Android for that reason, but the render model is far enough from React or SwiftUI that it's worth pausing on before we get to the code.
Components run once
In React, a component function runs every time state changes. Hooks — useState, useEffect — exist to keep values alive across those reruns and to schedule side-effects at the right moment.
Leptos doesn't work that way. A #[component] function runs once, when it mounts. Signals, context, and closures created inside the body are created once and stay. What reruns is the fine-grained parts inside the view! macro: a move || closure tracks the signals it reads, and reruns only that closure when any of them change. The rest of the function body never runs again.
So this works without ceremony:
let (view, set_view) = signal(core.view());The signal is created on mount and persists for the life of the component. There's no useState equivalent because the closure is the persistence.
The practical consequence: the root component creates the core, the view signal, and the dispatcher once, and hands them out to the tree.
Booting the core
main.rs is trivial — it mounts the root component:
fn main() {
    _ = console_log::init_with_level(log::Level::Debug);
    console_error_panic_hook::set_once();

    leptos::mount::mount_to_body(web_leptos::App);
}
The setup lives in lib.rs:
/// The root component: the single point where the core, the view signal,
/// and the dispatcher meet.
///
/// Two pieces of state leave this component:
///
/// - `view: ReadSignal<ViewModel>` — the reactive read-side of the model.
///   Memos below project it into per-stage sub-view-models.
/// - `dispatch: UnsyncCallback<Event>` — an imperative callback handed
///   through context. Events are commands, not state, so they don't live
///   in a signal.
#[component]
pub fn app() -> impl IntoView {
    let core = core::new();
    let (view, set_view) = signal(core.view());

    let dispatch_core = Rc::clone(&core);
    let dispatch = UnsyncCallback::new(move |event: Event| {
        core::update(&dispatch_core, event, set_view);
    });
    provide_context(DispatchContext(dispatch));

    // Fire `Event::Start` once on mount. We defer it to an effect so
    // `provide_context` has finished wiring before any child reads it.
    let start_core = Rc::clone(&core);
    Effect::new(move |_| {
        core::update(&start_core, Event::Start, set_view);
    });

    // Project the top-level view model into per-stage memos. Each screen
    // component takes one of these and reads individual fields via
    // `.read()` or `.with()` inside its own reactive closures.
    //
    // The `_ => Default::default()` branches are never visible: `Show`
    // below only mounts the matching subtree. The Default is load-bearing
    // for types — it lets the Memo produce a concrete `HomeViewModel`
    // regardless of which variant the parent signal is currently in.
    let onboard_vm = Memo::new(move |_| {
        view.with(|v| match v {
            ViewModel::Onboard(m) => m.clone(),
            _ => OnboardViewModel::default(),
        })
    });
    let home_vm = Memo::new(move |_| {
        view.with(|v| match v {
            ViewModel::Active(ActiveViewModel::Home(m)) => m.clone(),
            _ => HomeViewModel::default(),
        })
    });
    let favorites_vm = Memo::new(move |_| {
        view.with(|v| match v {
            ViewModel::Active(ActiveViewModel::Favorites(m)) => m.clone(),
            _ => FavoritesViewModel::default(),
        })
    });
    let failed_message = Memo::new(move |_| {
        view.with(|v| match v {
            ViewModel::Failed { message } => message.clone(),
            _ => String::new(),
        })
    });

    view! {
        <div class="max-w-xl mx-auto px-4 py-8">
            <ScreenHeader
                title="Crux Weather"
                subtitle="Rust Core, Rust Shell (Leptos)"
                icon=CLOUD_SUN
            />
            <Show when=move || view.with(|v| matches!(v, ViewModel::Loading))>
                <Card>
                    <Spinner message="Loading..." />
                </Card>
            </Show>
            <Show when=move || view.with(|v| matches!(v, ViewModel::Onboard(_)))>
                <OnboardView vm=onboard_vm />
            </Show>
            <Show when=move || view.with(|v| matches!(v, ViewModel::Active(ActiveViewModel::Home(_))))>
                <HomeView vm=home_vm />
            </Show>
            <Show when=move || view.with(|v| matches!(v, ViewModel::Active(ActiveViewModel::Favorites(_))))>
                <FavoritesView vm=favorites_vm />
            </Show>
            <Show when=move || view.with(|v| matches!(v, ViewModel::Failed { .. }))>
                {move || view! {
                    <Card>
                        <StatusMessage
                            icon=WARNING_CIRCLE
                            message=failed_message.get()
                            tone=StatusTone::Error
                        />
                    </Card>
                }}
            </Show>
        </div>
    }
}
Three things leave this function.
The core is wrapped in an Rc because the dispatcher and the startup effect each need their own handle. Both captures own a clone of the same shared::Core<Weather>.
The view signal (view, set_view) holds the current ViewModel. It's initialised from core.view() so the first render has something to paint. Leptos itself doesn't know what a Crux view model is — to Leptos, this is just a Signal<ViewModel> that gets set from somewhere.
The dispatcher is an UnsyncCallback<Event> — a thin wrapper around Rc<dyn Fn>. It takes an Event, pushes it into the core, and resolves whatever comes back. provide_context parks it on the component tree so every descendant can pull it without prop-threading.
The Effect::new at the bottom fires Event::Start once on mount. It has to be an effect rather than a bare function call because provide_context hasn't finished registering until the component body returns; deferring Start to the post-mount effect queue ensures startup doesn't race ahead of the tree being ready for it.
The signal model
Two kinds of state cross between the shell and the core, and they use different mechanisms:
- View model → shell: a signal. Leptos reads it reactively.
- Events → core: a callback. The shell invokes it imperatively.
It's tempting to make both signals — a (event, set_event) pair that an Effect watches and forwards to the core. An earlier iteration of this shell did exactly that. It works, but it's wrong in two ways.
First, signals conflate consecutive writes. If you set_event.set(A) and then set_event.set(B) before the reactive system flushes, A is lost. Events can't be lost — they're commands, each one has to reach the core in order.
Second, signals model state, not commands. Using a callback for events and a signal for the view model keeps the directionality explicit: the shell asks the core to do something; the core tells the shell what its state is now.
The dispatcher lives in context:
/// A callback that sends events to the Crux core.
///
/// `UnsyncCallback` (rather than `Callback`) because `Rc<shared::Core<Weather>>`
/// is `!Send` — WASM is single-threaded, so we never cross a thread boundary
/// and don't need `Arc` / `Send` / `Sync`.
pub type SendEvent = UnsyncCallback<Event>;

/// Context wrapper for the global dispatcher.
///
/// Provided once in `App` via `provide_context` and read anywhere in the tree
/// via [`use_dispatch`]. Avoids threading a `WriteSignal<Event>` through every
/// component's prop list.
#[derive(Clone)]
pub struct DispatchContext(pub SendEvent);

/// Pull the dispatcher from component context.
#[must_use]
pub fn use_dispatch() -> SendEvent {
    expect_context::<DispatchContext>().0
}
UnsyncCallback rather than Callback because Rc<shared::Core<Weather>> is !Send — WASM is single-threaded, so there's no thread boundary to worry about and no reason to pay for Arc / Send / Sync.
Child components pull it with use_dispatch() and fire events as:
dispatch.run(Event::Active(ActiveEvent::ResetApiKey));Projecting the view model
The root holds a Signal<ViewModel>, but the individual screens only care about their own slice. A naive approach would clone the whole view model into each screen on every change; a better one is to project — derive a Memo<SubViewModel> per stage and hand each screen its own signal.
    // Project the top-level view model into per-stage memos. Each screen
    // component takes one of these and reads individual fields via
    // `.read()` or `.with()` inside its own reactive closures.
    //
    // The `_ => Default::default()` branches are never visible: `Show`
    // below only mounts the matching subtree. The Default is load-bearing
    // for types — it lets the Memo produce a concrete `HomeViewModel`
    // regardless of which variant the parent signal is currently in.
    let onboard_vm = Memo::new(move |_| {
        view.with(|v| match v {
            ViewModel::Onboard(m) => m.clone(),
            _ => OnboardViewModel::default(),
        })
    });
    let home_vm = Memo::new(move |_| {
        view.with(|v| match v {
            ViewModel::Active(ActiveViewModel::Home(m)) => m.clone(),
            _ => HomeViewModel::default(),
        })
    });
    let favorites_vm = Memo::new(move |_| {
        view.with(|v| match v {
            ViewModel::Active(ActiveViewModel::Favorites(m)) => m.clone(),
            _ => FavoritesViewModel::default(),
        })
    });
    let failed_message = Memo::new(move |_| {
        view.with(|v| match v {
            ViewModel::Failed { message } => message.clone(),
            _ => String::new(),
        })
    });
A Memo is a derived signal with built-in equality checking — it only notifies downstream readers when the projected value actually differs from the last. So home_vm emits only when the top-level view model is in the Home variant and the inner HomeViewModel has changed.
The _ => Default::default() branch is what makes this type-check without forcing Memo<Option<…>> on every screen. The fallback is never rendered: each <Show when=…> below gates its subtree to the matching variant, so the Default value only exists to satisfy the type system.
This requires Default impls on the stage view models, which live in shared/src/view/:
#![allow(unused)]
fn main() {
impl Default for OnboardStateViewModel {
    fn default() -> Self {
        Self::Input {
            api_key: String::new(),
            can_submit: false,
        }
    }
}
}
Enum #[derive(Default)] with a #[default] variant works for unit variants (like LocalWeatherViewModel::CheckingPermission); struct variants need a manual impl.
Reading the projection
The screen takes its projected signal as a prop and reads fields inside reactive closures. The Home screen is representative:
#[component]
pub fn home_view(#[prop(into)] vm: Signal<HomeViewModel>) -> impl IntoView {
    let dispatch = use_dispatch();

    view! {
        <Card class="mb-4">
            {move || {
                // Read the current `local_weather` slice. `.read()` returns
                // a guard that derefs to `&HomeViewModel`; clone the inner
                // variant so we can match it outside the borrow.
                let value = vm.read().local_weather.clone();
                match value {
                    LocalWeatherViewModel::CheckingPermission => view! {
                        <StatusMessage icon=MAP_PIN_LINE message="Checking location permission..." />
                    }.into_any(),
                    LocalWeatherViewModel::LocationDisabled => view! {
                        <StatusMessage
                            icon=MAP_PIN_LINE
                            message="Location is disabled. Enable location access to see local weather."
                        />
                    }.into_any(),
                    LocalWeatherViewModel::FetchingLocation => view! {
                        <Spinner message="Getting your location..." />
                    }.into_any(),
                    LocalWeatherViewModel::FetchingWeather => view! {
                        <Spinner message="Loading weather data..." />
                    }.into_any(),
                    LocalWeatherViewModel::Fetched(wd) => view! { <CurrentWeather data=*wd /> }.into_any(),
                    LocalWeatherViewModel::Failed => view! {
                        <StatusMessage
                            icon=CLOUD_SLASH
                            message="Failed to load weather."
                            tone=StatusTone::Error
                        />
                    }.into_any(),
                }
            }}
        </Card>
        {move || {
            // `.with(|v| ...)` is the closure form — borrow, project,
            // return whatever the closure returns. Here: the favourites
            // vector (cloned once per render).
            let favorites = vm.with(|v| v.favorites.clone());
            (!favorites.is_empty()).then(|| view! {
                <Card class="mb-4">
                    <SectionTitle icon=STAR title="Favourites" />
                    <div class="grid gap-2">
                        {favorites.into_iter().map(|fav| view! {
                            <FavoriteWeatherCard fav=fav />
                        }).collect::<Vec<_>>()}
                    </div>
                </Card>
            })
        }}
        <div class="flex justify-center gap-2 mt-4">
            <Button
                label="Favourites"
                icon=STAR
                on_click=UnsyncCallback::new(move |()| {
                    dispatch.run(Event::Active(ActiveEvent::home(HomeEvent::GoToFavorites)));
                })
            />
            <Button
                label="Reset API Key"
                icon=KEY
                variant=ButtonVariant::Secondary
                on_click=UnsyncCallback::new(move |()| {
                    dispatch.run(Event::Active(ActiveEvent::ResetApiKey));
                })
            />
        </div>
    }
}
Two read patterns appear here:
.read()returns a guard that derefs to&HomeViewModel. It's the direct form —vm.read().local_weather.clone()reads a field and clones the inner value. Good for single-field access..with(|v| …)takes a closure that borrows the whole value. Good when you want to project or test —vm.with(|v| v.favorites.clone())here, orview.with(|v| matches!(v, ViewModel::Loading))for a discriminant check.
Both avoid cloning the outer view model. .get() is available too but clones the entire value — fine for a Signal<bool> or Signal<String>, wasteful for a Signal<HomeViewModel>.
Each move || closure tracks only the fields it reads. When local_weather changes but favorites doesn't, only the first closure reruns. That's the granularity Leptos gives you — no VDOM diffing, just precise subscriptions.
Handling effects
core/mod.rs owns the per-effect dispatch. The kernel is a match on the Effect enum:
fn process_effect(core: &Core, effect: Effect, render: WriteSignal<ViewModel>) {
    match effect {
        Effect::Render(_) => render.set(core.view()),
        Effect::Http(request) => http::resolve(core, request, render),
        Effect::KeyValue(request) => kv::resolve(core, request, render),
        Effect::Location(request) => location::resolve(core, request, render),
        Effect::Secret(request) => secret::resolve(core, request, render),
        Effect::Time(request) => time::resolve(core, request, render),
    }
}
Five capability branches plus Render, which writes the current view model into the signal. The shell and the core share the same Rust types, so the match compiles into a direct call — no serialisation layer between them.
Each capability lives in its own file. Here's HTTP:
pub(super) fn resolve(
    core: &super::Core,
    mut request: crux_core::Request<HttpRequest>,
    render: WriteSignal<ViewModel>,
) {
    let core = core.clone();
    wasm_bindgen_futures::spawn_local(async move {
        let op = &request.operation;
        log::debug!("http {} {}", op.method, op.url);

        let response = send_request(op).await;
        super::resolve_effect(&core, &mut request, response.into(), render);
    });
}
spawn_local because WASM is single-threaded — there's no runtime to multiplex on. The closure makes the fetch call, then hands the response back to the core via resolve_effect:
pub type Core = Rc<shared::Core<Weather>>;

pub fn new() -> Core {
    Rc::new(shared::Core::new())
}

/// Push an event into the core and resolve every effect it produces.
pub fn update(core: &Core, event: Event, render: WriteSignal<ViewModel>) {
    log::debug!("event: {event:?}");
    process_effects(core, core.process_event(event), render);
}
core.resolve(...) returns a fresh batch of effects, so resolve_effect loops back through process_effect. A Crux command with .await points produces its next effect only after the previous one resolves, so the shell has to keep going until the command's task actually finishes.
The other capabilities — kv, location, secret, time — follow the same shape: take the request, do the work, resolve, recurse.
Shared components
Screens compose the shared components in components/common/ — Card, Button, Spinner, TextField, StatusMessage, Modal, and so on. They're plain Tailwind-styled Leptos components that know nothing about Crux; screens assemble them and wire each button to the dispatcher.
A Button takes label: Signal<String> (so static strings and reactive closures both work), enabled: Signal<bool>, an optional icon: IconData (&'static IconWeightData — phosphor's own alias), and an on_click: UnsyncCallback<()>. In practice the call site reads:
<Button
    label="Reset API Key"
    icon=KEY
    variant=ButtonVariant::Secondary
    on_click=UnsyncCallback::new(move |()| {
        dispatch.run(Event::Active(ActiveEvent::ResetApiKey));
    })
/>
The UnsyncCallback::new(move |()| dispatch.run(…)) pattern is the same bridge as elsewhere: Leptos's imperative event world meets the core's event log.
What's next
That's the Leptos shell end-to-end. The structural story is the same as iOS and Android — events in, effects out, view model drives the tree — but the reactivity primitives are Leptos-specific: a signal for the view model, Memos for the per-stage projection, a callback for events, and a move || per reactive slot.
Happy building!
Middleware
Middleware is a relatively new, and somewhat advanced feature for split effect handling, i.e. handling some effects in the shell, and some still in the core, but outside the app's state loop.
Middleware can be useful when you have an existing 3rd party library written in Rust which you want to use, but it isn't written in a sans-I/O way with managed effects or otherwise isn't compatible with Crux. This is sadly most libraries with side effects.
It is quite likely most apps will never need to use middleware. Before reaching for middleware, we encourage you to consider:
- Implementing the side-effect in each Shell using native, platform SDKs. Shared libraries give a productivity boost at first, but for the same reason Crux uses Capabilities, they can't always be the best platform citizens, and often rely on very low-level system APIs which compromise the experience, don't collaborate well with platform security measures, etc.
- Moving coordination logic from the Rust implementation into a custom capability in the core and implementing it on top of lower level capabilities, e.g. HTTP. This would be the case for HTTP API SDK type libraries, but may well not be practical at first
Only if neither of these is a good option, reach for a middleware. The cost of using it is that the effect handling becomes less straightforward, which may cause some headaches debugging effect ordering, etc.
We are also still learning how middleware operates in the wild, and the API may change more than the rest of Crux tends to.
All that said, the feature is used in production with success today and should work well.
How it works
Middleware sits between the Core and the Shell in the effect processing pipeline. When the app requests effects, they pass through the middleware stack on their way to the shell. A middleware layer can intercept specific effect variants, handle them (performing the side-effect in Rust), and resolve the request — all without the shell ever seeing that effect. Effects the middleware doesn't handle pass through to the shell as normal.
We'll walk through the counter-middleware example to see how this works in practice. This example is a counter app that has a "random" button — when pressed, the counter changes by a random amount. The random number generation is handled by a middleware, rather than by the shell.
Defining the operation
First, we need an Operation type that describes the request and its output. This is the
same as defining a capability's protocol — a request type and a response type:
#[derive(Facet, Debug, Clone, PartialEq, Eq, Serialize, Deserialize)]
pub struct RandomNumberRequest(pub isize, pub isize); // request a random number from 1 to N, inclusive

#[derive(Facet, Debug, PartialEq, Eq, Deserialize)]
pub struct RandomNumber(pub isize);

impl Operation for RandomNumberRequest {
    type Output = RandomNumber;
}
The RandomNumberRequest carries the range (min, max), and RandomNumber carries the result.
The Operation impl connects them so that Crux knows a RandomNumberRequest produces a
RandomNumber.
The app uses this operation as one variant of its Effect enum:
#[effect(facet_typegen)]
#[derive(Debug)]
pub enum Effect {
    Render(RenderOperation),
    Http(HttpRequest),
    ServerSentEvents(SseRequest),
    Random(RandomNumberRequest),
}
And the app can request a random number using Command::request_from_shell, just as it
would for any shell-handled effect:
            Event::Random => Command::request_from_shell(RandomNumberRequest(-5, 5))
                .map(|out| out.0)
                .then_send(Event::UpdateBy),
The app doesn't know or care that this effect will be intercepted by middleware — it just requests the effect and handles the response.
Implementing EffectMiddleware
The EffectMiddleware trait is how you tell Crux what to do when it encounters a specific
effect. You implement try_process_effect, which receives the operation and an
EffectResolver that you use to send back the result.
Here's the RngMiddleware from the example:
use std::{
    sync::mpsc::{Sender, channel},
    thread::spawn,
};

use crux_core::middleware::{EffectMiddleware, EffectResolver};
use rand::rngs::SysRng;
use rand::{RngExt, SeedableRng, TryRng as _, rngs::StdRng};

use crate::capabilities::{RandomNumber, RandomNumberRequest};

pub struct RngMiddleware {
    jobs_tx: Sender<(RandomNumberRequest, EffectResolver<RandomNumber>)>,
}

impl RngMiddleware {
    pub fn new() -> Self {
        let (jobs_tx, jobs_rx) = channel::<(RandomNumberRequest, EffectResolver<RandomNumber>)>();

        // Persistent background worker
        spawn(move || {
            let mut sys_rng = SysRng;
            let mut rng =
                StdRng::seed_from_u64(sys_rng.try_next_u64().expect("could not seed RNG"));

            while let Ok((RandomNumberRequest(from, to), mut resolver)) = jobs_rx.recv() {
                #[allow(clippy::cast_sign_loss)]
                let top = (to - from) as usize;
                #[allow(clippy::cast_possible_wrap)]
                let out = rng.random_range(0..top) as isize + from;

                resolver.resolve(RandomNumber(out));
            }
        });

        Self { jobs_tx }
    }
}

impl EffectMiddleware for RngMiddleware {
    type Op = RandomNumberRequest;

    fn try_process_effect(
        &self,
        operation: RandomNumberRequest,
        resolver: EffectResolver<RandomNumber>,
    ) {
        self.jobs_tx
            .send((operation, resolver))
            .expect("Job failed to send to worker thread");
    }
}
A few things to note:
- The
type Opassociated type tells Crux which operation this middleware handles (RandomNumberRequestin this case). try_process_effectreceives the operation and anEffectResolver. You must callresolver.resolve(output)with the result when the work is done.- The processing happens on a background thread. This is important — the middleware
must not block the caller of
process_event. On native targets this typically means spawning a thread; on WASM it means an async task (e.g.spawn_local). - The background thread pattern shown here (a persistent worker with a channel) is a good approach when the middleware holds state (like the RNG seed). For stateless work, you could simply spawn a thread per request.
Wiring it up
The middleware is composed with the Core in the FFI module, where you build the
bridge between the core and the shell. The example splits the wiring by target:
native runs the middleware on a background thread; WebAssembly skips it because
this middleware is thread::spawn based.
    pub fn new(shell: Arc<dyn CruxShell>) -> Self {
        // Native: RngMiddleware handles `Random` in a background task, so its
        // effects are delivered to the shell asynchronously via the callback.
        #[cfg(not(target_family = "wasm"))]
        let core = Core::<Counter>::new()
            .handle_effects_using(RngMiddleware::new())
            .map_effect::<Effect>()
            .bridge::<BincodeFfiFormat>(move |effect_bytes| match effect_bytes {
                Ok(effect) => shell.process_effects(effect),
                Err(e) => panic!("{e}"),
            });

        // Wasm: no background tasks, so effects are returned synchronously from
        // update/resolve. The callback is wired for API parity but unused.
        #[cfg(target_family = "wasm")]
        let core =
            Core::<Counter>::new().bridge::<BincodeFfiFormat>(
                move |effect_bytes| match effect_bytes {
                    Ok(effect) => shell.process_effects(effect),
                    Err(e) => panic!("{e}"),
                },
            );

        Self { core }
    }
The native branch reads bottom-to-top as a pipeline:
Core::<Counter>::new()— creates the core, which produces the app's fullEffectenum (including theRandomvariant)..handle_effects_using(RngMiddleware::new())— wraps the core with the RNG middleware.Randomeffects are intercepted and resolved here; everything else passes through..map_effect::<Effect>()— remaps to the FFI-facingEffectenum used by typegen and the bridge. In this example the FFIEffectmirrors the app's, so this is a 1:1 remap. This is also where you can narrow the effect type: drop variants that middleware fully consumes from the FFI enum and panic on them inFrom, so the shell never sees them. The counter example doesn't narrowRandombecause the WebAssembly shells handle it themselves..bridge::<BincodeFfiFormat>(...)— creates the FFI bridge as usual.
On WebAssembly there is no middleware: the bridge wraps Core directly, so
Random effects flow straight through to the shell, which fulfills them itself.
The FFI effect type
The FFI module declares its own Effect enum. This is the enum typegen turns
into shell types, and the bridge serializes it:
#[effect(facet_typegen)]
pub enum Effect {
    Render(RenderOperation),
    Http(HttpRequest),
    ServerSentEvents(SseRequest),
    Random(RandomNumberRequest),
}
A From implementation converts from the app's full effect type. In this example the
two enums have the same variants, so every arm remaps 1:1:
impl From<crate::app::Effect> for Effect {
    fn from(effect: crate::app::Effect) -> Self {
        match effect {
            crate::Effect::Render(request) => Self::Render(request),
            crate::Effect::Http(request) => Self::Http(request),
            crate::Effect::ServerSentEvents(request) => Self::ServerSentEvents(request),
            crate::Effect::Random(request) => Self::Random(request),
        }
    }
}
If a middleware fully consumes a variant on every target you build, you can
remove that variant from this enum and panic! on it in From — the shell then
sees a narrower set of effects. The counter example keeps Random here because
the WebAssembly shells trigger it themselves and need it in the typegen.
Testing
The app can be tested exactly the same way as any other Crux app — the middleware is not
involved in unit tests. You test the app's update function directly, treating Random
as a normal effect:
    #[test]
    fn random_change() {
        let app = Counter;
        let mut model = Model::default();

        let mut cmd = app.update(Event::Random, &mut model);

        // the app should request a random number from the web API
        let mut request = cmd.effects().next().unwrap().expect_random();

        assert_eq!(request.operation, RandomNumberRequest(-5, 5));
        request.resolve(RandomNumber(-2)).unwrap();

        // And start an UpdateBy the number

        let event = cmd.events().next().unwrap();
        assert_eq!(event, Event::UpdateBy(-2));
This is one of the nice properties of middleware: the app logic remains pure and testable, and the middleware is a separate concern that's composed at the FFI boundary.
Summary
To add a middleware to your app:
- Define an
Operation— a request type and output type, just like a capability protocol. - Implement
EffectMiddleware— handle the operation and resolve the result, typically on a background thread. - Wire it up — use
.handle_effects_using()in your FFI setup to intercept the effects, and optionally.map_effect()to narrow the effect type for the shell.
For the full API reference, see the middleware module docs.
Other platforms
This section is a collection of instructions for using Crux with other platforms than the ones we've chosen to write Part I and Part II for. The support is just as mature for all of them, we are simply more familiar with the five covered here.
You can read about using Crux with:
- React Router — TypeScript web framework (WebAssembly)
- Yew — Rust web framework (WebAssembly)
- Dioxus — Rust web framework (WebAssembly)
- Tauri — Desktop/mobile app with a web frontend and Rust backend
- Ratatui — Terminal UI (TUI) app in Rust
Web — TypeScript and React Router
These are the steps to set up and run a simple TypeScript Web app that calls into a shared core.
This walk-through assumes you have already set up the shared library and codegen as described in Shared core and types.
There are many frameworks available for writing Web applications with JavaScript/TypeScript. We've chosen React with React Router for this walk-through. However, a similar setup would work for other frameworks.
Create a React Router App
For this walk-through, we'll use the pnpm package manager
for no reason other than we like it the most! You can use npm exactly the same
way, though.
Let's create a simple React Router app for TypeScript with pnpm. You can give
it a name and then probably accept the defaults.
pnpm create react-router@latest
Compile our Rust shared library
When we build our app, we also want to compile the Rust core to WebAssembly so that it can be referenced from our code.
To do this, we'll use BoltFFI, which you can install like this:
cargo install boltffi_cli --version '=0.25.2' --locked
brew install binaryen # provides wasm-opt
The crate is boltffi_cli; it installs the boltffi binary used below.
Now that we have boltffi installed, we can build our shared library to
WebAssembly for the browser.
(cd shared && boltffi pack wasm)
You might want to add a wasm:build script to your package.json file, and
call it when you build your React Router project.
{
  "scripts": {
    "build": "pnpm run wasm:build && react-router build",
    "dev": "pnpm run wasm:build && react-router dev",
    "wasm:build": "cd ../shared && boltffi pack wasm"
  }
}
Add the shared library as a Wasm package to your web-react-router project:
cd web-react-router
pnpm add ./generated/pkg
We want Vite to bundle our shared Wasm package, so we register the wasm and
React Router plugins in vite.config.ts:
import { reactRouter } from "@react-router/dev/vite";
import wasm from "vite-plugin-wasm";
import { defineConfig } from "vite";

export default defineConfig({
  plugins: [wasm(), reactRouter()],
});
Add the Shared Types
To generate the shared types for TypeScript, run the codegen binary, telling
it which language to emit and where to put the output:
cargo run --package shared --bin codegen --features codegen,facet_typegen -- \
    --language typescript --output-dir generated/types
You can check that they have been generated correctly:
ls --tree generated/types
generated/types
├── app.ts          # your app's Event / Effect / ViewModel types
├── app.d.ts
├── bincode
│  ├── bincodeDeserializer.ts
│  ├── bincodeSerializer.ts
│  └── index.ts
├── serde
│  ├── binaryDeserializer.ts
│  ├── binarySerializer.ts
│  ├── deserializer.ts
│  ├── serializer.ts
│  ├── types.ts
│  └── index.ts
├── package.json
└── tsconfig.json
You can see that it also generates an npm package that we can add directly to
our project.
pnpm add ./generated/types
Load the Wasm binary when our React Router app starts
The app/entry.client.tsx file is where we load our Wasm binary. We import the
shared package and wait for its initialized promise to resolve before
hydrating the app, so the WASM module is ready before any event reaches the
core.
import { startTransition, StrictMode } from "react";
import { hydrateRoot } from "react-dom/client";
import { HydratedRouter } from "react-router/dom";
import * as sharedWasm from "shared";

const wasmInitialized = (sharedWasm as unknown as { initialized: Promise<void> })
  .initialized;

wasmInitialized.then(() => {
  startTransition(() => {
    hydrateRoot(
      document,
      <StrictMode>
        <HydratedRouter />
      </StrictMode>
    );
  });
});
Create some UI
We will use the simple counter example, which has a shared library and generated TypeScript types that will work with the following example code.
Simple counter example
A simple app that increments, decrements and resets a counter.
Wrap the core to support capabilities
First, let's add some boilerplate code to wrap our core and handle the
capabilities that we are using. For this example, we only need to support the
Render capability, which triggers a render of the UI.
This code that wraps the core only needs to be written once — it only grows when we need to support additional capabilities.
Edit app/core.ts to look like the following. This code sends our
(UI-generated) events to the core, and handles any effects that the core asks
for. In this simple example, we aren't calling any HTTP APIs or handling any
side effects other than rendering the UI, so we just handle this render effect
by updating the component's view hook with the core's ViewModel.
Notice that we have to serialize and deserialize the data that we pass between the core and the shell. This is because the core is running in a separate WebAssembly instance, and so we can't just pass the data directly.
import type { Dispatch, SetStateAction } from "react";
import { CoreFFI } from "shared";
import * as sharedWasm from "shared";
import type { Effect, Event } from "shared_types/app";
import { EffectVariantRender, Request, ViewModel } from "shared_types/app";
import { BincodeDeserializer, BincodeSerializer } from "shared_types/bincode";

const wasmInitialized = (sharedWasm as unknown as { initialized: Promise<void> })
  .initialized;

export class Core {
  core: CoreFFI | null = null;
  initializing: Promise<void> | null = null;
  setState: Dispatch<SetStateAction<ViewModel>>;

  constructor(setState: Dispatch<SetStateAction<ViewModel>>) {
    // Don't initialize CoreFFI here - wait for WASM to be loaded
    this.setState = setState;
  }

  initialize(shouldLoad: boolean): Promise<void> {
    if (this.core) {
      return Promise.resolve();
    }

    if (!this.initializing) {
      const load = shouldLoad ? wasmInitialized : Promise.resolve();

      this.initializing = load
        .then(() => {
          this.core = CoreFFI.new();
          this.setState(this.view());
        })
        .catch((error) => {
          this.initializing = null;
          console.error("Failed to initialize wasm core:", error);
        });
    }

    return this.initializing;
  }

  view(): ViewModel {
    if (!this.core) {
      throw new Error("Core not initialized. Call initialize() first.");
    }
    return deserializeView(this.core.view());
  }

  update(event: Event) {
    if (!this.core) {
      throw new Error("Core not initialized. Call initialize() first.");
    }
    const serializer = new BincodeSerializer();
    event.serialize(serializer);

    const effects = this.core.update(serializer.getBytes());

    const requests = deserializeRequests(effects);
    for (const { effect } of requests) {
      this.processEffect(effect);
    }
  }

  private processEffect(effect: Effect) {
    switch (effect.constructor) {
      case EffectVariantRender: {
        this.setState(this.view());
        break;
      }
    }
  }
}

function deserializeRequests(bytes: Uint8Array | number[]): Request[] {
  const deserializer = new BincodeDeserializer(asBytes(bytes));
  const len = deserializer.deserializeLen();
  const requests: Request[] = [];
  for (let i = 0; i < len; i++) {
    const request = Request.deserialize(deserializer);
    requests.push(request);
  }
  return requests;
}

function deserializeView(bytes: Uint8Array | number[]): ViewModel {
  return ViewModel.deserialize(new BincodeDeserializer(asBytes(bytes)));
}

function asBytes(bytes: Uint8Array | number[]): Uint8Array {
  return bytes instanceof Uint8Array ? bytes : new Uint8Array(bytes);
}
That switch statement, above, is where you would handle any other effects that
your core might ask for. For example, if your core needs to make an HTTP
request, you would handle that here. To see an example of this, take a look at
the
counter example
in the Crux repository.
Create a component to render the UI
Edit app/routes/_index.tsx to look like the following. Notice that we pass the
setState hook to the update function so that we can update the state in
response to a render effect from the core (as seen above).
import { useEffect, useRef, useState } from "react";

import {
  ViewModel,
  EventVariantReset,
  EventVariantIncrement,
  EventVariantDecrement,
} from "shared_types/app";
import { Core } from "../core";

export const meta = () => {
  return [
    { title: "Crux Counter — React Router" },
    { name: "description", content: "Crux Counter with React Router" },
  ];
};

export default function Index() {
  const [view, setView] = useState(new ViewModel(""));
  const core = useRef(new Core(setView));

  useEffect(() => {
    void core.current.initialize(false);
  }, []);

  return (
    <main>
      <section className="box container has-text-centered m-5">
        <p className="is-size-5">{view.count}</p>
        <div className="buttons section is-centered">
          <button
            className="button is-primary is-danger"
            onClick={() => core.current.update(new EventVariantReset())}
          >
            {"Reset"}
          </button>
          <button
            className="button is-primary is-success"
            onClick={() => core.current.update(new EventVariantIncrement())}
          >
            {"Increment"}
          </button>
          <button
            className="button is-primary is-warning"
            onClick={() => core.current.update(new EventVariantDecrement())}
          >
            {"Decrement"}
          </button>
        </div>
      </section>
    </main>
  );
}
Now all we need is some CSS.
To add a CSS stylesheet, we can add it to the Links export in the
app/root.tsx file.
export const links: LinksFunction = () => [
  {
    rel: "stylesheet",
    href: "https://cdn.jsdelivr.net/npm/bulma@0.9.4/css/bulma.min.css",
  },
];
Build and serve our app
We can build our app, and serve it for the browser, in one simple step.
pnpm dev

Web — Rust and Yew
These are the steps to set up and run a simple Rust Web app that calls into a shared core.
This walk-through assumes you have already added the shared library to your repo, as described in Shared core and types.
There are many frameworks available for writing Web applications in Rust. We've chosen Yew for this walk-through because it is arguably the most mature. However, a similar setup would work for any framework that compiles to WebAssembly.
Create a Yew App
Our Yew app is just a new Rust project, which we can create with Cargo. For this
example we'll call it web-yew.
cargo new web-yew
We'll also want to add this new project to our Cargo workspace, by editing the
root Cargo.toml file.
[workspace]
members = ["shared", "web-yew"]
Now we can start fleshing out our project. Let's add some dependencies to
web-yew/Cargo.toml.
[package]
name = "web-yew"
version = "0.1.0"
authors.workspace = true
repository.workspace = true
edition.workspace = true
license.workspace = true
keywords.workspace = true
rust-version.workspace = true

[lints]
workspace = true

[dependencies]
shared = { path = "../shared" }
yew = { version = "0.23.0", features = ["csr"] }
We'll also need a file called index.html, to serve our app.
<!doctype html>
<html>
    <head>
        <meta charset="utf-8" />
        <meta name="viewport" content="width=device-width, initial-scale=1" />
        <title>Yew Counter</title>
        <link
            rel="stylesheet"
            href="https://cdn.jsdelivr.net/npm/bulma@0.9.4/css/bulma.min.css"
        />
        <link data-trunk rel="rust" />
    </head>
</html>
Create some UI
There are several, more advanced, examples of Yew apps in the Crux repository.
However, we will use the
simple counter example,
which has a shared library that will work with the following example code.
Simple counter example
A simple app that increments, decrements and resets a counter.
Wrap the core to support capabilities
First, let's add some boilerplate code to wrap our core and handle the
capabilities that we are using. For this example, we only need to support the
Render capability, which triggers a render of the UI.
This code that wraps the core only needs to be written once — it only grows when we need to support additional capabilities.
Edit src/core.rs to look like the following. This code sends our
(UI-generated) events to the core, and handles any effects that the core asks
for. In this simple example, we aren't calling any HTTP APIs or handling any
side effects other than rendering the UI, so we just handle this render effect
by sending it directly back to the Yew component. Note that we wrap the effect
in a Message enum because Yew components have a single associated type for
messages and we need that to include both the events that the UI raises (to send
to the core) and the effects that the core uses to request side effects from the
shell.
Also note that because both our core and our shell are written in Rust (and run in the same memory space), we do not need to serialize and deserialize the data that we pass between them. We can just pass the data directly.
use shared::{Counter, Effect, Event};
use std::rc::Rc;
use yew::Callback;

pub type Core = Rc<shared::Core<Counter>>;

pub enum Message {
    Event(Event),
    #[allow(dead_code)]
    Effect(Effect),
}

pub fn new() -> Core {
    Rc::new(shared::Core::new())
}

pub fn update(core: &Core, event: Event, callback: &Callback<Message>) {
    for effect in core.process_event(event) {
        process_effect(core, effect, callback);
    }
}

pub fn process_effect(_core: &Core, effect: Effect, callback: &Callback<Message>) {
    match effect {
        render @ Effect::Render(_) => callback.emit(Message::Effect(render)),
    }
}That match statement, above, is where you would handle any other effects that
your core might ask for. For example, if your core needs to make an HTTP
request, you would handle that here. To see an example of this, take a look at
the
counter example
in the Crux repository.
Edit src/main.rs to look like the following. The update function is
interesting here. We set up a Callback to receive messages from the core and
feed them back into Yew's event loop. Then we test to see if the incoming
message is an Event (raised by UI interaction) and if so we use it to update
the core, returning false to indicate that the re-render will happen later. In
this app, we can assume that any other message is a render Effect and so we
return true indicating to Yew that we do want to re-render.
mod core;

use crate::core::{Core, Message};
use shared::Event;
use yew::prelude::*;

#[derive(Default)]
struct RootComponent {
    core: Core,
}

impl Component for RootComponent {
    type Message = Message;
    type Properties = ();

    fn create(_ctx: &Context<Self>) -> Self {
        Self { core: core::new() }
    }

    fn update(&mut self, ctx: &Context<Self>, msg: Self::Message) -> bool {
        let link = ctx.link().clone();
        let callback = Callback::from(move |msg| {
            link.send_message(msg);
        });
        if let Message::Event(event) = msg {
            core::update(&self.core, event, &callback);
            false
        } else {
            true
        }
    }

    fn view(&self, ctx: &Context<Self>) -> Html {
        let link = ctx.link();
        let view = self.core.view();

        html! {
            <section class="box container has-text-centered m-5">
                <p class="is-size-5">{&view.count}</p>
                <div class="buttons section is-centered">
                    <button class="button is-primary is-danger"
                        onclick={link.callback(|_| Message::Event(Event::Reset))}>
                        {"Reset"}
                    </button>
                    <button class="button is-primary is-success"
                        onclick={link.callback(|_| Message::Event(Event::Increment))}>
                        {"Increment"}
                    </button>
                    <button class="button is-primary is-warning"
                        onclick={link.callback(|_| Message::Event(Event::Decrement))}>
                        {"Decrement"}
                    </button>
                </div>
            </section>
        }
    }
}

fn main() {
    yew::Renderer::<RootComponent>::new().render();
}
Build and serve our app
The easiest way to compile the app to WebAssembly and serve it in our web page
is to use trunk, which we can install with
Homebrew (brew install trunk) or Cargo
(cargo install trunk).
We can build our app, serve it and open it in our browser, in one simple step.
trunk serve --open
Web — Rust and Dioxus
These are the steps to set up and run a simple Rust Web app that calls into a shared core.
This walk-through assumes you have already added the shared library to your repo, as described in Shared core and types.
There are many frameworks available for writing Web applications in Rust. We've chosen Dioxus for this walk-through. However, a similar setup would work for other frameworks that compile to WebAssembly.
Create a Dioxus App
Dioxus has a CLI tool called dx, which can initialize, build and serve our app.
cargo install dioxus-cli
Test that the executable is available.
dx --help
Before we create a new app, let's add it to our Cargo workspace (so that the
dx tool won't complain), by editing the root Cargo.toml file.
For this example, we'll call the app web-dioxus.
[workspace]
members = ["shared", "web-dioxus"]
Now we can create a new Dioxus app. The tool asks for a project name, which
we'll provide as web-dioxus.
dx create

cd web-dioxus
Now we can start fleshing out our project. Let's add some dependencies to the
project's Cargo.toml.
[package]
name = "web-dioxus"
version = "0.1.0"
authors.workspace = true
repository.workspace = true
edition.workspace = true
license.workspace = true
keywords.workspace = true
rust-version.workspace = true

[lints]
workspace = true

[dependencies]
console_error_panic_hook = "0.1.7"
dioxus = { version = "0.7.9", features = ["web"] }
dioxus-logger = "0.7.9"
futures-util = "0.3.32"
shared = { path = "../shared" }
tracing = "0.1.44"
Create some UI
There is slightly more advanced example of a Dioxus app in the Crux repository.
However, we will use the simple counter example, which has a shared library that will work with the following example code.
Simple counter example
A simple app that increments, decrements and resets a counter.
Wrap the core to support capabilities
First, let's add some boilerplate code to wrap our core and handle the
capabilities that we are using. For this example, we only need to support the
Render capability, which triggers a render of the UI.
This code that wraps the core only needs to be written once — it only grows when we need to support additional capabilities.
Edit src/core.rs to look like the following. This code sends our
(UI-generated) events to the core, and handles any effects that the core asks
for. In this simple example, we aren't calling any HTTP APIs or handling any
side effects other than rendering the UI, so we just handle this render effect
by updating the component's view hook with the core's ViewModel.
Because both our core and our shell are written in Rust (and run in the same memory space), we do not need to serialize and deserialize the data that we pass between them. We can just pass the data directly.
use std::rc::Rc;

use dioxus::{
    prelude::{Signal, UnboundedReceiver},
    signals::WritableExt as _,
};
use futures_util::StreamExt;
use shared::{Counter, Effect, Event, ViewModel};
use tracing::debug;

type Core = Rc<shared::Core<Counter>>;

pub struct CoreService {
    core: Core,
    view: Signal<ViewModel>,
}

impl CoreService {
    pub fn new(view: Signal<ViewModel>) -> Self {
        debug!("initializing core service");
        Self {
            core: Rc::new(shared::Core::new()),
            view,
        }
    }

    #[allow(clippy::future_not_send)] // WASM is single-threaded
    pub async fn run(&self, rx: &mut UnboundedReceiver<Event>) {
        let mut view = self.view;
        view.set(self.core.view());
        while let Some(event) = rx.next().await {
            self.update(event, &mut view);
        }
    }

    fn update(&self, event: Event, view: &mut Signal<ViewModel>) {
        debug!("event: {:?}", event);

        for effect in &self.core.process_event(event) {
            process_effect(&self.core, effect, view);
        }
    }
}

fn process_effect(core: &Core, effect: &Effect, view: &mut Signal<ViewModel>) {
    debug!("effect: {:?}", effect);

    match effect {
        Effect::Render(_) => {
            view.set(core.view());
        }
    }
}That match statement, above, is where you would handle any other effects that
your core might ask for. For example, if your core needs to make an HTTP
request, you would handle that here. To see an example of this, take a look at
the
counter example
in the Crux repository.
Edit src/main.rs to look like the following. This code sets up the Dioxus app
and connects the core to the UI. We create a signal for the view state
and a coroutine that receives events from the UI and forwards them to the core.
mod core;

use dioxus::prelude::*;
use tracing::Level;

use shared::{Event, ViewModel};

use core::CoreService;

#[allow(clippy::volatile_composites)] // false positive from Dioxus asset! macro internals
#[component]
fn App() -> Element {
    let view = use_signal(ViewModel::default);

    let core = use_coroutine(move |mut rx| {
        let svc = CoreService::new(view);
        async move { svc.run(&mut rx).await }
    });
    rsx! {
        document::Link {
            rel: "stylesheet",
            href: asset!("../public/css/bulma.min.css")
        }
        main {
            section { class: "section has-text-centered",
                p { class: "is-size-5", "{view().count}" }
                div { class: "buttons section is-centered",
                    button { class:"button is-primary is-danger",
                        onclick: move |_| {
                            core.send(Event::Reset);
                        },
                        "Reset"
                    }
                    button { class:"button is-primary is-success",
                        onclick: move |_| {
                            core.send(Event::Increment);
                        },
                        "Increment"
                    }
                    button { class:"button is-primary is-warning",
                        onclick: move |_| {
                            core.send(Event::Decrement);
                        },
                        "Decrement"
                    }
                }
            }
        }
    }
}

fn main() {
    dioxus_logger::init(Level::DEBUG).expect("failed to init logger");
    console_error_panic_hook::set_once();

    launch(App);
}
We also need a Dioxus.toml configuration file to set up the app title and
asset directory.
[application]
name = "web-dioxus"
default_platform = "web"
out_dir = "dist"
asset_dir = "public"

[web.app]
title = "Crux Simple Counter example"

[web.watcher]
reload_html = true
watch_path = ["src", "public"]
Build and serve our app
Now we can build our app and serve it in one simple step.
dx serve
Desktop/Mobile — Tauri
These are the steps to set up and run a Crux app as a desktop (and mobile) application using Tauri. Tauri uses a native webview to render the UI, with a Rust backend — making it a natural fit for Crux.
This walk-through assumes you have already added the shared library to your repo, as described in Shared core and types.
Tauri apps have a Rust backend (where the Crux core lives) and a web frontend (React, in this example). Because the core runs directly in the Rust backend process, there is no need for WebAssembly or FFI — the shell calls the core directly and communicates with the frontend via Tauri's event system.
Create a Tauri App
Install the Tauri CLI if you haven't already:
cargo install tauri-cli
Create a new Tauri app. Tauri's init command will scaffold the project
structure for you — choose React as the frontend framework.
cargo tauri init
Project structure
A Tauri project has two parts:
src-tauri/— the Rust backend, where the Crux core livessrc/— the web frontend (React + TypeScript in this example)
Backend dependencies
Add the shared library and Tauri to your src-tauri/Cargo.toml:
[package]
name = "counter_tauri"
version = "0.1.0"
authors.workspace = true
repository.workspace = true
edition.workspace = true
license.workspace = true
keywords.workspace = true
rust-version.workspace = true

[lib]
name = "tauri_lib"
crate-type = ["staticlib", "cdylib", "rlib"]

[build-dependencies]
tauri-build = { version = "2.6.3", features = [] }

[dependencies]
shared = { path = "../../shared" }
tauri = { version = "2.11.5", features = [] }

[features]
custom-protocol = ["tauri/custom-protocol"]

[lints.rust]
unexpected_cfgs = { level = "warn", check-cfg = [
    'cfg(mobile)',
    'cfg(desktop)',
] }
Frontend dependencies
Your package.json should include the Tauri API package for communicating
between the frontend and backend:
{
  "name": "tauri",
  "private": true,
  "version": "0.0.0",
  "type": "module",
  "scripts": {
    "dev": "vite",
    "build": "tsc && vite build",
    "preview": "vite preview",
    "tauri": "tauri",
    "postinstall": "mkdir -p dist"
  },
  "dependencies": {
    "@tauri-apps/api": "^2.11.0",
    "react": "^19.2.7",
    "react-dom": "^19.2.7"
  },
  "devDependencies": {
    "@tauri-apps/cli": "^2.11.2",
    "@types/node": "^25.9.2",
    "@types/react": "^19.2.17",
    "@types/react-dom": "^19.2.3",
    "@vitejs/plugin-react": "^6.0.2",
    "typescript": "^6.0.3",
    "vite": "^8.0.16"
  },
  "packageManager": "pnpm@9.6.0+sha512.38dc6fba8dba35b39340b9700112c2fe1e12f10b17134715a4aa98ccf7bb035e76fd981cf0bb384dfa98f8d6af5481c2bef2f4266a24bfa20c34eb7147ce0b5e"
}
The Rust backend
The Rust backend is where the Crux core runs. We create a static Core
instance and expose Tauri commands that forward events to the core. When the
core requests a Render effect, we emit a Tauri event to the frontend
with the updated view model.
use shared::{Core, Counter, Effect, Event};
use std::sync::{Arc, LazyLock};
use tauri::Emitter;

static CORE: LazyLock<Arc<Core<Counter>>> = LazyLock::new(|| Arc::new(Core::new()));

fn handle_event(event: Event, core: &Arc<Core<Counter>>, app: &tauri::AppHandle) {
    for effect in core.process_event(event) {
        process_effect(&effect, core, app);
    }
}

fn process_effect(effect: &Effect, core: &Arc<Core<Counter>>, app: &tauri::AppHandle) {
    match effect {
        Effect::Render(_) => {
            let view = core.view();
            let _ = app.emit("render", view);
        }
    }
}

#[tauri::command]
async fn increment(app_handle: tauri::AppHandle) {
    handle_event(Event::Increment, &CORE, &app_handle);
}

#[tauri::command]
async fn decrement(app_handle: tauri::AppHandle) {
    handle_event(Event::Decrement, &CORE, &app_handle);
}

#[tauri::command]
async fn reset(app_handle: tauri::AppHandle) {
    handle_event(Event::Reset, &CORE, &app_handle);
}

/// The main entry point for Tauri
/// # Panics
/// If the Tauri application fails to run.
#[cfg_attr(mobile, tauri::mobile_entry_point)]
pub fn run() {
    tauri::Builder::default()
        .invoke_handler(tauri::generate_handler![increment, decrement, reset])
        .run(tauri::generate_context!())
        .expect("error while running tauri application");
}
A few things to note:
- The
Coreis stored in aLazyLock<Arc<...>>so it can be shared across Tauri command handlers. - Each user action (increment, decrement, reset) is a separate Tauri command that sends the corresponding event to the core.
- The
Rendereffect is handled by callingapp.emit("render", view), which sends the serializedViewModelto the frontend as a Tauri event. - Because the core is running directly in Rust, there is no serialization
boundary between the shell and the core — we call
core.process_event()directly.
The React frontend
The frontend listens for render events from the backend and updates the UI.
User interactions invoke Tauri commands, which run in the Rust backend.
import { useEffect, useState } from "react";
import { invoke } from "@tauri-apps/api/core";
import { listen, UnlistenFn } from "@tauri-apps/api/event";

type ViewModel = {
  count: string;
};

const initialState: ViewModel = {
  count: "",
};

function App() {
  const [view, setView] = useState(initialState);

  useEffect(() => {
    let unlistenToRender: UnlistenFn;

    listen<ViewModel>("render", (event) => {
      setView(event.payload);
    }).then((unlisten) => {
      unlistenToRender = unlisten;
    });

    // trigger initial render
    invoke("reset");

    return () => {
      unlistenToRender?.();
    };
  }, []);

  return (
    <main>
      <section className="section has-text-centered">
        <p className="title">Crux Counter Example</p>
        <p className="is-size-5">Rust Core, Rust Shell (Tauri + React)</p>
      </section>
      <section className="container has-text-centered">
        <p className="is-size-5">{view.count}</p>
        <div className="buttons section is-centered">
          <button
            className="button is-primary is-danger"
            onClick={() => invoke("reset")}
          >
            {"Reset"}
          </button>
          <button
            className="button is-primary is-success"
            onClick={() => invoke("increment")}
          >
            {"Increment"}
          </button>
          <button
            className="button is-primary is-warning"
            onClick={() => invoke("decrement")}
          >
            {"Decrement"}
          </button>
        </div>
      </section>
    </main>
  );
}

export default App;
The frontend is straightforward:
- On mount, we call
listen("render", ...)to receive view model updates from the backend, and invokeresetto trigger an initial render. - Button clicks call
invoke("increment"),invoke("decrement"), etc. — these are the Tauri commands defined in our Rust backend. - There is no serialization code in the frontend — Tauri handles the
serialization of the
ViewModelstruct automatically.
Build and run
cargo tauri dev
Terminal — Rust and Ratatui
These are the steps to set up and run a Crux app as a terminal UI (TUI) application using Ratatui. This is a great way to build lightweight, keyboard-driven interfaces that share the same core logic as your web and mobile apps.
This walk-through assumes you have already added the shared library to your repo, as described in Shared core and types.
Because both the core and the shell are written in Rust and run in the same process, there is no FFI boundary — the shell calls the core directly with no serialization overhead.
Create the project
Our TUI app is just a new Rust project, which we can create with Cargo.
cargo new tui
Add it to your Cargo workspace by editing the root Cargo.toml:
[workspace]
members = ["shared", "tui"]
Add the dependencies to tui/Cargo.toml:
[package]
name = "tui"
version = "0.1.0"
authors.workspace = true
edition.workspace = true
repository.workspace = true
license.workspace = true
keywords.workspace = true
rust-version.workspace = true

[lints]
workspace = true

[dependencies]
shared = { path = "../shared" }
ratatui = "0.30.2"
crossterm = "0.29.0"
We depend on shared (our Crux core), ratatui (the TUI framework), and
crossterm (for terminal input handling).
The shell
The entire TUI shell lives in a single main.rs. Let's walk through the key
parts.
use std::io;

use crossterm::event::{self, Event, KeyCode, KeyEvent, KeyEventKind};
use ratatui::{
    DefaultTerminal, Frame,
    buffer::Buffer,
    layout::{Constraint, Layout, Rect},
    style::{Color, Style, Styled, Stylize},
    symbols::border,
    text::{Line, Text},
    widgets::{Block, Paragraph, Widget},
};
use shared::{Core, Counter, Effect, Event as AppEvent};

const BUTTONS: [(&str, AppEvent); 3] = [
    ("Increment", AppEvent::Increment),
    ("Decrement", AppEvent::Decrement),
    ("Reset", AppEvent::Reset),
];

#[allow(clippy::cast_possible_truncation)]
const NUM_BUTTONS: u16 = BUTTONS.len() as u16;

struct App {
    core: Core<Counter>,
    selected: usize,
    exit: bool,
}

impl App {
    fn new() -> Self {
        Self {
            core: Core::new(),
            selected: 0,
            exit: false,
        }
    }

    fn run(&mut self, terminal: &mut DefaultTerminal) -> io::Result<()> {
        while !self.exit {
            terminal.draw(|frame| self.draw(frame))?;
            self.handle_events()?;
        }
        Ok(())
    }

    fn draw(&self, frame: &mut Frame) {
        frame.render_widget(self, frame.area());
    }

    fn handle_events(&mut self) -> io::Result<()> {
        match event::read()? {
            Event::Key(key_event) if key_event.kind == KeyEventKind::Press => {
                self.handle_key_event(key_event);
            }
            _ => {}
        }
        Ok(())
    }

    fn handle_key_event(&mut self, key_event: KeyEvent) {
        match key_event.code {
            KeyCode::Char('q') | KeyCode::Esc => self.exit = true,
            KeyCode::Left | KeyCode::Char('h') => self.select_prev(),
            KeyCode::Right | KeyCode::Char('l') => self.select_next(),
            KeyCode::Enter | KeyCode::Char(' ') => self.press_selected(),
            KeyCode::Char('+' | '=') => self.dispatch(AppEvent::Increment),
            KeyCode::Char('-') => self.dispatch(AppEvent::Decrement),
            KeyCode::Char('0') => self.dispatch(AppEvent::Reset),
            _ => {}
        }
    }

    const fn select_prev(&mut self) {
        self.selected = self.selected.saturating_sub(1);
    }

    const fn select_next(&mut self) {
        if self.selected < BUTTONS.len() - 1 {
            self.selected += 1;
        }
    }

    fn press_selected(&self) {
        let (_, ref event) = BUTTONS[self.selected];
        self.dispatch(event.clone());
    }

    fn dispatch(&self, event: AppEvent) {
        for effect in self.core.process_event(event) {
            match effect {
                Effect::Render(_) => {
                    // The shell re-renders on the next loop iteration
                }
            }
        }
    }
}

impl Widget for &App {
    fn render(self, area: Rect, buf: &mut Buffer) {
        let view = self.core.view();

        let title = Line::from(" Simple Counter ".bold());
        let instructions = Line::from(vec![
            " Select ".into(),
            "<←→>".blue().bold(),
            " Confirm ".into(),
            "<Enter>".blue().bold(),
            " Quit ".into(),
            "<Q> ".blue().bold(),
        ]);
        let block = Block::bordered()
            .title(title.centered())
            .title_bottom(instructions.centered())
            .border_set(border::THICK);

        let inner = block.inner(area);
        block.render(area, buf);

        // Split inner into: space for subtitle | main content (count+buttons) | bottom pad
        // count(3) + gap(1) + buttons(3) = 7
        let [top_space, main_content, _] = Layout::vertical([
            Constraint::Fill(1),
            Constraint::Length(7),
            Constraint::Fill(1),
        ])
        .areas(inner);

        // -- Subtitle (vertically centered in the space above the counter) --
        let [_, subtitle_area, _] = Layout::vertical([
            Constraint::Fill(1),
            Constraint::Length(1),
            Constraint::Fill(1),
        ])
        .areas(top_space);

        let sub_title = Line::from("Rust Core, Rust Shell (Ratatui)".bold());
        Paragraph::new(sub_title)
            .centered()
            .render(subtitle_area, buf);

        // -- Main content areas --
        let [count_area, _, buttons_area] = Layout::vertical([
            Constraint::Length(3),
            Constraint::Length(1),
            Constraint::Length(3),
        ])
        .areas(main_content);

        // -- Count display --
        let counter_text = Text::from(vec![Line::from(view.count.yellow().bold())]);
        let count_block = Block::bordered().border_set(border::PLAIN);
        Paragraph::new(counter_text)
            .centered()
            .block(count_block)
            .render(count_area, buf);

        // -- Buttons --
        ButtonBar::new(self.selected).render(buttons_area, buf);
    }
}

struct ButtonBar {
    selected: usize,
}

impl ButtonBar {
    const fn new(selected: usize) -> Self {
        Self { selected }
    }
}

impl Widget for ButtonBar {
    fn render(self, area: Rect, buf: &mut Buffer) {
        let button_width: u16 = 14;
        let gap_width: u16 = 2;
        let total_width = button_width * NUM_BUTTONS + gap_width * (NUM_BUTTONS - 1);

        let [_, button_strip, _] = Layout::horizontal([
            Constraint::Fill(1),
            Constraint::Length(total_width),
            Constraint::Fill(1),
        ])
        .areas(area);

        let constraints: Vec<Constraint> = BUTTONS
            .iter()
            .enumerate()
            .flat_map(|(i, _)| {
                if i < BUTTONS.len() - 1 {
                    vec![
                        Constraint::Length(button_width),
                        Constraint::Length(gap_width),
                    ]
                } else {
                    vec![Constraint::Length(button_width)]
                }
            })
            .collect();

        let cols = Layout::horizontal(constraints).split(button_strip);

        let colors = [Color::Green, Color::Yellow, Color::Red];

        for (i, (label, _)) in BUTTONS.iter().enumerate() {
            let col = cols[i * 2]; // even indices are buttons, odd are gaps
            let is_selected = i == self.selected;
            let color = colors[i];

            let (text_style, bdr_set) = if is_selected {
                (
                    Style::new().fg(Color::Black).bg(color).bold(),
                    border::THICK,
                )
            } else {
                (Style::new().fg(color), border::PLAIN)
            };

            let line = Line::from((*label).set_style(text_style));
            let btn_block = Block::bordered()
                .border_set(bdr_set)
                .border_style(text_style);
            Paragraph::new(line)
                .centered()
                .style(text_style)
                .block(btn_block)
                .render(col, buf);
        }
    }
}

fn main() -> io::Result<()> {
    ratatui::run(|terminal| App::new().run(terminal))
}
How it works
The TUI shell follows the same pattern as any Crux shell, but with a terminal render loop instead of a UI framework:
-
Event loop — Ratatui runs a loop that draws the UI and then waits for keyboard input. Each keypress is mapped to an app
Event(e.g. pressing+sendsEvent::Increment). -
Dispatching events — The
dispatchmethod sends events to the core viacore.process_event()and processes the resulting effects. For this simple example, the only effect isRender, which is a no-op in the TUI — the shell re-renders on every loop iteration anyway. -
Rendering the view — On each frame, the shell calls
core.view()to get the currentViewModeland renders it using Ratatui widgets. The counter value is displayed in a bordered box with a row of selectable buttons below it. -
No serialization — Because both the core and the shell are Rust running in the same process, we call
Core::new(),core.process_event(), andcore.view()directly with native Rust types.
Build and run
cargo run -p tui
Your app should look something like this in the terminal:
┏━━━━━━━━━━━━━━ Simple Counter ━━━━━━━━━━━━━━┓
┃                                             ┃
┃       Rust Core, Rust Shell (Ratatui)       ┃
┃                                             ┃
┃          ┌───────────────────┐              ┃
┃          │         0         │              ┃
┃          └───────────────────┘              ┃
┃                                             ┃
┃    ┃ Increment ┃  │ Decrement │  │  Reset  │┃
┃                                             ┃
┗━━ Select <←→> Confirm <Enter> Quit <Q> ━━━━┛

</div>
</div>
Command Runtime
In the previous sections we focused on building applications in Crux and using its public APIs to do so. In this and the following chapters, we'll look at how the internals of Crux work, starting with the command runtime.
The command runtime is a set of components that process effects, presenting the two perspectives we previously mentioned:
- For the core, the shell appears to be a platform with a message based system interface
- For the shell, the core appears as a stateful library responding to events with requests for side-effects
There are a few challenges to solve in order to facilitate this interface.
First, each run of the update function returns a Command which may
contain several concurrent tasks, each requesting effects from the shell.
The requested effects are expected to be emitted together, and each batch
of effects will be processed concurrently, so the calls can't be blocking.
Second, each effect may require multiple round-trips between the core and
shell to conclude and we don't want to require a call to update per
round trip, so we need some ability to "suspend" execution while waiting
for an effect to be fulfilled. The ability to suspend effects introduces a
new challenge — effects which are suspended need, once resolved, to
continue execution in the same async task.
Given this concurrency and execution suspension, an async interface seems
like a good candidate. Commands request work from the shell, .await the
results, and continue their work when the result has arrived. The call to
request_from_shell or stream_from_shell translates into an effect
request returned from the current core "transaction" (one call to
process_event or resolve).
In this chapter, we will focus on the runtime and the core interface and ignore the serialisation, bridge and FFI, and return to them in the following sections. The examples will assume a Rust based shell.
Async runtime
One of the fairly unique aspects of Rust's async is the fact that it doesn't come with a bundled runtime. This is recognising that asynchronous execution is useful in various different scenarios, and no one runtime can serve all of them. Crux takes advantage of this and brings its own runtime, tailored to the execution of side-effects on top of a message based interface.
For a deeper background on Rust's async architecture, we recommend the Asynchronous Programming in Rust book, especially the chapter about executing futures and tasks. We will assume you are familiar with the basic ideas and mechanics of async here.
The job of an async runtime is to manage a number of tasks, each driving one
future to completion. This management is done by an executor, which is
responsible for scheduling the futures and polling them at the right time to
drive their execution forward. General-purpose runtimes like Tokio do
this on a number of threads in a thread pool, but in Crux, we run in
the context of a single function call (of the app's update function)
and potentially in a WebAssembly context which is single-threaded
anyway, so our runtime only needs to poll all the tasks sequentially,
to see if any of them need to continue.
Polling all the tasks would work, and in our case wouldn't even be that inefficient, but the async system is set up to avoid unnecessary polling of futures with one additional concept - wakers. A waker is a mechanism which can be used to signal to the executor that something that a given task is waiting on has changed, and the task's future should be polled, because it will be able to proceed. This is how "at the right time" from the above paragraph is decided.
In our case there's a single situation which causes such a change - a result has arrived from the shell, for a particular effect requested earlier.
Always use the Command APIs provided by Crux for async work (see the capabilities chapter). Using other async APIs can lead to unexpected behaviour, because the resulting futures are not tied to Crux effects. Such futures will resolve, but only after the next shell request causes the Crux executor to execute.
If you want to depend on a crate that requires a standard runtime like Tokio, you can integrate it through an effect via middleware.
One effect's life cycle
So, step by step, our strategy for commands to handle effects is:
- A
Commandcreates a task containing a future with some code to run (viaCommand::neworctx.spawn) - The new task is scheduled to be polled next time the executor runs
- The executor goes through the list of ready tasks until it gets to our task and polls it
- The future runs to the point where the first async call is
awaited. In commands, this should only be a future returned from one of the calls to request something from the shell, or a future resulting from a composition of such futures (through async method calls or combinators likeselectorjoin). - The shell request future's first step is to create the request and prepare it to be sent. We will look at the mechanics of the sending shortly, but for now it's only important that part of this request is a callback used to resolve it.
- The request future, as part of the first poll by the executor, sends the request to be handed to the shell. As there is no result from the shell yet, it returns a pending state and the task is suspended.
- The request is passed on to the shell to resolve (as a return value
from
process_eventorresolve) - Eventually, the shell has a result ready for the request and asks
the core to
resolvethe request. - The request's resolve callback is executed, sending the provided result through an internal channel. The channel wakes the future's waker, which enqueues the task for processing on the executor.
- The executor runs again (asked to do so by the core's
resolveAPI after calling the callback), and polls the awoken future. - The future sees there is now a result available and continues the execution of the original task until a further await or until completion.
The cycle may repeat a few times, depending on the command implementation, but eventually the original task completes and is removed.
This is probably a lot to take in, but the basic gist is that command
futures (the ones created by Command::new or ctx.spawn) always
pause on request futures (the ones returned from request_from_shell
et al.), which submit requests. Resolving requests updates the state
of the original future and wakes it up to continue execution.
With that in mind we can look at the individual moving parts and how they communicate.
Spawning tasks on the executor
The first step for anything to happen is creating a Command with a
task. Each task runs within a CommandContext, which provides the
interface for communicating with the shell and the app:
pub struct CommandContext<Effect, Event> {
    pub(crate) effects: Sender<Effect>,
    pub(crate) events: Sender<Event>,
    pub(crate) tasks: Sender<Task>,
    pub(crate) rc: Arc<()>,
}
There are sending ends of channels for effects and events, and also
a sender for spawning new tasks. The rc field is a reference
counter used to track whether any contexts are still alive
(indicating the command may still produce more work).
A Command is itself an async executor, managing a set of tasks:
#[must_use = "Unused commands never execute. Return the command from your app's update function or combine it with other commands with Command::and or Command::all"]
pub struct Command<Effect, Event> {
    effects: Receiver<Effect>,
    events: Receiver<Event>,
    context: CommandContext<Effect, Event>,

    // Executor internals
    // TODO: should this be a separate type?
    ready_queue: Receiver<TaskId>,
    spawn_queue: Receiver<Task>,
    tasks: Slab<Task>,
    ready_sender: Sender<TaskId>, // Used in creating wakers for tasks
    waker: Arc<AtomicWaker>,      // Shared with task wakers when polled in async context

    // Signaling
    aborted: Arc<AtomicBool>,
}
It holds the receiving ends of the effect and event channels, along
with the executor internals: a Slab of tasks, a ready queue of
task IDs, and a spawn queue for new tasks.
Each Task is a simple data structure holding a future and some
coordination state:
pub(crate) struct Task {
    // Used to wake the join handle when the task concludes
    pub(crate) join_handle_wakers: Receiver<Waker>,
    // Set to true when the task finishes, used by the join handle
    // RFC: is there a safe way to do this relying on the waker alone?
    pub(crate) finished: Arc<AtomicBool>,
    // Set to true when the task is aborted. Aborted tasks will poll Ready on the
    // next poll
    pub(crate) aborted: Arc<AtomicBool>,
    // The future polled by this task
    pub(crate) future: BoxFuture<'static, ()>,
}
Tasks are spawned by CommandContext::spawn:
    pub fn spawn<F, Fut>(&self, make_future: F) -> JoinHandle
    where
        F: FnOnce(Self) -> Fut,
        Fut: Future<Output = ()> + Send + 'static,
    {
        let (sender, receiver) = crossbeam_channel::unbounded();

        let ctx = self.clone();
        let future = make_future(ctx);

        let task = Task {
            finished: Arc::default(),
            aborted: Arc::default(),
            future: future.boxed(),
            join_handle_wakers: receiver,
        };

        let handle = JoinHandle {
            finished: task.finished.clone(),
            aborted: task.aborted.clone(),
            register_waker: sender,
        };

        self.tasks
            .send(task)
            .expect("Command could not spawn task, tasks channel disconnected");

        handle
    }
After constructing a task with the future returned by the closure,
it is sent to the command's spawn queue. A JoinHandle is returned,
which can be used to await the task's completion or abort it.
The command runs all tasks to completion (or suspension) with
run_until_settled:
    pub(crate) fn run_until_settled(&mut self) {
        if self.was_aborted() {
            // Spawn new tasks to clear the spawn_queue as well
            self.spawn_new_tasks();

            self.tasks.clear();

            return;
        }

        loop {
            self.spawn_new_tasks();

            if self.ready_queue.is_empty() {
                break;
            }

            while let Ok(task_id) = self.ready_queue.try_recv() {
                match self.run_task(task_id) {
                    TaskState::Missing | TaskState::Suspended => {
                        // Missing:
                        //   The task has been evicted because it completed.  This can happen when
                        //   a _running_ task schedules itself to wake, but then completes and gets
                        //   removed
                        // Suspended:
                        //   we pick it up again when it's woken up
                    }
                    TaskState::Completed | TaskState::Cancelled => {
                        // Remove and drop the task, it's finished
                        let task = self.tasks.remove(task_id.0);

                        task.finished.store(true, Ordering::Release);
                        task.wake_join_handles();

                        drop(task);
                    }
                }
            }
        }
    }
The method first checks if the command has been aborted. If not, it loops: spawning any new tasks from the spawn queue, then polling each ready task. Tasks that complete are removed. Tasks that are suspended wait to be woken.
The waking mechanism is provided by CommandWaker:
pub(crate) struct CommandWaker {
    pub(crate) task_id: TaskId,
    pub(crate) ready_queue: Sender<TaskId>,
    // Waker for the executor running this command as a Stream.
    // When the command is executed directly (e.g. in tests) this waker
    // will not be registered.
    pub(crate) parent_waker: Arc<AtomicWaker>,
    woken: AtomicBool,
}

impl Wake for CommandWaker {
    fn wake(self: Arc<Self>) {
        self.wake_by_ref();
    }

    fn wake_by_ref(self: &Arc<Self>) {
        // If we can't send the id to the ready queue, there is no Command to poll the task again anyway,
        // nothing to do.
        // TODO: Does that mean we should bail, since waking ourselves is
        // now pointless?
        let _ = self.ready_queue.send(self.task_id);
        self.woken.store(true, Ordering::Release);

        // Note: calling `wake` before `register` is a no-op
        self.parent_waker.wake();
    }
}
When a task's future needs to be woken (because a shell response has arrived), the waker sends the task's ID back to the ready queue and also wakes the parent waker (used when the command is running as a stream inside another command).
While there are a lot of moving pieces involved, the basic mechanics
are relatively straightforward — tasks are submitted either by
Command::new, ctx.spawn, or awoken by arriving responses to the
requests they submitted. The queue of tasks is processed whenever
run_until_settled is called. This happens in the Core API
implementation: both process_event and resolve trigger it as
part of their processing.
Now we know how the futures get executed, suspended and resumed, we can examine the flow of information between commands and the Core API calls layered on top.
Requests flow from commands to the shell
The key to understanding how the effects get processed and executed is to name all the various pieces of information, and discuss how they are wrapped in each other.
The basic inner piece of the effect request is an operation. This
is the intent which the command is submitting to the shell. Each
operation has an associated output value, with which the operation
request can be resolved. There are multiple capabilities in each
app, and in order for the shell to easily tell which capability's
effect it needs to handle, we wrap the operation in an effect. The
Effect type is a generated enum based on the app's set of
capabilities, with one variant per capability. It allows us to
multiplex (or type erase) the different typed operations into a
single type, which can be matched on to process the operations.
Finally, the effect is wrapped in a request which carries the effect, and an associated resolve callback to which the output will eventually be given. We discussed this callback in the previous section — its job is to send the result through an internal channel, waking up the paused future. The request is the value passed to the shell, and used as both the description of the effect intent, and the "token" used to resolve it.
Each task in a command has access to a CommandContext, which holds
the sending ends of channels for effects and events. When a task
calls request_from_shell, the context creates a Request
containing the operation and a resolve callback, wraps it in the
app's Effect type (via the From trait), and sends it through the
effects channel. The Command collects these effects and surfaces
them to the Core.
Looking at the core itself:
pub struct Core<A>
where
    A: App,
{
    // WARNING: The user controlled types _must_ be defined first
    // so that they are dropped first, in case they contain coordination
    // primitives which attempt to wake up a future when dropped. For that
    // reason the executor _must_ outlive the user type instances

    // user types
    model: RwLock<A::Model>,
    app: A,

    // internals
    root_command: Mutex<Command<A::Effect, A::Event>>,
}
The Core holds a root_command — a single long-lived Command
onto which all commands returned from update are spawned. This
root command acts as the top-level executor, collecting all effects
and events across all active commands.
A single update cycle
To piece all these things together, let's look at processing a
single call from the shell. Both process_event and resolve share
a common step advancing the command runtime.
Here is process_event:
    pub fn process_event(&self, event: A::Event) -> Vec<A::Effect> {
        let mut model = self.model.write().expect("Model RwLock was poisoned.");

        let command = self.app.update(event, &mut model);

        // drop the model here, we don't want to hold the lock for the process() call
        drop(model);

        let mut root_command = self
            .root_command
            .lock()
            .expect("Capability runtime lock was poisoned");
        root_command.spawn(|ctx| command.into_future(ctx));

        drop(root_command);

        self.process()
    }
and here is resolve:
    pub fn resolve<Output>(
        &self,
        request: &mut impl Resolvable<Output>,
        result: Output,
    ) -> Result<Vec<A::Effect>, ResolveError>
    {
        let resolve_result = request.resolve(result);
        debug_assert!(resolve_result.is_ok());

        resolve_result?;

        Ok(self.process())
    }
The interesting things happen in the common process method:
    pub(crate) fn process(&self) -> Vec<A::Effect> {
        let mut root_command = self
            .root_command
            .lock()
            .expect("Capability runtime lock was poisoned");

        let mut events: VecDeque<_> = root_command.events().collect();

        while let Some(event_from_commands) = events.pop_front() {
            let mut model = self.model.write().expect("Model RwLock was poisoned.");
            let command = self.app.update(event_from_commands, &mut model);
            drop(model);

            root_command.spawn(|ctx| command.into_future(ctx));

            events.extend(root_command.events());
        }

        root_command.effects().collect()
    }
First, we drain events from the root command (which internally runs
all ready tasks before collecting). There can be new events because
we just returned a command from update (which may have immediately
sent events) or resolved some effects (which woke up suspended
futures that then sent events).
For each event, we call update again, spawning the returned
command onto the root command, and drain any further events produced.
This continues until no more events remain.
Finally, we collect all of the effect requests submitted in the process and return them to the shell.
Resolving requests
We've now seen everything other than the mechanics of resolving
requests. The resolve callback is carried by the request as a
RequestHandle, tagged by the expected number of resolutions:
type ResolveOnce<Out> = Box<dyn FnOnce(Out) + Send>;
type ResolveMany<Out> = Box<dyn Fn(Out) -> Result<(), ()> + Send>;

/// Resolve is a callback used to resolve an effect request and continue
/// one of the capability Tasks running on the executor.
pub enum RequestHandle<Out> {
    Never,
    Once(ResolveOnce<Out>),
    Many(ResolveMany<Out>),
}
A RequestHandle can be Never (for notifications that don't
expect a response), Once (for one-shot requests), or Many (for
streaming requests). Resolving a Once handle consumes it, turning
it into Never to prevent double-resolution.
Here's how the resolve callback is set up in request_from_shell:
    pub fn request_from_shell<Op>(&self, operation: Op) -> ShellRequest<Op::Output>
    where
        Op: Operation,
        Effect: From<Request<Op>> + Send + 'static,
    {
        let (output_sender, output_receiver) = mpsc::unbounded();

        let request = Request::resolves_once(operation, move |output| {
            // If the channel is closed, the associated task has been cancelled
            let _ = output_sender.unbounded_send(output);
        });

        let send_request = {
            let effect = request.into();
            let effects = self.effects.clone();
            move || {
                effects
                    .send(effect)
                    .expect("Command could not send request effect, effect channel disconnected");
            }
        };

        ShellRequest::new(Box::new(send_request), output_receiver)
    }
The callback sends the output through an mpsc channel. On the
receiving end, the ShellRequest future is waiting — when the value
arrives, the channel wakes the future's waker, which schedules the
task on the executor to continue.
In the next chapter we look at how Crux generates the foreign types so that requests and responses can be serialised in order to pass across the language boundary via the FFI interface.
Type generation
Why type generation?
Declaring every type across an FFI boundary is painful. Complex types like nested enums, generics, and rich view models are awkward to expose directly through general-purpose FFI binding tools. And even when you can declare them, maintaining the declarations by hand as your app evolves is tedious and error-prone.
Crux sidesteps this problem by keeping the FFI surface as small as
possible. The entire core-shell interface is just three methods —
update, resolve, and view — and all data crosses the boundary as
serialized byte arrays (using bincode). The
shell doesn't need to know the Rust types at the FFI level at all.
BoltFFI gives Crux the bindings for that byte-oriented API, but it doesn't remove the need for generated shell types. Two constraints matter here:
- Shell types should be immutable value types. Rust-backed FFI objects can make ownership and mutation part of the UI boundary; immutability is still being worked through in boltffi#292.
- Shells need to connect view models to UI-native state mechanisms:
Swift
@Observable, KotlinStateFlow, TypeScript framework state such as ReactuseState, and C#INotifyPropertyChanged/ObservableObject. Those APIs expect native values or native observable wrappers, not Rust-backed objects.
Crux is still exploring where those responsibilities should sit, and
whether difficient
can reduce the payload over the wire by sending changes instead of
whole values. For now, type generation is the stable layer that gives
shells native value types while the FFI stays small.
That generated layer has a concrete job: the shell must serialize
events and deserialize effects and view models on its side of the
boundary. To do that, it needs equivalent type definitions in Swift,
Kotlin, TypeScript, or C#, along with the matching serialization code.
Type generation inspects your Rust types and generates those foreign
types and their bincode serialization implementations automatically.
How it works
Type generation uses the Facet crate for
zero-cost reflection. Types that derive the Facet trait can be
introspected at build time to discover their shape — fields, variants,
generic parameters. The
facet-generate crate
uses that reflection data to generate equivalent types (and their
serialization code) in Swift, Kotlin, TypeScript, and C#.
The process has three parts:
- Annotate your types — derive
Faceton types that cross the FFI boundary, and use#[effect(facet_typegen)]on yourEffectenum. - Add a codegen binary to your shared crate — a short
mainthat registers your app and generates the foreign code. - Run it — typically via a
just typegenrecipe as part of your build workflow.
Annotating your types
Events, ViewModel, and other data types
Types that the shell needs to know about should derive Facet (along
with Serialize and Deserialize for the FFI serialization). Here's
the counter example:
#[derive(Facet, Serialize, Deserialize, Clone, Debug)]
#[repr(C)]
pub enum Event {
    Increment,
    Decrement,
    Reset,
}
#[derive(Facet, Serialize, Deserialize, Clone, Default)]
pub struct ViewModel {
pub count: String,
}Note the #[repr(C)] on the enum — this is required by Facet for
enums that cross the FFI boundary.
The Effect type
The Effect enum uses the #[effect(facet_typegen)] attribute, which
tells the #[effect] macro to generate the type registration code
that the codegen binary needs:
#[effect(facet_typegen)]
#[derive(Debug)]
pub enum Effect {
    Render(RenderOperation),
}
The macro discovers the operation types carried by each variant (e.g.
RenderOperation) and registers them for type generation
automatically.
Skipping and opaque types
Not all event variants need to cross the FFI boundary. Internal
events (ones the shell never sends) can be excluded from the generated
output with #[facet(skip)]:
#[derive(Facet, Serialize, Deserialize, Clone, Debug, PartialEq, Eq)]
#[repr(C)]
pub enum Event {
    // events from the shell
    Get,
    Increment,
    Decrement,
    Random,
    StartWatch,

    // events local to the core
    #[serde(skip)]
    #[facet(skip)]
    Set(#[facet(opaque)] crux_http::Result<crux_http::Response<Count>>),

    #[serde(skip)]
    #[facet(skip)]
    Update(Count),

    #[serde(skip)]
    #[facet(skip)]
    UpdateBy(isize),
}
In this example, Set, Update, and UpdateBy are internal events
— the shell never creates them, so they're skipped.
However, Facet must still be derivable on the entire type,
including skipped variants. If a skipped variant contains a field
whose type doesn't implement Facet (like crux_http::Result<...>),
you need to mark that field with #[facet(opaque)] so the derive
succeeds. That's why Set has both #[facet(skip)] on the variant
and #[facet(opaque)] on its field.
The codegen binary
Each shared crate includes a small binary that drives the type generation. Here's the one from the counter example:
use std::path::PathBuf;

use anyhow::Result;
use clap::{Parser, ValueEnum};
use crux_core::type_generation::facet::{Config, TypeRegistry};
use log::info;

use shared::Counter;

#[derive(Copy, Clone, PartialEq, Eq, PartialOrd, Ord, ValueEnum)]
enum Language {
    Swift,
    Kotlin,
    Csharp,
    Typescript,
}

#[derive(Parser)]
#[command(version, about, long_about = None)]
struct Args {
    #[arg(short, long, value_enum)]
    language: Language,
    #[arg(short, long)]
    output_dir: PathBuf,
}

fn main() -> Result<()> {
    pretty_env_logger::init();
    let args = Args::parse();

    let typegen_app = TypeRegistry::new().register_app::<Counter>()?.build()?;

    let name = match args.language {
        Language::Swift => "App",
        Language::Kotlin => "com.crux.examples.counter",
        Language::Csharp => "CounterApp.Shared",
        Language::Typescript => "app",
    };
    let config = Config::builder(name, &args.output_dir).build();

    match args.language {
        Language::Swift => {
            info!("Typegen for Swift");
            typegen_app.swift(&config)?;
        }
        Language::Kotlin => {
            info!("Typegen for Kotlin");
            typegen_app.kotlin(&config)?;
        }
        Language::Csharp => {
            info!("Typegen for C#");
            typegen_app.csharp(&config)?;
        }
        Language::Typescript => {
            info!("Typegen for TypeScript");
            typegen_app.typescript(&config)?;
        }
    }

    Ok(())
}
The key steps are:
TypeRegistry::new().register_app::<Counter>()?— discovers all types reachable from yourAppimplementation (events, effects, view model, and the operation types they reference)..build()?— produces aCodeGeneratorwith the full type graph.Config::builder(name, &output_dir)— configures the output. Thenameparameter is the package/module name (e.g."App"for Swift,"com.crux.examples.counter"for Kotlin,"app"for TypeScript,"CounterApp.Shared"for C#)..swift(&config)?/.kotlin(&config)?/.typescript(&config)?/.csharp(&config)?— generates the code, including the target-language serialization runtime forbincode.
BoltFFI binding generation is run separately by the shell build recipes with
boltffi pack .... The codegen binary is intentionally focused on Crux app
types.
Cargo.toml setup
The codegen binary needs a few additions to your shared/Cargo.toml.
Declare the binary, gated on a codegen feature:
[[bin]]
name = "codegen"
required-features = ["codegen"]
Enable facet_typegen in crux_core:
[features]
facet_typegen = ["crux_core/facet_typegen"]
And add facet as a dependency — all types that cross the FFI
boundary derive Facet:
[dependencies]
facet = { version = "=0.44", features = ["chrono"] }
Running type generation
Type generation is typically run via Just
recipes. Each shell runs the codegen binary and writes the output into
a generated/ directory inside itself. In the counter example, the
layout looks like this:
examples/counter/
├── shared/            # the Crux core
├── apple/
│   └── generated/     # Swift package "App"
├── Android/
│   └── generated/     # Kotlin package "com.crux.examples.counter"
├── web-react-router/
│   └── generated/
│       └── types/     # TypeScript package "app"
└── ...
The package names are set in codegen.rs via the Config::builder
call — see the codegen binary above.
Each shell's Justfile has a typegen recipe. For example, the Apple
shell runs:
RUST_LOG=info cargo run \
    --package shared \
    --bin codegen \
    --features codegen,facet_typegen \
    -- \
        --language swift \
        --output-dir generated
The --output-dir is relative to the shell directory where the recipe
runs — so the generated code lands right where the shell project can
reference it. The TypeScript shells use generated/types to keep the
types separate from the wasm package (which lives in generated/pkg).
The generated/ directories are gitignored and regenerated as part of
the build process. Each shell's build recipe depends on typegen.
What gets generated
For each target language, the codegen produces:
- Type definitions — enums, structs, and their serialization code,
matching the shape of your Rust types. For example,
Event,Effect,ViewModel, and any operation types. - Serialization runtime — Serde and
bincodeimplementations in the target language, so the shell can serialize events and deserialize effects and view models. - Helper extensions — like
Requests.swift, which provides convenience methods for working with effect requests.
For Swift, Kotlin, TypeScript, and C#, this typegen output sits beside the BoltFFI-generated binding package for the byte-oriented core API.
Migrating crux_http to native http types
From the next release, crux_http::http re-exports the upstream
http crate (v1.4) instead of the internal
http-types-red-badger-temporary-fork. This is a breaking change for code
that used http-types-specific names, but most apps need little or no
adjustment.
Quick checklist
Most apps using crux_http through its high-level API (Http::get(…),
RequestBuilder, Response<T>) will compile unchanged. Work through the
sections below only for the patterns that apply to your code.
Method variants renamed
http_types::Method used UpperCamelCase enum variants. http::Method uses
SCREAMING_SNAKE_CASE associated constants.
#![allow(unused)]
fn main() {
// Before
use crux_http::Method;
Http::request(Method::Get,  url)
Http::request(Method::Post, url)

// After
use crux_http::Method;  // still the same import
Http::request(Method::GET,  url)
Http::request(Method::POST, url)
}
Status code names and HttpError::Http.code is now u16
http_types::StatusCode used UpperCamelCase variants (StatusCode::Unauthorized).
http::StatusCode uses SCREAMING_SNAKE_CASE constants (StatusCode::UNAUTHORIZED).
In addition, the code field inside HttpError::Http { code, .. } changed
from http_types::StatusCode to a plain u16.
#![allow(unused)]
fn main() {
// Before
match err {
    HttpError::Http { code, .. }
        if code == crux_http::http::StatusCode::Unauthorized => { … }
    _ => { … }
}

// After — compare against the u16 directly …
match err {
    HttpError::Http { code, .. } if code == 401 => { … }
    _ => { … }
}

// … or via http::StatusCode
use crux_http::http::StatusCode;
match err {
    HttpError::Http { code, .. }
        if code == StatusCode::UNAUTHORIZED.as_u16() => { … }
    _ => { … }
}
}
MIME type constants
http_types exposed extra MIME constants like mime::JSON and mime::HTML.
The standard mime crate uses longer names. crux_http::mime is now a direct
re-export of the mime crate.
#![allow(unused)]
fn main() {
// Before
use crux_http::http::mime;
request_builder.content_type(mime::JSON)
request_builder.content_type(mime::HTML)

// After
use crux_http::mime;
request_builder.content_type(mime::APPLICATION_JSON)
request_builder.content_type(mime::TEXT_HTML)
}
crux_http::http::Body / Headers / Version
These types came from http_types. The replacements:
| Old | New |
|---|---|
crux_http::http::Body (async, streaming) | crux_http::Body (sync, in-memory) |
crux_http::http::Headers | http::HeaderMap |
crux_http::http::Version | http::Version |
The new crux_http::Body is always in-memory (Vec<u8> backed). The
streaming / AsyncRead interface of http_types::Body is not carried over.
If you need to stream a large or chunked HTTP response, the correct Crux
pattern is a dedicated streaming capability — not AsyncRead on RawResponse.
AsyncRead was a leaky abstraction that pushed network I/O mechanics into the
core; the streaming capability pattern keeps the boundary clean.
The examples/counter-http/shared/src/sse.rs file shows exactly this pattern
for Server-Sent Events, but the same skeleton works for any chunked HTTP body:
#![allow(unused)]
fn main() {
// 1. Define the protocol
#[derive(Facet, Serialize, Deserialize, Clone, Debug, PartialEq, Eq)]
pub struct StreamingHttpRequest { pub url: String }

#[derive(Facet, Serialize, Deserialize, Debug, PartialEq, Eq)]
#[repr(C)]
pub enum StreamingHttpResponse {
    Chunk(Vec<u8>),
    Done,
}

impl Operation for StreamingHttpRequest {
    type Output = StreamingHttpResponse;
}

// 2. Build a StreamBuilder capability method
pub fn stream_get<Effect, Event>(
    url: impl Into<String>,
) -> StreamBuilder<Effect, Event, impl Stream<Item = Vec<u8>>>
where
    Effect: From<Request<StreamingHttpRequest>> + Send + 'static,
    Event: Send + 'static,
{
    let url = url.into();
    StreamBuilder::new(|ctx| {
        ctx.stream_from_shell(StreamingHttpRequest { url })
            .take_while(|r| future::ready(!matches!(r, StreamingHttpResponse::Done)))
            .map(|r| match r {
                StreamingHttpResponse::Chunk(bytes) => bytes,
                StreamingHttpResponse::Done => unreachable!(),
            })
    })
}
}
The shell sends Chunk(bytes) for each network chunk and Done at EOF. The
core processes the resulting Stream<Item = Vec<u8>> with normal async stream
combinators. This pattern is clean, avoids any I/O in the core, and no AsyncRead is required.
http-compat feature removed
The http-compat feature previously provided opt-in TryFrom / TryInto
conversions between crux_http types and the http crate's types. Those
conversions are now built in and unconditional:
#![allow(unused)]
fn main() {
// From http::Request<Body> to crux_http::Request — always available
let req: crux_http::Request = http_request.into();

// From crux_http::Response<T> to http::Response<T> — always available
let http_resp = http::Response::<Vec<u8>>::try_from(crux_response)?;
}
Remove the feature flag from your Cargo.toml:
# Before
crux_http = { version = "…", features = ["http-compat"] }
# After
crux_http = { version = "…" }
Interoperating with http_types (opt-in)
If you have middleware or shell code that still uses http_types::Request or
http_types::Response and needs to pass them into crux_http, enable the new
http-types feature:
crux_http = { version = "…", features = ["http-types"] }
This provides From<http_types::Request> for crux_http::Request,
From<http_types::Response> for crux_http::RawResponse, and the reverse
directions. It also re-exports the http_types crate as crux_http::http_types
for convenience.
Note: The
http_types::Body::into_bytes()method isasync, so converting a request with a body fromhttp_types::Requesttocrux_http::Requestwill leave the body empty. Setcrux_http::Request::set_body(…)separately after the conversion if needed.
Getting multiple header values
The previous http_types::HeaderValues iterator is replaced by
http::header::GetAll. Use the new header_all method when a header can
appear more than once. header_all is available on Request, RawResponse,
and Response<T>:
#![allow(unused)] fn main() { // Before (http_types returned HeaderValues with .iter()) let values: Vec<String> = response .header("link") .unwrap() .iter() .map(|v| v.to_string()) .collect(); // After — on a response let values: Vec<String> = response .header_all("set-cookie") .iter() .map(|v| v.to_str().unwrap_or("").to_string()) .collect(); // After — on a request (e.g. in middleware) let accepted: Vec<&str> = request .header_all("accept") .iter() .filter_map(|v| v.to_str().ok()) .collect(); }
For a single value, header("name") still works on all three types and returns
Option<&http::HeaderValue>.
Setting headers
The low-level header mutation methods on Request, RawResponse, and
Response<T> now accept http::HeaderValue directly instead of
impl AsRef<str>. The return types also change to mirror http::HeaderMap:
insert_header returns Option<HeaderValue> (the evicted previous value, if
any) and append_header returns bool.
The high-level builder .header(name, value) on RequestBuilder and
ResponseBuilder is unchanged — it still accepts any impl AsRef<str> for
convenience and panics on invalid values. Only direct calls to insert_header
or append_header on the types themselves need updating.
#![allow(unused)] fn main() { use crux_http::http::HeaderValue; // Static value — use from_static (zero-cost, panics at compile time on invalid input) req.insert_header(http::header::CONTENT_TYPE, HeaderValue::from_static("application/json")); // Dynamic value — use from_str, which returns Result let token = get_token(); req.insert_header( http::header::AUTHORIZATION, HeaderValue::from_str(&format!("Bearer {token}")).expect("token is valid ASCII"), ); // Accumulating multiple values (e.g. in middleware) let had_prior = req.append_header( "x-request-id", HeaderValue::from_static("abc"), ); }
Request::set_header is now deprecated — it was an http-types-era alias
for insert_header. Replace all uses:
#![allow(unused)] fn main() { // Before req.set_header("x-trace-id", value); // After req.insert_header("x-trace-id", value); }
ResponseAsync renamed to RawResponse
The intermediate response type that flows through the middleware chain has been
renamed. ResponseAsync was misleading because nothing about the type is
asynchronous — it holds a plain (StatusCode, HeaderMap, Vec<u8>). RawResponse
describes its actual role: the unvalidated response from the shell, before the
4xx/5xx error check that happens inside Response::new().
#![allow(unused)] fn main() { // Before use crux_http::ResponseAsync; async fn my_middleware( req: Request, client: Client, next: Next<'_>, ) -> Result<ResponseAsync> { let res: ResponseAsync = next.run(req, client).await?; // … Ok(res) } // After use crux_http::RawResponse; async fn my_middleware( req: Request, client: Client, next: Next<'_>, ) -> Result<RawResponse> { let res: RawResponse = next.run(req, client).await?; // … Ok(res) } }
Client::send() also now returns Result<RawResponse>.
RawResponse body methods are now synchronous
body_bytes(), body_string(), body_json(), and body_form() on
RawResponse no longer return a future. Since crux_http bodies are
always fully buffered in memory before they reach the core, there was
never any real async work to do.
#![allow(unused)] fn main() { // Before let mut res: RawResponse = …; let bytes = res.body_bytes().await?; let text = res.body_string().await?; let value = res.body_json::<MyType>().await?; let form = res.body_form::<MyForm>().await?; // After — drop the .await let bytes = res.body_bytes()?; let text = res.body_string()?; let value = res.body_json::<MyType>()?; let form = res.body_form::<MyForm>()?; }
If your middleware or test helper sits inside an async fn purely
because of these calls, it can now be a plain fn.
Request::set_content_type takes &mime::Mime
The low-level Request::set_content_type method now borrows the MIME
type rather than taking ownership.
#![allow(unused)] fn main() { // Before req.set_content_type(mime::APPLICATION_JSON); // After req.set_content_type(&mime::APPLICATION_JSON); }
The high-level builder methods (.content_type(…) on RequestBuilder
and command::RequestBuilder) are unchanged — they still accept any
impl Into<Mime> by value. Only direct calls to Request::set_content_type
need updating.
RFC: New side effect API - Command
This RFC has been adopted and implemented, it's kept for future reference as additional context for the design choices.
This is a proposed implementation of a new API for creating (requesting) side-effects in crux apps. It is quite a significant part of the Crux API surface, so we'd really appreciate feedback on the direction this is taking.
Why?
Why a new effect API, you may ask. Was there anything wrong with the original one? Not really. Not critically wrong anyway. One could achieve all the necessary work with it just fine, it enables quite complex effect orchestration with async Rust and ultimately enables Crux cores to stay fully pure and therefore be portable and very cheaply testable. This new proposed API is an evolution of the original, building on it heavily.
However.
There's a number of paper cuts, obscured intentions, limitations, and misaligned incentives which come with the original API:
The original API is oddly imperative, but non-blocking.
A typical call to a capability looks roughly like:
caps.some_capability.do_a_thing(inputs, Event::ThingDone). This call doesn't
block, but also doesn't return any value. The effect request is magically
registered, but is not represented as a value - it's gone. Fell through the
floor and into the Crux runtime.
Other than being a bit odd, this has two consequences. One is that it is impossible to combine or modify capability calls in any other way than executing them concurrently. This includes any type of transformation, like a declarative retry strategy or a timeout and, in particular, cancellation.
The more subtle consequence (and my favourite soap box) is that it encourages a style of architecture inside Crux apps, which Crux itself is working quite hard to discourage overall.
The temptation is to build custom types and functions, pass capability instances
to them and call them deep down in the call stacks. This obscures the intended
mental model in which the update call mutates state and results in some
side-effects - it returns them back to the shell to execute. Except in the
actual type signature of update it does not.
The intent of Crux is to very strictly separate code updating state from code interacting with the outside world with side-effects. Borrowing ChatGPT's analogy - separate the brain of the robot from its body. The instructions for movement of the body should be an overall result of the brain's decision making, not sprinkled around it.
The practical consequence of the sprinkling is that code using capabilities is
difficult to test fully without the AppTester for the same reason it is
difficult to test any other code doing I/O of any sort. In our case it's
practically impossible to test code using capabilities without the AppTester,
because creating instances of capabilities is not easy.
The original API doesn't make it obvious that the intent is to avoid this mixing and so people using it tend to try to mix it and find themselves in various levels of trouble.
In summary: Effects should be a return value from the update function, so
that all code generating side effects makes it very explicit, making it part of
its return type. That should in turn encourage more segregation of stateful but
pure logic from effects.
Access to async code is limited to capabilities and orchestration of effects is limited to async code
This, like most things, started with good intention - people find async code to be "doing Rust on hard mode", and so for the most part Crux is designed to avoid async until you genuinely need it. Unfortunately it turned out to mean that you need async (or loads of extra events) as soon as any level of effect chaining is required.
For example - fetching an API auth token, followed by three HTTP API calls, followed by writing each response to disk (or local storage) is a sequence of purely side-effect operations. The recipe is known up front, and at no point are any decisions using the model being made.
With the original API the choices were either to introduce intermediate events between the steps of the effect state machine OR to implement the work in async rust in a capability, which gets to spawn async tasks. The limitation there was that the tasks can't easily call other capabilities.
With the
introduction of the Compose capability
that last limitation was removed, allowing composition of effects across
capabilities, even within the update function body, so long as the
capabilities offer an async API. The result was calls to caps.compose.spawn
ending up all over and leading to creation of a new kind of type - a
capability orchestrator, for example an API client, which is built from a few
capabilities (lets say HTTP, KV and a custom authentication) and Compose. This
kind of type is basically untestable on its own.
In summary: It should be possible to do simple orchestration of effects without async code and gradually move into async code when its expressivity becomes more convenient.
Testing code with side-effects requires the AppTester
As covered above, the code producing side effects requires a special runtime in order to run fully and be tested, and so any code using capabilities automatically makes testing impossible without the AppTester. And of course apps themselves are only testable with the AppTester harness.
In summary: It should be possible for tests to call the update function and inspect the side effects like any other return value.
Capabilities have various annoying limitations
- Capabilities are "tethered" to the crux core, allowing them to submit effects
and events and spawn tasks, but it means instances of capabilities have to be
created by Crux and injected into the
updatefunction. - The first point means that capability authors don't have any control over their capability's main type, and therefore it's impossible for capabilities to have any internal state. For capabilities managing ongoing effects, like WebSocket connections for example, this is limiting. It can be worked around by the capability creating and returning values representing such ongoing connections, which can communicate with a separate task spawned by the capability over an async channel. The task read from the channel in a loop, and therefore can have local state. It works, but it is far from obvious.
- They have to offer two sets of APIs: one for event callback use, one for async use. This largely just adds boilerplate, but there is a clear pattern where the event callback calls simply use their async twins. That can be done by Crux and the boilerplate removed.
- They don't compose cleanly. With the exception of
Compose, capabilities are expected to emit their own assigned variant ofEffect, preordained at the time the capability instance is created. This doesn't specifically stop one capability from asking another to emit an effect, but it is impossible to modify the second capability's request in any way - block specific one, retry it, combine it with a timeout, all the way up to completely virtualising it: resolving the effect using other data, like an in-memory cache, instead of passing it to the shell.
In summary: Capabilities should not be special and should simply be code which encapsulates
- the definition of the core/shell communication protocol for the particular type of effect
- creation of the requests and any additional orchestration needed for this communication
App composition is not very flexible
This is really just another instance of the limitations of capabilities and the
imperative effect API. Any transformations involved in making an app a "child"
of another app has to be done up front. Specifically, this involves mapping or
wrapping effects and events of the child app onto the effect and event type of
the parent, typically with a From implementation which can't make contextual
decisions.
In summary: Instead, this mapping should be possible after the fact, and be case specific. It should be possible for apps to partially virtualise effects of the child apps, re-route or broadcast the events emitted by one child app to other children, etc.
How does this improve the situation?
So, with all (or at least most of) the limitations exposed, how is this proposed API better?
Enter Command
As others before us, such as Elm and
TCA,
we end up with a solution where update returns effects. Specifically, it is
expected to returns an effect orchestration which is the result of the update
call as an instance of a new type called Command.
In a way, Command is the current effect executor in a box, with some extras.
Command is a lot like
FuturesUnordered -
it holds one or more futures which it runs in the order they get woken up until
they all complete.
On top of this, Command provides to the futures a "context" - a type with an API
which allows the futures within the command to submit effects and events. This
is essentially identical to the current CapabilityContext. The difference is
that the effects and events get collected in the Command and can be inspected,
modified, forwarded or ignored.
In a general shape, Command is a stream of Effect or Events created as an
orchestration of futures. It also implements Stream, which means commands can
wrap other commands and use them for any kind of orchestration.
Orchestration with or without async
Since Commands are values, we can work with them after they are created. It's pretty simple to take several commands and join them into one which runs the originals concurrently:
#![allow(unused)] fn main() { let command = Command::all([command_a, command_b, command_c]); }
Commands provide basic constructors for the primitives:
- A command that does nothing (a no-op):
Command::done() - A command that emits an event:
Command::event(Event::NextEvent)) - A command that sends a notification to the shell:
Command::notify_shell(my_notification) - A command that sends a request to the shell:
Command::request_from_shell(my_request).then_send(Event::Response) - A command that sends a stream request to the shell:
Command::stream_from_shell(my_request).then_send(Event::StreamEvent)
Notice that the latter two use chaining to register the event handler. This is
because the other useful orchestration ability is chaining - creating a command
with a result of a previous command. This requires a form of the builder
pattern, since commands themselves are streams, not futures, and doing a simple
.then would require a fair bit of boilerplate.
Instead, to create a request followed by another request you can use the builder pattern as follows:
#![allow(unused)] fn main() { let command = Command::request_from_shell(a_request) .then_request(|response| Command::request_from_shell(make_another_request_from(response))) .then_send(Event::Done); }
This works just the same with streams or combinations of requests and streams.
.then_* and Command::all are nice, but on occasion, you will need the full
power of async. The equivalent of the above with async works like this:
#![allow(unused)] fn main() { let command = Command::new(|ctx| async { let response = ctx.request_from_shell(a_request).await; let second_response = ctx.request_from_shell(make_another_request_from(response)).await; ctx.send_event(Event::Done(second_response)) }) }
Alternatively, you can create the futures from command builders:
#![allow(unused)] fn main() { let command = Command::new(|ctx| async { let response = Command::request_from_shell(a_request) .into_future(ctx).await; let second_response = Command::request_from_shell(make_another_request_from(response)) .into_future(ctx).await; ctx.send_event(Event::Done(second_response)) }) }
You might be wondering why that's useful, and the answer is that it allows
capabilities to return the result of Command::request_from_shell for simple
shell interactions and not worry about whether they are being used in a sync or
async context. It would be ideal if the command builders themselves could
implement Future or Stream, but unfortunately, to be useful to us, the
futures need access to the context which will only be created once the Command
itself is created.
Testing without AppTester
Commands can be tested by inspecting the resulting effects and events. The
testing API consist of essentially three functions: effects(), events() and
is_done(). All three first run the Command's underlying tasks until they
settle and then return an iterator over the accumulated effects or events, and
in the case of is_done a bool indicating whether there is any more work to do.
An example test looks like this:
#![allow(unused)] fn main() { #[test] fn request_effect_can_be_resolved() { let mut cmd = Command::request_from_shell(AnOperation) .then_send(Event::Completed); let effect = cmd.effects().next(); assert!(effect.is_some()); let Effect::AnEffect(mut request) = effect.unwrap(); assert_eq!(request.operation, AnOperation); request .resolve(AnOperationOutput) .expect("Resolve should succeed"); let event = cmd.events().next().unwrap(); assert_eq!(event, Event::Completed(AnOperationOutput)); assert!(cmd.is_done()) } }
In apps, this will be very similar, except the cmd will be returned by the
app's update function.
This API is mainly for testing, but is available to all consumers in all contexts, as it can easily become very useful for special cases when composing applications and virtualising commands in various ways.
Capabilities are no longer special
With the Command, capabilities become command creators and transformers. This
makes them no different from user code in a lot of ways.
The really basic ones can just be a set of functions. Any more complicated ones can now have state, call other capabilities, transform the commands produced by them, etc.
The expectation is that the majority of low-level capability APIs will return a
CommandBuilder, so that they can be used from both event callback context and
async context equally easily.
Better app composition
Instead of transforming the app's Capabilities types in order to wrap them in
another app up front, when composing apps the resulting commands get
transformed. More specifically, this involves two map calls:
#![allow(unused)] fn main() { let original: Command<Effect, Event> = capability_call(); let cmd: Command<NewEffect, Event> = original.map_effect(|effect| effect.into()); // provided there's a From impl let cmd: Command<Effect, NewEvent> = original.map_event(|event| Event::Child(event)); }
The basic mapping is pretty straightforward, but can become as complex as required. For example, events produced by a child app can be consumed and re-routed, duplicated and broadcast across multiple children, etc. The mapping can also be done by fully wrapping the original Command in another using async
#![allow(unused)] fn main() { let original: Command<Effect, Event> = capability_call(); let cmd = Command::new(|ctx| async move { while let Some(output) = original.next().await { match output { CommandOutput::Effect(effect) => { // ... do things using `ctx` } CommandOutput::Event(event) => { // ... do things using `ctx` } } } }); }
Other benefits and features
A grab bag of other things:
- Spawn now returns a
JoinHandlewhich can be.awaited - Tasks can be aborted by calling
.abort()on aJoinHandle - Whole commands can be aborted using an
AbortHandlereturned by.abort_handle(). The handle can be stored in the model and used later. - Commands can be "hosted" on a pair of channel senders returning a future which should be compatible with the existing executor enabling a reasonably smooth migration path
- This API should in theory enable declarative effect middlewares like caching, retries, throttling, timeouts, etc...
Limitations and drawbacks
I'm sure we'll find some. :)
For one, the return type signature for capabilities is not great, for example:
RequestBuilder<Effect, Event, impl Future<Output = AnOperationOutput>>.
One major perceived limitation which still remains is that model is not
accessible from the effect code. This is by design, to avoid data races from
concurrent access to the model. It should hopefully be a bit more obvious now
that the effect code is returned from the update function wrapped in a
Command.
Open questions and other considerations
- The command API expects the
Effecttype to implementFrom<Request<Op>>for any capability Operations it is used with. This is derived by theEffectmacro, and is expected to be supported by a derive macro even in the future state. - We have not fully thought about back-pressure in the Commands (for events, effects and spawned tasks) even to the level of "is any needed?"
- We will explore ways to make the code that interleaves effects and state updates more "linear" - require fewer intermediate events - separately at a later stage
Type generation migration
This RFC has been adopted and implemented, it's kept for future reference as additional context for the design choices.
The actual roadmap has diverged from this decision when we adopted Facet as the frontend for type generation. The philosophy and overall design stays the same, and we may revisit the front-end again, but Facet gives us a good way of focusing on the IR and backend, unlocking features, rather than on the rustdoc based frontend without getting any immediate value.
This note proposes a roadmap of migrating Crux and the apps to a new type generation system, based on rustdoc JSON.
Why?
The current system has limitations, is quite fiddly to set up, and the generated code is not great.
The new system removes a lot of the limitations, but to get the most benefit, we will want to generate code, which is fundamentally not compatible with the original output. Given this output is used by existing shell implementations, we need to provide a smooth upgrade path.
At the same time, due to the limitations, we know of Crux users who opted out of the typegen and use something like 1Password's Typeshare. They may not want to continue doing so, and we should enable a migration path from this to the new typegen as well.
To coordinate this transition, this RFC is aiming to provide the roadmap we can follow, which a majority of people are happy with, and had a chance to comment on.
Current system
The current system is based on Serde. It's a combination of two related crates: serde-reflection and serde-generate. Serde-reflection uses the derived Deserialize implementations on types to discover their shape and captures it as data. This data is used by serde-generate to generate equivalent types in TypeScript, Swift, Kotlin and some other languages, alongside an implementation of serialization on the "foreign" side.
This system has limitations:
- Only supports types which are
Deserialize(this is not a big problem in practice). - Only supports types expressed using the Serde data model. This means it fundamentally can't capture certain kinds of metadata, e.g. use of generic types and their trait bounds, any additional decorations on the foreign side (implemented protocols in Swift, etc.), any other information not provided to the deserializer.
- We have no control over the generated code. This is especially problematic in TypeScript and the representation of enums.
Why not use Typeshare?
Typeshare is great, but has its own set of limitations. The very key one is that it is based on analysing Rust code with the compiler, only operates on types which are annotated with a #[typeshare] procmacro and doesn't see into crates. It also doesn't understand macro generated code, which is problematic for discovery of relevant types, when some of the code is generated by derive macros (especially the Effect type cluster).
Rustdoc based system
The system we've been working on is based on rustdoc, specifically it's ability to output the type metadata in JSON. This actually covers all the bases:
- It sees all the types in all the used crates (including
coreandstd) - It can see macro generated code
- It has all the relevant metadata - generic arguments, trait bounds, implementors of traits, etc.
It is only a data set however. We need to do the work of finding the types, understanding them, and generating the foreign equivalents.
This broadly happens in three phases.
- Discover entry points – this is a Crux specific part, which can find implementations of
crux_core::Appand find their associated types, to use as entry points to start the type discovery - Walk the type graph from entry points down to primitives – this is the key component of the work, which translates the raw type information into an "intermediate representation" (IR), which can be used in step 3
- Generation – converting the IR into equivalent types in the selected foreign language
Key benefits and features to enable
Because we can discover the apps and find entry points from there, we no longer need the separate shared_types crate, where developers can register extra types and direct the typegen.
We can support a wider feature set:
- Better generated code, including "decorations" (e.g. Swift protocols)
- Generic types support (in languages which support them)
- Additional foreign code extensions:
- Different serialisation format
- Data based interior mutability support (to support fine-grained updates of the view model in the future)
- Custom code extensions
The goal of this work is to make the type generation completely transparent to the developers most of the time. It should Just Work ™️.
Reducing boilerplate
The other change we'll want to make is how the typegen is executed. Instead of having a separate crate with a build.rs file (which was necessary in order to see the code of the core crate while running build.rs), the new type generation will come as a separate CLI tool, produced as an additional target on the core crate, similar to the uniffi-bindgen tool today. In fact as part of this, we will try to subsume the uniffi-bindgen tool into the same CLI tool, and move from writing a .udl file for the FFI interface to using annotations, likely Crux ones, so that we can take control of how we generate FFI for different platforms (UniFFI, WebAssembly and others).
Ultimately, creating the full FFI interface for the Crux core should become a single build command.
Ways to migrate which we want to support
There are a few migrations involved in this transition:
- Migrating the core from original type generation to the new one
- Migrating the shells from original generated types to the new ones
- Migrating from another type generation system to Crux typegen
We want to support all of them independently, and, crucially, gradually, type by type. For the second and third migration above, it MUST be possible to mix and match approaches at all times.
From old typegen
The initial implementation of the new type generation will aim for parity with the original, while removing all the configuration boilerplate in the process.
It is likely that this stage will remain experimental for some time, because the type discovery mechanism works quite differently to the Serde based one. We will invite community feedback on how well the system is working on their existing code and collect examples where it doesn't work too well.
The second stage of the migration, which is likely to happen concurrently, is the implementation of various improvements to the generated code. To facilitate this being opt-in by type, we're likely to use an annotation driven optionality, along the lines of (the names and specific format may of course change):
#![allow(unused)] fn main() { // Generate legacy output at definition site #[cruxgen(legacy = true)] MyType(bool) // Enable future output at reference site SomeType { other: cruxgen! { future = true, OtherType } } }
This should allow apps to migrate slowly, one type at a time, making necessary changes to the consuming code on the shell side.
From a different typegen (e.g. Typeshare)
The strategy to support migrating from a different type generation system is similar, but by using a full opt-out of the Crux type generation:
// Skip at definition site
#[cruxgen(skip)]
MyType(bool)
// Skip at reference site
SomeType {
other: cruxgen! { skip = true, OtherType }
}
In order to cover discrepancies in feature set, we will also do our best to support custom code generation extensions quite early on, but the strategy for specifying them is not yet very clear
Migration roadmap
The migration needs somewhat careful orchestration, so that big step changes are not required for Crux users to adopt. It should go something like this:
Phase 1 - develop the frontend and IR
In this phase we still use serde-generate as a backend, and focus on getting the frontend - the type discovery and the developer interface.
1 - serde-generate feature parity and start validating
Gets us to a working, reliable type generation front end, able to discover all the relevant types and capture the metadata. This is likely to require a period of testing with real-world codebases.
2 - enable annotation controlled feature selection
Support annotations to skip types, ignore fields and similar basic things which previously relied on serde annotations. Both ways should work for the time being, but with future mode enabled, the serde annotations should start being ignored. This is the start of the two modes diverging.
If possible, the annotations should be allowed on both definition sites and reference sites. We need to think about how conflict resolution works in this case, if multiple sites are annotated but with different directions.
Phase 2 - replace the backend, stabilise the IR
In this phase, we replace the serde-generate backend and gradually change what the output looks like. At the same time we gain features.
1 – take over generation of the code to parity
Replace or vendor in serde-generate in order to support outputting all the original code in supported languages At this point, we can retire the serde implementation fully, so long as we're confident with.
We should also introduce the legacy switch which forces backwards compatibility.
2 – change future output to be more idiomatic
Make changes to the generated code to better represent the types idiomatically to the language.
3 - stabilise the IR
To enable extension points on the backend side, we'll need to stabilise the intermediate representation of the discovered types and their relationships.
4 - enable custom extensions
Allow users to add extensions to the generated code, given the IR. This is almost like a derive macro but for the foreign language(s). The exact mechanism is to be decided, but it should be possible to make them language specific (e.g. Swift-only).
5 - support optionality, especially in serialisation
The goal of the output is to be idiomatic to the target codebase, which will likely require some optionality (e.g. which serialisation library to use in Kotlin). We should do our best to pick sensible defaults, and delegate as much as possible to custom extensions, otherwise we risk an explosion in the features we need to support.
One specific optionality we should enable support for is the serialisation format over the FFI boundary.
Phase 3 - enable as default
At some point when the base future output stops evolving too much, we can make it default (when neither future nor legacy is specified).
Further down the line, we retire the legacy support as the final step.
RFC: Effect Router and shell-owned effect handling
This RFC proposes a new approach for mixed effect handling, based on routing effects by type to explicit handlers.
The main goal, similar to middleware, is to support advanced cases where some effects should be handled inside the Core, or where request/result data is not serializable across the FFI boundary, while keeping the default, serialized FFI path simple.
We are primarily looking for feedback on the direction and model, rather than the exact public API details (we can iron that out on on a later pull request).
Why?
The advanced need we keep running into is two-fold:
- not all effects should always be handled on the shell side (e.g. need to use an existing Rust SDK)
- some request/result data cannot or should not be serialized across the bridge (e.g. need to fetch a GPU rendering surface, font information, large byte buffer, or other opaque / non-serializable data)
Middleware was our first attempt at solving this. It works for the core-side effect handling, but it has quickly shown design limitations:
- routing follow-up effects after
resolveis difficult to reason about - stacking layers is mechanically complex
- mixing bridge interfaces (e.g. serialized and custom FFI), while probably possible, is just too difficult
- the stack metaphor does not align with how effect handling is usually chosen
The main design direction of the new approach is that handling is typically aligned with the effect type. We think that in practice, people want handling to differ between effect categories (http, time, files, database, ...), but rarely between requests of the same category ("some HTTP requests go one way, other HTTP requests another").
So instead of a middleware pipeline, this RFC proposes a router with handlers, where routing happens by effect type. The main difference is that in the middleware, the metaphor was a stack or pipeline where some effects were teed off to the side. In this approach, there is an explicit fan out by type.
If this approach lands, the plan is to deprecate the middleware API and replace it with effect routing.
Design decisions and constraints
- Keep
Appimplementations unaware of handling mechanics. This allows them to change independently, and differ between platforms for the same app. - Keep the main FFI type as the assembly point, like we did with middleware. The type is user-owned, explicit and the users get full control over their FFI surface this way.
- Keep Bridge as the default/simple path. No change
- Make Router an opt-in upgrade for advanced cases. We don't want early users to need to immediately understand the full extent of the mechanics of effect handling. The FFI side of the shared crate should be considered boilerplate, and not need to be touched until the user realises the need to do something special.
- Support mixed handling of effects in one app:
- Serialized FFI using Facet type generation, like today
- New typed/opaque "lane" with custom FFI with no built-in constraints
- Core-local Rust lane, like the one enabled by middleware
- Other lanes, if they come up
- Keep migration cost minimal for existing bridge-based apps, and make the upgrade path from simple to advanced use smooth
Non-goals
In this RFC we're not looking to:
- Finalise all low-level public API visibility details
- Design any level of macro sugar
- Finalise all failure/cancellation policy details
- Optimise effect registry internals in this phase.
Proposed architecture
As with the Middleware approach, the Shell is responsible for creating a Core instance and providing an implementation of a Core-defined trait defining the callback interface to the Shell. The trait is now extended with multiple callbacks
pub(crate) trait CameraShell: Send + Sync {
fn process_serialized_effects(&self, bytes: Vec<u8>);
fn process_camera_effect(&self, effect: CameraEffect);
}We introduce a Router wrapper around Core. The router is
constructed with a routing closure which decides how each effect type is
handled.
let router = Router::new(core, {
let shell = shell.clone();
let serialized_registry = serialized_registry.clone();
let camera_registry = camera_registry.clone();
|weak_router| {
let fs_store = file_store::FileStoreHandler::new(weak_router.clone());
move |effect| match effect {
// Core-side effect, processed in Rust
app::Effect::FileStore(request) => {
fs_store.process_file_store(request);
}
// Shell-side effect, but with a custom FFI for opaque data
app::Effect::Camera(request) => {
let (id, op) = camera_registry.register(request);
shell.process_camera_effect(CameraEffect { id, operation: op });
}
// Original serialized FFI
effect => {
let serialized_effect = SerializedEffect::try_from(effect)
.expect("non-serialized effects are handled above");
let request = serialized_registry.register(serialized_effect);
let mut bytes = vec![];
Format::serialize(&mut bytes, &vec![request])
.expect("serialized effect request should encode");
shell.process_serialized_effects(bytes);
}
}
}
});The closure can:
- send effects to shell callbacks from the aforementioned shell trait
- send effects to core-local async handlers
- fall through to a serialized lane (also implemented by shell trait)
Async handlers resolve back through the router, so follow-up effects are automatically routed using the same policy.
Effect lanes
In principle, there are a few "lanes" of effect handling, which have common mechanics. In the proof of concept code, there are three:
Serialized lane
The serialized lane keeps the bridge-like behavior:
- request is registered with an id
- shell receives bytes
- shell resolves with id and bytes
- registry remembers how to deserialize for that id and resumes the right suspended request
This is the default lane and remains the primary onboarding path. It will also typically act as the default match arm in the routing closure.
Opaque typed lane
The typed lane supports payloads/results that are awkward or undesirable to serialize (for example pointer-style handles or opaque references), using typed callbacks and typed resolve methods. These are fully in the user's control and Crux has no opinions on them.
A generic Registry type is provided to support recording the effect requests under
an ID and store the Resolve continuation (which cannot cross an FFI boundary of
any kind).
Core-local lane
The local lane allows effect requests to be handled by Rust code outside
App::update, including async/background work. Handler completion resolves back
through the router.
pub(crate) struct FileStoreHandler {
jobs_tx: Sender<Request<app::StoreFile>>,
}
impl FileStoreHandler {
pub(crate) fn new<S>(sink: Weak<S>) -> Self
where
S: ResolveSink<app::StoreFile> + Send + Sync + 'static,
{
let (jobs_tx, jobs_rx) = unbounded();
thread::spawn(move || worker(jobs_rx, sink));
Self { jobs_tx }
}
pub(crate) fn process_file_store(&self, request: Request<app::StoreFile>) {
self.jobs_tx
.send(request)
.expect("file store worker queue disconnected")
}
}Runtime flow
The key trick to this is that all follow up effects after any type of resolution are passed through the routing layer and dispatched to the right handler again.
At runtime, the flow is:
update(event)produces effects- router dispatches each effect to the selected lane/handler
- shell/local handler eventually resolves the request
- resolution goes through router, so the effect runtime is moved forward
- router collets and routes follow-up effects
- repeat until settled (no more follow up effects)
This flow was (almost) possible without any of this scaffolding, but the router makes it less fragile, by enforcing the routing of follow-up effects and advancing the runtime at the right times.
Open questions
- Should we keep double-dispatch in the serialized case (router dispatch, then shell match on serialized effect), or move toward one FFI callback pair per effect type?
- What is the best way to expose runtime advance for router-managed
resolve(id, bytes)flows, without creating an awkward public "half-method" or requiring users to remember extra steps? - What registry implementation should back effect id lookup in the production
API (
HashMapin prototype, potentially a more specialised structure later)? - Should we support synchronous handling? Currently a loop in synchronously handled effect would lead to an infinite mutual recursion, which will need addressing by either supporting it, or explicitly preventing it like the effect middleware does
- Failure/cancellation handling in the routing setup. This is not perfect in the basic Bridge case either
Considerations for the first question: The big pro would be that different effects could have separate IDs, and we could prevent resolving one effect with a value of another by mistake. The downside is that each new effect would need to get registered in a few places – the effect type the match arm of the router and a new pair of FFI methods in the trait and in the FFI impl.
Next steps
- Gather feedback on this approach and the open questions.
- Prove the architecture in a full example, including FFI generation workflow, to validate the integration story.
- Refine public API shape based on that validation, then proceed with middleware deprecation planning.
RFC: Decouple crux_http from http-types
This RFC is a proposal and has not yet been adopted. We are looking for feedback on the overall direction and the open questions, rather than the exact public API details.
Related issues:
- #285 — Migrate from
crux_httpto standardhttpcrate types (milestone 0.19) - #357 — Investigate gradual migration path of
crux_httptohttp - #195 — emscripten compatibility (reason for the
http-typesfork)
Summary
crux_http is currently built on top of http-types
(specifically our fork, http-types-red-badger-temporary-fork). http-types is
no longer actively maintained, and the Rust ecosystem has converged on the
http crate (the "hyperium" types) as the lingua franca
for HTTP request/response/header/method/status types.
This document proposes:
- Moving the
http-typesdependency, and all code that touches it, behind an opt-inhttp-typesCargo feature. - Making the default build of
crux_httpuse thehttpcrate's types natively. - Replacing the existing
http-compatfeature (which only providesFrom/TryIntoconversions to/fromhttptypes) with first-class, native support forhttptypes.
The goal, as framed in #357, is that existing consumers can enable the
http-types feature and continue as before, while new users get http
compatibility out of the box.
Why?
http-typesis unmaintained. We already carry a temporary fork (http-types-red-badger-temporary-fork) purely to work around an emscripten build issue (#195). Carrying a fork of an abandoned crate is a long-term liability.- The community standard is
http. Consumers increasingly use crates that interoperate viahttptypes (e.g.reqwest,axum,tower-http,hyper). Issue #285 reports concrete friction: users have to hand-convert betweencrux_http'shttp-types-based types and thehttptypes their other dependencies expect. - The
http-compatfeature is a partial, lossy bridge. It only offers one-directional conversions (http::Request<B> -> crux_http::Requestandcrux_http::Response<Body> -> http::Response<Body>) and silently drops information (e.g. unsupported HTTP versions, non-UTF-8 headers viaunwrap). Native support is strictly better.
Background: what http-types gives us vs. what http gives us
This migration is not a drop-in dependency swap. http-types is a rich,
batteries-included HTTP model, whereas http is deliberately a minimal set of
type definitions with no I/O, no body model, and no MIME handling. Knowing the
gap precisely is the crux of this design.
http-types API surface currently used by crux_http
Gathered from across the crate (lib.rs, request.rs, request_builder.rs,
response/*.rs, config.rs, client.rs, command.rs, error.rs,
middleware/redirect.rs, protocol.rs):
http-types item | Where used | http-crate equivalent |
|---|---|---|
Method | everywhere; re-exported as crux_http::Method | http::Method (direct) |
StatusCode | Response, ResponseAsync, HttpError::Http, redirect | http::StatusCode (direct; but see "opaque" note) |
Version | Response, ResponseAsync | http::Version (direct; opaque consts, not an enum) |
Url | re-exported (actually from the url crate already) | keep url::Url; http uses Uri |
Headers, HeaderName, HeaderValue, HeaderValues, ToHeaderValues | request/response headers, header_serde | http::HeaderMap / HeaderName / HeaderValue (different semantics: multi-value model, byte-based values) |
headers::{CONTENT_TYPE, LOCATION} and iterators (Iter, IterMut, Names, IntoIter) | header access, redirect | http::header::* constants + HeaderMap iterators (different semantics) |
Body | Request/ResponseAsync body, body(impl Into<Body>), set_body, take_body, into_bytes, AsyncRead | no equivalent — http bodies are a generic B |
Mime, mime::{HTML, JSON, ...} | content_type, re-exported as crux_http::http::mime | no equivalent — use the mime crate |
Request / Response (concrete, body-owning) | the structs crux_http::Request/ResponseAsync wrap | http::Request<B> / http::Response<B> (different semantics: generic over body, no I/O, Uri not Url) |
Error | response/decode.rs, From<http_types::Error> for HttpError | no equivalent — http has small per-type errors only |
convert::DeserializeOwned | command.rs, request_builder.rs, expect.rs | use serde::de::DeserializeOwned directly (direct) |
query() / set_query() | Request | no equivalent — reimplement with serde_qs (already a dependency) |
The three real gaps
Body.http-types::Bodyis an async, streaming body withinto_bytes(),AsyncRead, MIME tracking, andInto<Body>impls forString,&str,Vec<u8>,serde_json::Value, files, readers, etc. Inhttp, the body is just the generic parameterB— there is no body type at all. As #357 notes, we will need our ownBodytype (or to settle onVec<u8>/bytes::Bytes).Mime. Used bycontent_type()and thebody_*helpers to setContent-Type. The standalonemimecrate is the natural replacement (it is even whathttp-typesre-exported).Error.http-types::Erroris a status-carrying error type. We already have our ownHttpError; we can drop theFrom<http_types::Error>bridge and thehttp_types::Erroruse indecode.rs.
Key insight: the wire protocol is already http-types-free
The shell-facing protocol types in protocol.rs — HttpRequest, HttpResponse,
HttpHeader — already model the body as Vec<u8> and headers as
Vec<{name, value}> strings. They do not depend on http-types at all. All
the http-types Body/Mime/AsyncRead machinery is internal scaffolding
that is ultimately collapsed to bytes in
ProtocolRequestBuilder::into_protocol_request and rebuilt from bytes in
From<HttpResponse> for ResponseAsync.
This matters because it means the async body model is not load-bearing for the
core effect contract. It exists mainly to power the ergonomic builder API and
the async middleware story. That gives us latitude to replace Body with
something much simpler in the default path.
Naming collision warning (breaking change to be managed)
crux_http currently does:
pub use http_types as http; // crux_http::http == http-types (!)
pub use http_types::Method;
pub use url::Url;So today crux_http::http resolves to http-types, not the http crate.
Code in the wild uses crux_http::http::mime::HTML, crux_http::http::Method,
crux_http::http::{Url, Version}, etc.
Because features must be additive — enabling a feature should only add to a
crate's API, never change or remove things — crux_http::http will always
re-export the real http crate, regardless of whether http-types is enabled.
The http-types feature adds interop on top; it does not alter the default
representation. Existing code that imports crux_http::http::Body,
crux_http::http::mime::HTML, etc. will need to update its import paths (this is
a breaking release), but the migration is mechanical and the target is clear.
Foreign type generation (Swift, Kotlin, TypeScript)
A natural worry is that http::Request<B> / http::Response<B> are generic,
and the foreign types we emit with facet_generate for Swift, Kotlin and
TypeScript cannot be generic. This does not affect the design, because none
of the http (or http-types) types ever reach the type generator.
The only types registered for generation are the non-generic wire-protocol types
in protocol.rs (plus HttpError), via Operation::register_types and Facet
reflection:
HttpRequest—method: String,url: String,headers: Vec<HttpHeader>,body: Vec<u8>HttpResponse—status: u16,headers: Vec<HttpHeader>,body: Vec<u8>HttpHeader—name: String,value: StringHttpResult—enum { Ok(HttpResponse), Err(HttpError) }HttpError— theHttp { code, .. }variant is#[facet(skip)]+#[serde(skip)], so it is never emitted to foreign types
All of these are concrete and contain only primitives, owned strings, byte
vectors, and each other. The generic http::Request<B>/http::Response<B>, the
non-Facet http::Method/StatusCode/HeaderMap, and the crux façade types
(crux_http::Request, Response<Body>, ResponseAsync, and the proposed
crux-owned Body) are core-side only — they are never registered, never
serialized across the bridge, and never type-generated.
This is the same observation as "the wire protocol is already http-types-free",
seen from the codegen angle: because bodies are already collapsed to Vec<u8>
and headers to Vec<{String, String}> at the protocol boundary, swapping the
core-side representation is invisible to foreign type generation, and the
generated Swift/Kotlin/TypeScript types are byte-for-byte unchanged.
The one detail to keep tidy is HttpError::Http.code (see
"Resolved decisions"): it is http_types::StatusCode today, carried with
#[facet(opaque)] because it is not a Facet type. We will store it as a plain
u16 and drop the #[facet(opaque)] attribute. The variant is skipped from
generation regardless, so foreign output is unaffected.
Goals
- Default build depends on
http, nothttp-types. - Foreign type generation output (Swift/Kotlin/TypeScript) is unchanged, because only the non-generic wire-protocol types are ever generated.
http-typesbecomes an opt-in feature that restores today's behaviour and public surface as closely as practical.- Remove the
http-compatfeature; its conversions become unnecessary because the default types arehttptypes. - Drop the
http-types-red-badger-temporary-forkdependency from the default build (and with it, ideally, the emscripten workaround burden — #195). - Keep the shell-facing protocol (
HttpRequest/HttpResponse/HttpResult) and the FFI/typegen output unchanged. This migration must be invisible across the bridge. - Keep
crux_http::Method,crux_http::Url,Request,Response,RequestBuilder, thecommand::HttpAPI, and middleware working in both configurations.
Non-goals
- Changing the wire protocol or typegen output.
- Adding real network I/O to
crux_http(it remains a request-describing capability; the shell performs the request). - A streaming body model on the default path. Bodies are bounded
Vec<u8>today at the protocol boundary, and we will keep that. - Perfectly preserving every
http-types-specific method signature on the default path. Source-level breakage is expected for users who do not opt into thehttp-typesfeature; we will provide guidance and conversions.
Design options considered
Option A — Feature-gate everything, two parallel internal models
Literally follow the #357 sketch: add an http-types feature, and #[cfg]-gate
every type alias, import, and impl so the same public item names are backed by
either http-types or http/our-own types.
- Pros: Maximum source-compatibility for existing users when the feature is off and on; one published item set.
- Cons: As #357 itself predicts, "it is quite likely to make the code very
annoying to read." Every header/body/version touch point becomes a
#[cfg]-forked pair. Doc-tests, signatures (impl Into<Body>vs ourBody), and serialization (header_serde) all fork. High maintenance cost, easy to let one path rot.
Option B — Native http by default; http-types feature re-exports the old surface; introduce a crux-owned Body
Default path is rewritten to use http types plus a small crux-owned Body
type (wrapping bytes) and mime for content types. The http-types feature
swaps the internal representation back to http-types and restores the old
re-exports/conversions for users who need them.
- Pros: The default path is clean and idiomatic; new users get
httpwith no ceremony. The messy#[cfg]forking is concentrated at a small number of boundary types (Request,Response/ResponseAsync, header (de)serialization,Body,content_type) rather than smeared across the whole crate. - Cons: Still two code paths to maintain for the lifetime of the feature.
The crux-owned
Bodymust re-implement the ergonomicInto<Body>conversions.
Option C — Bite the bullet, http only, conversion traits, no http-types feature
Drop http-types entirely in one step. Provide From/TryFrom conversion
helpers to ease migration, but make everyone move.
- Pros: Simplest end state; no dual maintenance; fastest to a clean crate.
- Cons: Hard breaking change with no opt-out, contradicting the explicit request in #357/#285 to offer a backwards-compatible feature flag. Riskier for existing apps.
Recommendation
Option B. It delivers the stated objective — http by default,
http-types available as a compatibility feature — while keeping the dual-path
complexity contained to a handful of well-understood boundary modules instead of
the whole crate. Option C remains the fallback if Option B's dual maintenance
proves "far too messy" (the escape hatch #357 anticipates): we can later
deprecate and remove the http-types feature.
Proposed design (Option B)
Cargo features
[features]
default = ["encoding"]
encoding = ["encoding_rs", "web-sys"]
typegen = ["crux_core/typegen"]
facet_typegen = ["crux_core/facet_typegen"]
# Opt-in: restore the legacy http-types-based representation and public surface.
http-types = ["dep:http-types", "dep:mime"] # name TBD; see open questions
[dependencies]
http = "1.4" # now a default (non-optional) dependency
mime = "0.3" # replaces http_types::Mime on the default path
bytes = "1" # optional: backing store for the Body type
http-types = { package = "http-types-red-badger-temporary-fork", version = "6.0", default-features = false, optional = true }
# `http-compat` feature is removed.
Notes:
httpbecomes a normal dependency (it is tiny — onlybytes+itoa).- The
http-compatfeature and the optionalhttpdependency it gated are removed; the conversions it provided are no longer needed because the default types are alreadyhttptypes. - The
http-typesdependency becomesoptional = trueand is only compiled when thehttp-typesfeature is enabled.
Public surface (lib.rs)
pub use http; // always the real `http` crate
pub use http::Method;
pub use url::Url; // unchanged
pub use mime; // crux_http::mime (content types)Under the http-types feature, http_types is additionally re-exported for
users who need to bridge between crux_http types and legacy http-types code:
#[cfg(feature = "http-types")]
pub use http_types;There is no conditional re-export of crux_http::http — it always means the
real http crate.
A crux-owned Body type
Introduce crux_http::Body to replace http_types::Body. Because the protocol
collapses bodies to Vec<u8> anyway, this can be a simple, synchronous,
in-memory type:
pub struct Body {
bytes: bytes::Bytes,
mime: Option<mime::Mime>,
}bytes::Bytes is chosen over Vec<u8> for its O(1) clone — Request is
cloned on every middleware hop — and because http already pulls bytes into
the dependency graph, so there is no new transitive dependency. It should provide
Into<Body> conversions for String, &str, Vec<u8>, &[u8], and
serde_json::Value, plus into_bytes() -> bytes::Bytes, mime(), len(),
and is_empty(). The async AsyncRead/streaming aspects of http_types::Body
are not used by the effect contract and are not carried over.
Request and ResponseAsync
These wrapper structs currently hold an http_types::Request /
http_types::Response. They are rewritten with fields held directly:
method: http::Method, url: url::Url, headers: http::HeaderMap, body: Body (and status: http::StatusCode, version: Option<http::Version> for
responses). There is a single implementation — no #[cfg] forking.
The public methods (header, set_header, body, take_body, url,
method, query/set_query, iterators, content_type, …) are implemented
over http::HeaderMap + url::Url + Body. query/set_query use serde_qs
(already a dependency).
The AsRef/AsMut/From/Into impls now target http::Request<Body> and
http::HeaderMap unconditionally — the native version of what http-compat did,
but lossless and bidirectional. Under the http-types feature, additional
conversion impls for http_types::Request and http_types::Response are added
(gated with #[cfg(feature = "http-types")]) so users can bridge between the two
ecosystems. This is the only place #[cfg(feature = "http-types")] appears.
Response<Body> and header (de)serialization
Response<Body> stores version: Option<http::Version>,
status: http::StatusCode, and headers as http::HeaderMap. The custom
header_serde module (which serializes headers as Vec<(String, Vec<String>)>)
is re-pointed at HeaderMap. The new_headers() hack in response/mod.rs (which
constructs an http_types::Headers by spinning up a throwaway Request) is
replaced by http::HeaderMap::new() — a strict simplification.
Note http::StatusCode and http::Version do not implement facet::Facet.
http::Version is used only on the Response/ResponseAsync façade, which is
never type-generated, so that is fine. The one Facet-deriving type that
referenced a status code, HttpError::Http { code, .. }, is already
#[facet(skip)] and #[serde(skip)] (internal only); we additionally change
code to a plain u16 and drop #[facet(opaque)] (see error.rs below and
"Resolved decisions").
error.rs
- Remove
From<http_types::Error>. - Change
HttpError::Http.codefromhttp_types::StatusCodeto a plainu16, dropping#[facet(opaque)]but keeping the variant's#[facet(skip)]+#[serde(skip)](see "Resolved decisions"). decode.rsstops importinghttp_types::Error; itsDecodeErroris already self-contained.
middleware/redirect.rs
Re-point StatusCode, header LOCATION access, and the request URL mutation
onto http/url types. The http_types::url::ParseError arm becomes
url::ParseError (the url crate is a direct dependency).
protocol.rs
From<HttpResponse> for ResponseAsync currently builds an http_types::Response.
On the default path it builds the native ResponseAsync from status, headers,
body directly. into_protocol_request is largely unchanged (it already reads
method/url/headers/body generically), but the body extraction uses the new Body
API instead of http_types::Body::into_bytes.
What stays identical
HttpRequest,HttpResponse,HttpResult,HttpHeaderand their typegen / serde representations.- The
command::Httpbuilder method set (get/post/…/request). - The middleware trait shapes.
crux_http::Url(alwaysurl::Url) andcrux_http::Method(name preserved; underlying type changes fromhttp_types::Methodtohttp::Method).
Migration impact for users
| Scenario | Action |
|---|---|
App only uses crux_http::{get, post, RequestBuilder, Response, body_json, ...} and crux_http::Method | Likely compiles unchanged; Method is now http::Method (API-compatible for common uses). |
App imports crux_http::http::mime::* | Update to crux_http::mime::* or mime::* directly. |
App imports other crux_http::http::* items (e.g. Body, Headers, Version) | Update to http::* or crux_http::Body as appropriate. |
App used the http-compat feature | Feature removed; the default types are now http types, so TryFrom/TryInto round-trips are no longer needed — use the types directly. |
App has code that constructs or consumes http_types::Request/Response and needs to pass them to/from crux_http | Enable the http-types feature; conversion impls are provided. |
App relied on streaming http_types::Body / AsyncRead | The streaming body model is not carried over; refactor to use the in-memory crux_http::Body. |
We should ship:
- A
CHANGELOG.mdentry calling out thecrux_http::httpre-export change and the removal ofhttp-compat. - A short migration section (in the book / crate docs) with before/after
snippets, including how to turn on
http-types.
Implementation plan
All design questions are resolved (see "Resolved decisions"). Work through the tasks below in order — the groupings reflect natural dependencies within the change, not separate releases.
1. Pre-flight cleanup
Small, isolated changes. Good to do first to keep the diff clean.
error.rs—HttpError::Http.code: u16, drop#[facet(opaque)], removeFrom<http_types::Error>, updatetest_error_display.expect.rs—http_types::convert::DeserializeOwned→serde::de::DeserializeOwned.response/decode.rs— drop the unusedhttp_types::Errorimport.
2. Introduce crux_http::Body; remove http_types::Body/Mime from public API
Still entirely backed by http-types internally — no feature-flag forking yet.
This step removes http_types::Body and http_types::Mime from all public
signatures, which shrinks what needs #[cfg]-gating in the next step.
- Add
src/body.rs—pub struct Body { bytes: Vec<u8>, mime: Option<mime::Mime> }withInto<Body>impls forString,&str,Vec<u8>,&[u8],serde_json::Value; plusinto_bytes(),mime(),len(),is_empty(). - Add
mime = "0.3"to[dependencies]. crux_http::Request— store body ascrux_http::Bodyalongside the wrappedhttp_types::Request(not inside it);set_body/take_bodyoperate on the wrapper field. Thehttp_types::Requestis retained only for method, URL, headers, and query helpers.request_builder.rs/command.rs—body(impl Into<Body>)andcontent_type(impl Into<mime::Mime>)use our types;http_types::Bodyandhttp_types::Mimeno longer appear in any public signature.protocol.rs—into_protocol_requesttakes body bytes from the wrapper directly (synchronous); theasync http_types::Body::into_bytes()call is removed.lib.rs—pub use crate::body::Body;pub use mime.
3. Add http-types feature; implement native http path; remove http-compat
After step 2, the remaining http-types surface is the "frame" types: headers,
method, status, version, and the http_types::Request/Response wrappers.
Cargo.toml—http = "1.4"becomes a default dependency;http-typesbecomesoptional = truebehind the new feature; removehttp-compatand its gateddep:http.lib.rs— conditional re-exports (pub use httpvspub use http_types as http,http::Methodvshttp_types::Method).response/mod.rs—http::HeaderMap::new()replaces the throwaway-Requesthack.response/response.rs—http::StatusCode,http::Version,http::HeaderMap; updateheader_serde; replacehttp-compatTryIntowith a native lossless conversion.response/response_async.rs— holdstatus: http::StatusCode,headers: http::HeaderMap,body: Bodydirectly on the default path instead of wrappinghttp_types::Response.request.rs— replace the wrappedhttp_types::Requestwithmethod: http::Method,url: url::Url,headers: http::HeaderMap; re-implement header methods andquery/set_queryoverserde_qs; updateAsRef/AsMut/From/Intoimpls to targethttp::Request<Body>andhttp::HeaderMap.config.rs— header types.client.rs—Method/Urltypes.middleware/redirect.rs—http::StatusCode,http::header::LOCATION,url::ParseError.protocol.rs—From<HttpResponse> for ResponseAsyncconstructsResponseAsyncfields directly.src/compat.rs(new,#[cfg(feature = "http-types")]only) — conversion impls betweencrux_http::Request/Response/ResponseAsyncandhttp_types::Request/Response.
4. Tests and CI
- Confirm all existing tests pass on the default (
http) path. Theprotocol.rsinsta snapshots must be byte-for-byte unchanged — the primary guard that the migration is bridge-invisible. - Add a CI job:
cargo test --features http-typesforcrux_http. - Add round-trip integration tests:
http::Request<Body>→crux_http::Request→HttpRequestHttpResponse→crux_http::Response<Vec<u8>>→http::Response<Vec<u8>>
- Build the
counter-http,counter-middleware,weather, andnotesexamples on both feature configurations.
5. Docs and release
CHANGELOG.md—crux_http::httpnow re-exports thehttpcrate (nothttp-types);http-compatfeature removed; how to enablehttp-typesfor backwards compatibility.- Book migration section — before/after snippets for the common cases in the "Migration impact" table above.
Testing strategy
- Existing unit/integration tests (
tests/command_with_shell.rs,tests/command_with_tester.rs,client.rstests,protocol.rssnapshot tests) must pass on the default (http) path. Theprotocol.rsinsta snapshots assert the wire format and should be unchanged — a strong guard that the migration is bridge-invisible. - Add a CI job that builds and tests with
--features http-typesto keep the legacy path alive. - Add round-trip tests:
http::Request<Body> -> crux_http::Request -> HttpRequestandHttpResponse -> crux_http::Response -> http::Response<_>to lock in the native conversions that replacehttp-compat.
Resolved decisions
-
Feature name is
http-types, matching the crate name. -
Bodybacking store isbytes::Bytes.httpalready bringsbytesinto the dependency graph, so there is no new transitive dependency. The key benefit overVec<u8>isO(1)clone, which matters becauseRequestis cloned on every middleware hop. -
crux_http::httpalways re-exports the realhttpcrate. Features must be additive; thehttp-typesfeature therefore only adds thecrux_http::http_typesre-export and conversion impls. It does not change any default types or re-exports. The internal representation ishttp-based on all paths — there is no#[cfg]forking of the core types. -
httpis emscripten-compatible. The 128-bit issue that forced thehttp-typesfork (#195) washttp-types'trace_idfield. Thehttpcrate has only two runtime dependencies (bytes,itoa) and contains no 128-bit integers. The fork can be dropped entirely from the default build. -
HttpError::Http.codeis stored asu16.http::StatusCodeis not aFacettype, so au16lets us drop the#[facet(opaque)]workaround and matches thestatus: u16already onHttpResponse. We still keep the variant's#[facet(skip)]+#[serde(skip)]— that's there because theHttpvariant is internal-only (never reported by the shell), independent of the field type. Callers wanting a typed status can usehttp::StatusCode::from_u16(code).
Open questions
- Deprecation timeline. Do we commit up front to removing the
http-typesfeature in a future release (Option C end state), or keep it indefinitely?
Appendix: file-by-file change checklist
Cargo.toml— feature table + dependency changes (above).lib.rs— re-export switch (httpvshttp_types),Methodsource,mimere-export.request.rs— internal representation,Body/header methods,AsRef/AsMut/From/Intoimpls,query/set_query.request_builder.rs—Body/Mime/DeserializeOwnedimports;content_type,body,body_json,body_form,body_string,body_bytes.command.rs— same imports; builder body/content-type methods.config.rs—Url+ headers imports.client.rs—Method/Urlimports.response/mod.rs— replacenew_headers()hack withHeaderMap::new().response/response.rs—Version/StatusCode/HeaderMap,header_serde, drop/native-izehttp-compatTryInto.response/response_async.rs— internal representation, body methods,From/Intoimpls.response/decode.rs— drophttp_types::Error.error.rs—HttpError::Http.codetype, dropFrom<http_types::Error>.expect.rs—convert::DeserializeOwned→serde::de::DeserializeOwned.middleware/redirect.rs—StatusCode/LOCATION/url-mutation/parse-error.protocol.rs—From<HttpResponse> for ResponseAsync, body extraction.- CI — add
--features http-typesjob. CHANGELOG.md+ book — migration guide.