Web — TypeScript and React Router
These are the steps to set up and run a simple TypeScript Web app that calls into a shared core.
This walk-through assumes you have already set up the shared library and codegen as described in Shared core and types.
There are many frameworks available for writing Web applications with JavaScript/TypeScript. We've chosen React with React Router for this walk-through. However, a similar setup would work for other frameworks.
Create a React Router App
For this walk-through, we'll use the pnpm package manager
for no reason other than we like it the most! You can use npm exactly the same
way, though.
Let's create a simple React Router app for TypeScript with pnpm. You can give
it a name and then probably accept the defaults.
pnpm create react-router@latest
Compile our Rust shared library
When we build our app, we also want to compile the Rust core to WebAssembly so that it can be referenced from our code.
To do this, we'll use BoltFFI, which you can install like this:
cargo install boltffi_cli --version '=0.25.2' --locked
brew install binaryen # provides wasm-opt
The crate is boltffi_cli; it installs the boltffi binary used below.
Now that we have boltffi installed, we can build our shared library to
WebAssembly for the browser.
(cd shared && boltffi pack wasm)
You might want to add a wasm:build script to your package.json file, and
call it when you build your React Router project.
{
  "scripts": {
    "build": "pnpm run wasm:build && react-router build",
    "dev": "pnpm run wasm:build && react-router dev",
    "wasm:build": "cd ../shared && boltffi pack wasm"
  }
}
Add the shared library as a Wasm package to your web-react-router project:
cd web-react-router
pnpm add ./generated/pkg
We want Vite to bundle our shared Wasm package, so we register the wasm and
React Router plugins in vite.config.ts:
import { reactRouter } from "@react-router/dev/vite";
import wasm from "vite-plugin-wasm";
import { defineConfig } from "vite";

export default defineConfig({
  plugins: [wasm(), reactRouter()],
});
Add the Shared Types
To generate the shared types for TypeScript, run the codegen binary, telling
it which language to emit and where to put the output:
cargo run --package shared --bin codegen --features codegen,facet_typegen -- \
    --language typescript --output-dir generated/types
You can check that they have been generated correctly:
ls --tree generated/types
generated/types
├── app.ts          # your app's Event / Effect / ViewModel types
├── app.d.ts
├── bincode
│  ├── bincodeDeserializer.ts
│  ├── bincodeSerializer.ts
│  └── index.ts
├── serde
│  ├── binaryDeserializer.ts
│  ├── binarySerializer.ts
│  ├── deserializer.ts
│  ├── serializer.ts
│  ├── types.ts
│  └── index.ts
├── package.json
└── tsconfig.json
You can see that it also generates an npm package that we can add directly to
our project.
pnpm add ./generated/types
Load the Wasm binary when our React Router app starts
The app/entry.client.tsx file is where we load our Wasm binary. We import the
shared package and wait for its initialized promise to resolve before
hydrating the app, so the WASM module is ready before any event reaches the
core.
import { startTransition, StrictMode } from "react";
import { hydrateRoot } from "react-dom/client";
import { HydratedRouter } from "react-router/dom";
import * as sharedWasm from "shared";

const wasmInitialized = (sharedWasm as unknown as { initialized: Promise<void> })
  .initialized;

wasmInitialized.then(() => {
  startTransition(() => {
    hydrateRoot(
      document,
      <StrictMode>
        <HydratedRouter />
      </StrictMode>
    );
  });
});
Create some UI
We will use the simple counter example, which has a shared library and generated TypeScript types that will work with the following example code.
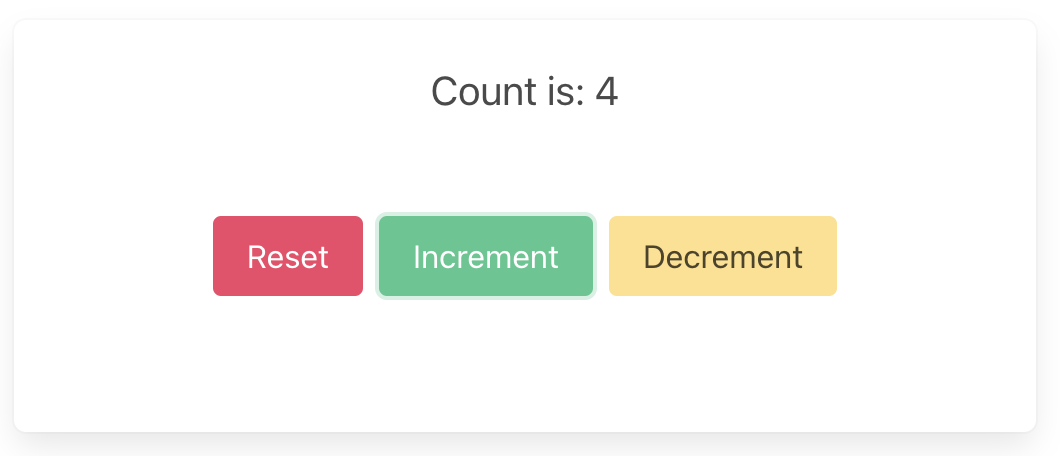
Simple counter example
A simple app that increments, decrements and resets a counter.
Wrap the core to support capabilities
First, let's add some boilerplate code to wrap our core and handle the
capabilities that we are using. For this example, we only need to support the
Render capability, which triggers a render of the UI.
This code that wraps the core only needs to be written once — it only grows when we need to support additional capabilities.
Edit app/core.ts to look like the following. This code sends our
(UI-generated) events to the core, and handles any effects that the core asks
for. In this simple example, we aren't calling any HTTP APIs or handling any
side effects other than rendering the UI, so we just handle this render effect
by updating the component's view hook with the core's ViewModel.
Notice that we have to serialize and deserialize the data that we pass between the core and the shell. This is because the core is running in a separate WebAssembly instance, and so we can't just pass the data directly.
import type { Dispatch, SetStateAction } from "react";
import { CoreFFI } from "shared";
import * as sharedWasm from "shared";
import type { Effect, Event } from "shared_types/app";
import { EffectVariantRender, Request, ViewModel } from "shared_types/app";
import { BincodeDeserializer, BincodeSerializer } from "shared_types/bincode";

const wasmInitialized = (sharedWasm as unknown as { initialized: Promise<void> })
  .initialized;

export class Core {
  core: CoreFFI | null = null;
  initializing: Promise<void> | null = null;
  setState: Dispatch<SetStateAction<ViewModel>>;

  constructor(setState: Dispatch<SetStateAction<ViewModel>>) {
    // Don't initialize CoreFFI here - wait for WASM to be loaded
    this.setState = setState;
  }

  initialize(shouldLoad: boolean): Promise<void> {
    if (this.core) {
      return Promise.resolve();
    }

    if (!this.initializing) {
      const load = shouldLoad ? wasmInitialized : Promise.resolve();

      this.initializing = load
        .then(() => {
          this.core = CoreFFI.new();
          this.setState(this.view());
        })
        .catch((error) => {
          this.initializing = null;
          console.error("Failed to initialize wasm core:", error);
        });
    }

    return this.initializing;
  }

  view(): ViewModel {
    if (!this.core) {
      throw new Error("Core not initialized. Call initialize() first.");
    }
    return deserializeView(this.core.view());
  }

  update(event: Event) {
    if (!this.core) {
      throw new Error("Core not initialized. Call initialize() first.");
    }
    const serializer = new BincodeSerializer();
    event.serialize(serializer);

    const effects = this.core.update(serializer.getBytes());

    const requests = deserializeRequests(effects);
    for (const { effect } of requests) {
      this.processEffect(effect);
    }
  }

  private processEffect(effect: Effect) {
    switch (effect.constructor) {
      case EffectVariantRender: {
        this.setState(this.view());
        break;
      }
    }
  }
}

function deserializeRequests(bytes: Uint8Array | number[]): Request[] {
  const deserializer = new BincodeDeserializer(asBytes(bytes));
  const len = deserializer.deserializeLen();
  const requests: Request[] = [];
  for (let i = 0; i < len; i++) {
    const request = Request.deserialize(deserializer);
    requests.push(request);
  }
  return requests;
}

function deserializeView(bytes: Uint8Array | number[]): ViewModel {
  return ViewModel.deserialize(new BincodeDeserializer(asBytes(bytes)));
}

function asBytes(bytes: Uint8Array | number[]): Uint8Array {
  return bytes instanceof Uint8Array ? bytes : new Uint8Array(bytes);
}
That switch statement, above, is where you would handle any other effects that
your core might ask for. For example, if your core needs to make an HTTP
request, you would handle that here. To see an example of this, take a look at
the
counter example
in the Crux repository.
Create a component to render the UI
Edit app/routes/_index.tsx to look like the following. Notice that we pass the
setState hook to the update function so that we can update the state in
response to a render effect from the core (as seen above).
import { useEffect, useRef, useState } from "react";

import {
  ViewModel,
  EventVariantReset,
  EventVariantIncrement,
  EventVariantDecrement,
} from "shared_types/app";
import { Core } from "../core";

export const meta = () => {
  return [
    { title: "Crux Counter — React Router" },
    { name: "description", content: "Crux Counter with React Router" },
  ];
};

export default function Index() {
  const [view, setView] = useState(new ViewModel(""));
  const core = useRef(new Core(setView));

  useEffect(() => {
    void core.current.initialize(false);
  }, []);

  return (
    <main>
      <section className="box container has-text-centered m-5">
        <p className="is-size-5">{view.count}</p>
        <div className="buttons section is-centered">
          <button
            className="button is-primary is-danger"
            onClick={() => core.current.update(new EventVariantReset())}
          >
            {"Reset"}
          </button>
          <button
            className="button is-primary is-success"
            onClick={() => core.current.update(new EventVariantIncrement())}
          >
            {"Increment"}
          </button>
          <button
            className="button is-primary is-warning"
            onClick={() => core.current.update(new EventVariantDecrement())}
          >
            {"Decrement"}
          </button>
        </div>
      </section>
    </main>
  );
}
Now all we need is some CSS.
To add a CSS stylesheet, we can add it to the Links export in the
app/root.tsx file.
export const links: LinksFunction = () => [
  {
    rel: "stylesheet",
    href: "https://cdn.jsdelivr.net/npm/bulma@0.9.4/css/bulma.min.css",
  },
];
Build and serve our app
We can build our app, and serve it for the browser, in one simple step.
pnpm dev